Juxta Editions is an online platform for digitizing printed and handwritten documents. You can either transcribe a single document, or a series of documents and compile them into an edition. Either way, the process begins the same way: by uploading a JPG, PNG, or GIF. Once this file is uploaded, Juxta Editions offers two methods of extracting their text into an XML file: by hand, or by using Optical Character Recognition (OCR). For my tutorial, I will upload a JPG of a page from a book on Korean Cinema and use OCR to turn it into an XML file. Once it’s in XML, it is easier to turn into an HTML file and place into a website, or use text reading software to pull out quotes like I did for my paper on Korean Cinema.
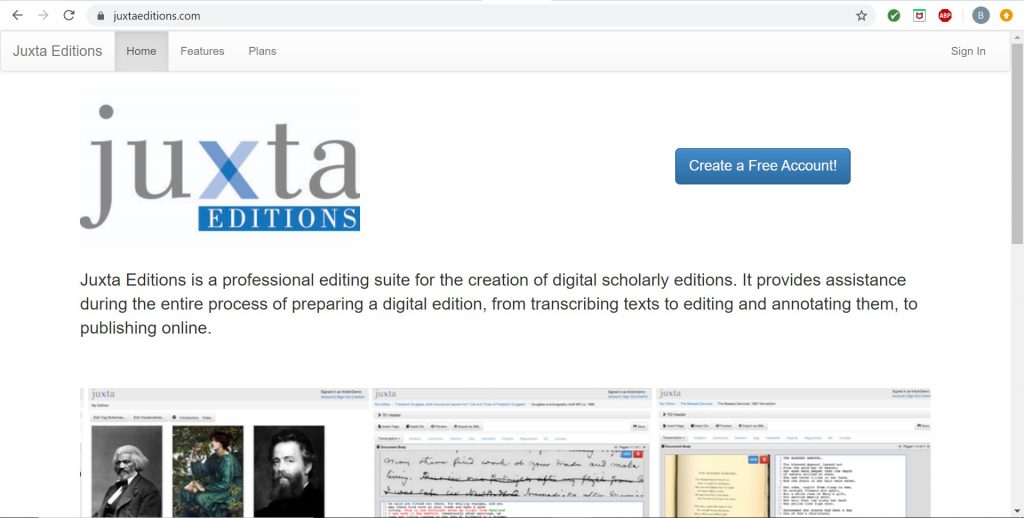
To access Juxta Editions, simply Google juxtaeditions.com. Once on their homepage, create a free account. Juxta Editions offers three different account plans, two of which cost money. The free version has some limits that I will explain later, but for our purposes a free account will suffice.
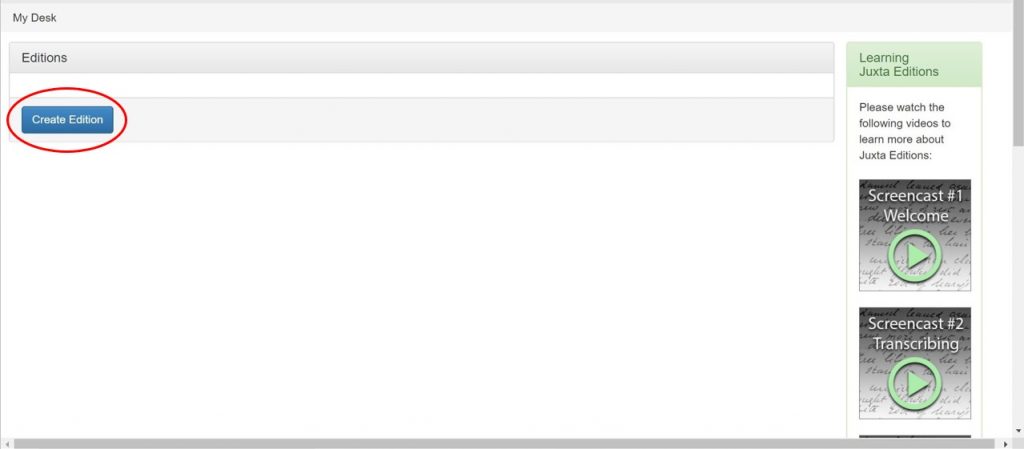
When you are ready to digitize your first document(s), click Create Edition on the top left of your screen. Unfortunately, the free version of Juxta Editions only allows you to create one edition, but you can add as many documents to that edition as you’d like. Once you’ve created an edition, you’ll be prompted to type a name and a description; for this tutorial, I simply named my edition “Tutorial.”
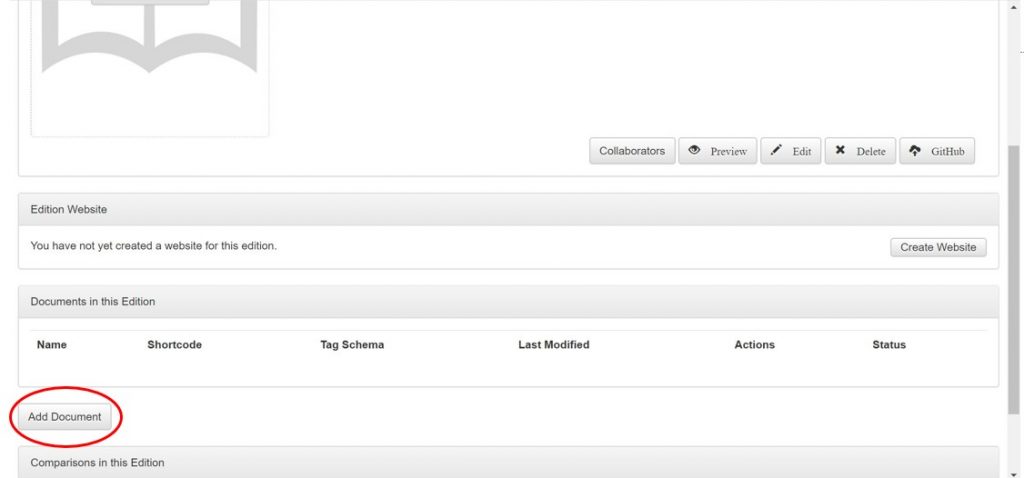
The first step in creating an edition is uploading your first document. Scroll down until the option to add a document appears on the lower left part of your screen. The next pop-up has a few different fields and uploading options, but for this tutorial just simply title the document. Again, I titled mine “Tutorial Page.”
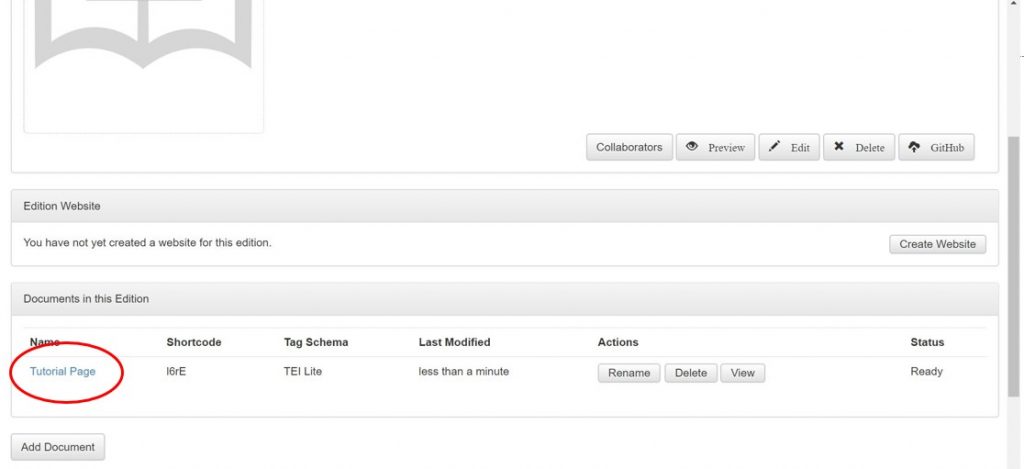
Now that you have created your first document, it is time to give it some content. To access this next step in creating your document, simply click on your newly titled document. You will find that it is in the same spot that the Add Document button was in the previous step.
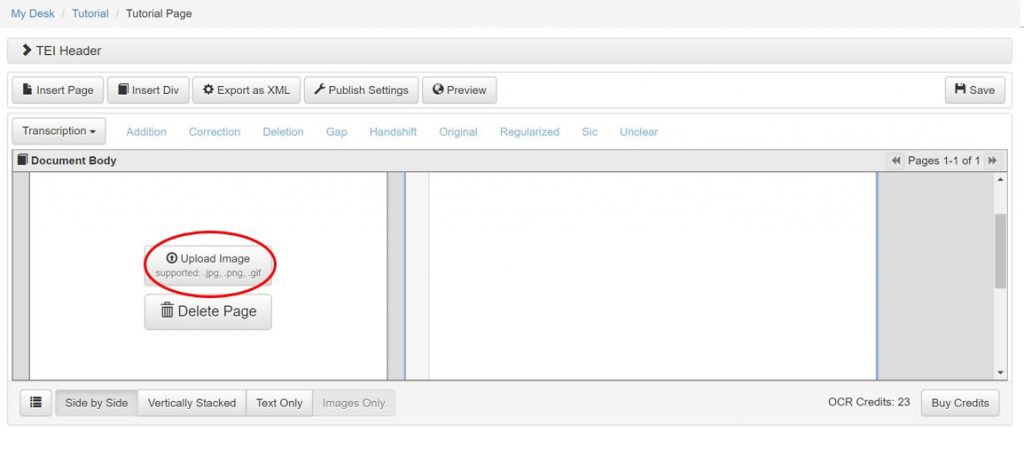
Once you select the document to edit, a dual-frame editor appears. The left box is where you upload your image of the document you are digitizing, while the right box will become the text editor once the image is uploaded. Simply click Upload Image and select your document image from your computer.
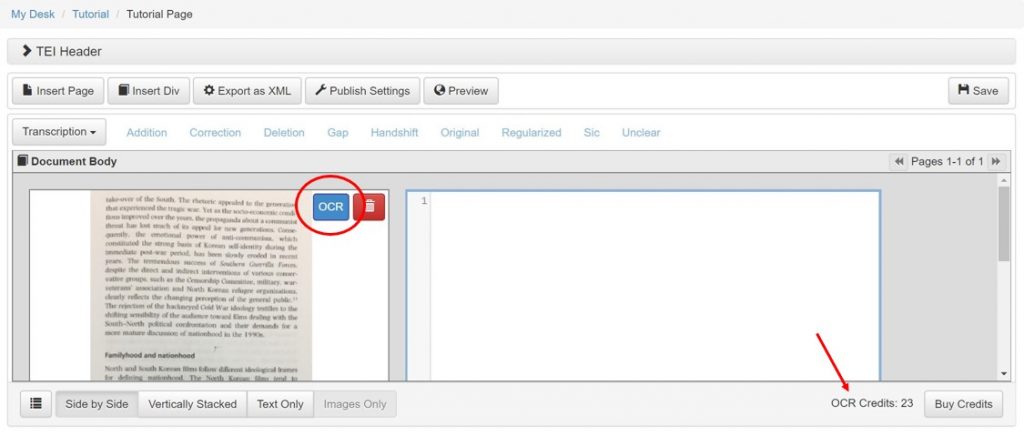
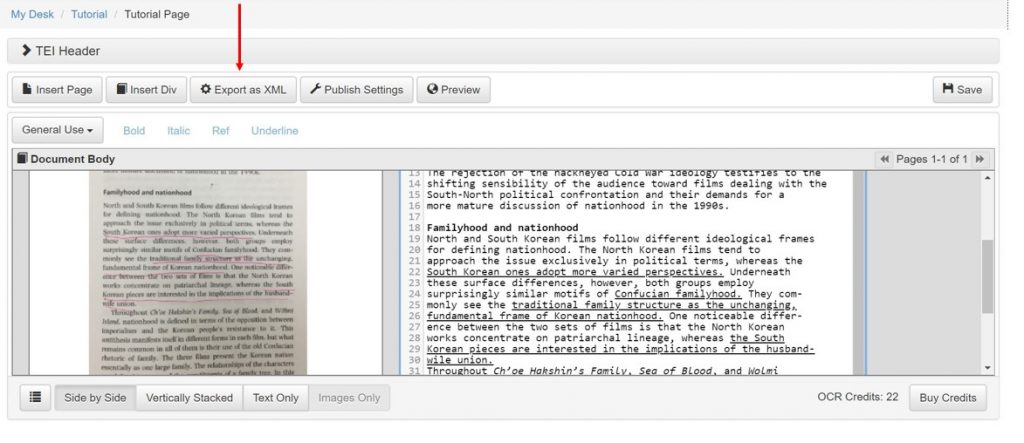
Once the image is uploaded, it is time to transfer its text to the text box. Juxta Editions offers two options for extracting this text: the first option is manually, and the second option is using OCR. The one downside of Juxta Editions is that no matter what plan you have, free or paid, they only allot you 25 OCR credits which are shown in the bottom right hand corner of the screen. They do offer the option of buying more, but if you want to avoid spending money, you can continue digitizing documents manually.
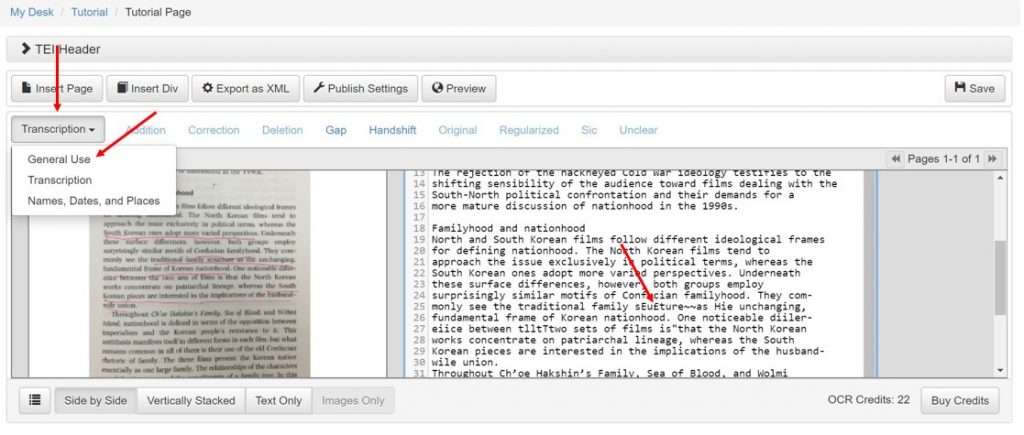
OCR isn’t perfect. Once you’ve ran the OCR on your uploaded image, I strongly suggest skimming over the new text and adjust any spelling errors (as pictured above). In my image, you can also see there are text characteristics such as bold, underlined, and italicized words. Once the spelling is satisfactory, you can go in and change the typography of these phrases by clicking Transcription, and then General Use.
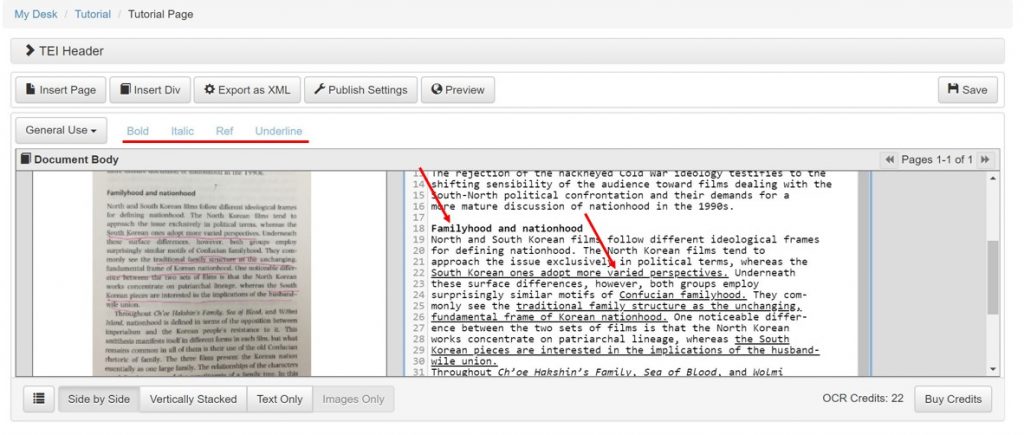
Under General Use, a panel will appear right above your image with different text styles. To apply these styles, simply highlight the portion of text in the right-hand box you wish to change, and click on which style matches the image on the left, and voila!
Once you feel that your text box matches the uploaded image, you’re ready to export! If you purchase an account with Juxta Editions, you can directly publish your XML file to the web, however the free version does not support this. That being said, you can still export your newly formatted document as an XML file, and plug it into your own website with a little bit of HTML knowledge. If you were to digitize an entire book, for example, all of those XML files could be plugged into a website and some coding could make reading that book an interactive experience.
To learn more about some of the other capabilities of Juxta Editions, they have a series of tutorials that can only be found on their website once you’ve registered an account. Once you feel comfortable with using Juxta Editions, here is an in-depth article that explains what XML is and how it can be applied with HTML if you are interested in sharing your digitized work with the world!
3 replies on “Juxta Editions Tutorial”
This is a great tool! I wish I had known about it a couple of weeks ago when we started our projects. I definitely could have used it to digitize some documents from the archives. Regardless, this is a really informative tutorial!
Great Post! After figuring out how to take a screenshot on Mac (my own shortcoming), I took a PNG image of one of the texts from my linguistics class and followed your tutorial on uploading it. I definitely did notice an immediate problem in the fact that, since my image was of a scanned book (with a page on the left and one on the right), the OCR tool viewed the top line of each page as a single line and did so with every successive line. However, this is an easy issue to solve by simply taking photos of each page at a time instead. Your tutorial was easy to follow and super helpful!
Thank you for your post! it is a really useful tool because it can extract text from images. The tutorial is really easy to follow because you have those arrows. Great job!