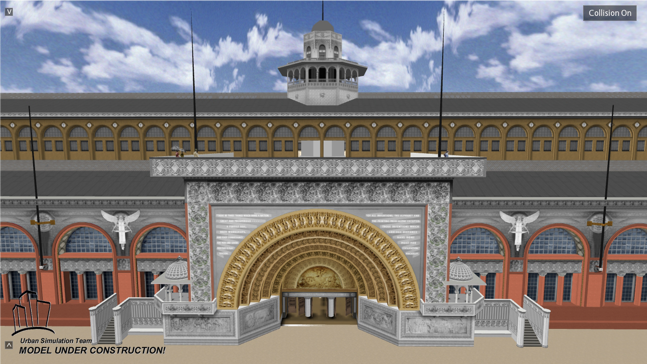
Manual 3D modeling techniques are very effective and have had a long history of producing impressive digital humanities projects. Lisa Snyder’s long-running project to recreate the World’s Columbian Exposition of 1863 in Chicago is a prime example of what these techniques can accomplish in skilled hands.
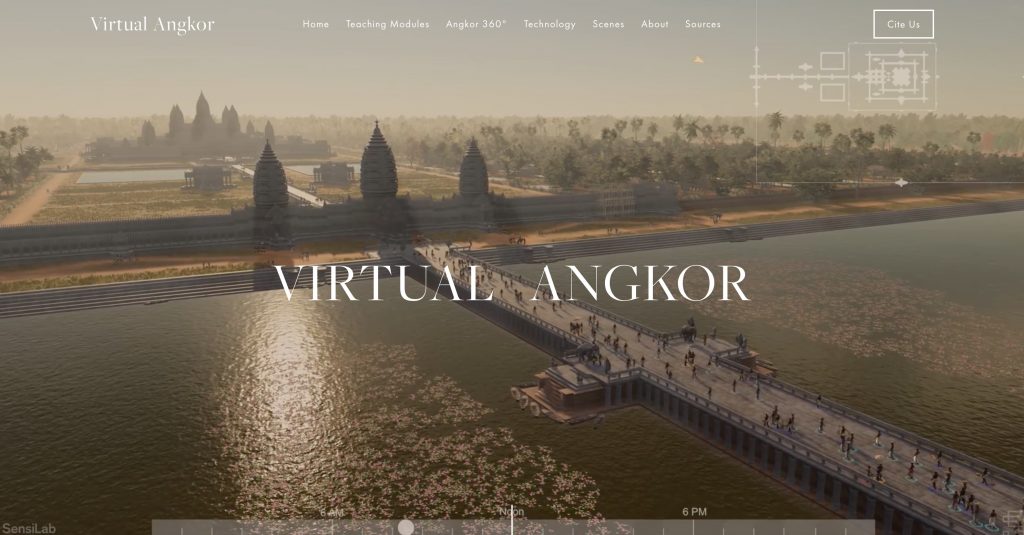
Increasingly, however, computers are doing more of the heavy lifting. There are several methods of generating 3D models that rely on algorithms to create geometric meshes that are being adopted for DH projects along with techniques borrowed from the film and video game industries like motion capture. The award winning Virtual Angkor being a prime example of the leading edge of these techniques.
Two major current methods for generating 3D content are procedural modeling and photogrammetry, which we’ll discuss today.
Procedural Modeling
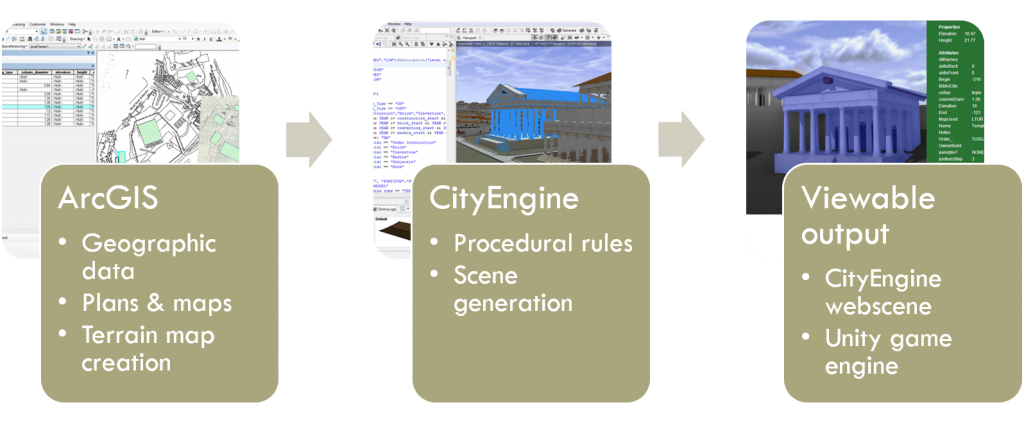
This term refers to the generation of complex geometry from basic shapes through the application of code-based rules. The leading platform for this type of work in DH is CityEngine, owned by ESRI, the makers of ArcGIS. This technique allows a user to produce, modify and update large, textured models of entire cities quickly and iteratively. The output can be explored online or integrated with gaming software or 3D animation packages to produce video games, simulations and movies.
This software was developed for modern city planners and urban architects, but has increasingly been put to use on historic landscapes and built environments, as in the impressive work of Marie Saldaña who developed a Roman temple rule set.
Photogrammetry
Photogrammetry is another algorithmic modeling technique that consists of taking multiple overlapping photographs and deriving measurements from them to create 3D models of objects or scenes. The basic principle is quite similar to the way many cameras these days allow you to create a panorama by stitching together overlapping photographs into a 2D mosaic. Photogrammetry takes the concept one step further by using the position of the camera as it moves through 3D space to estimate X, Y and Z coordinates for each pixel of the original image; for that it is also known as structure from motion or SfM.
Photogrammetry can be used to make highly accurate and realistically photo textured models of buildings, archaeological sites, landscapes (if the images are taken from the air) and objects. Close range photogrammetry of historical objects offers the possibility of both digitally preserving artifacts before they may be lost or damaged, and of allowing a whole suite of digital measurements, manipulations and other analyses to be performed that allow insights into the material that might not be visible to the naked eye. The technique is gaining in popularity and usage, since it produces very impressive results comparable to high end laser scanning technologies for a mere fraction of the cost.
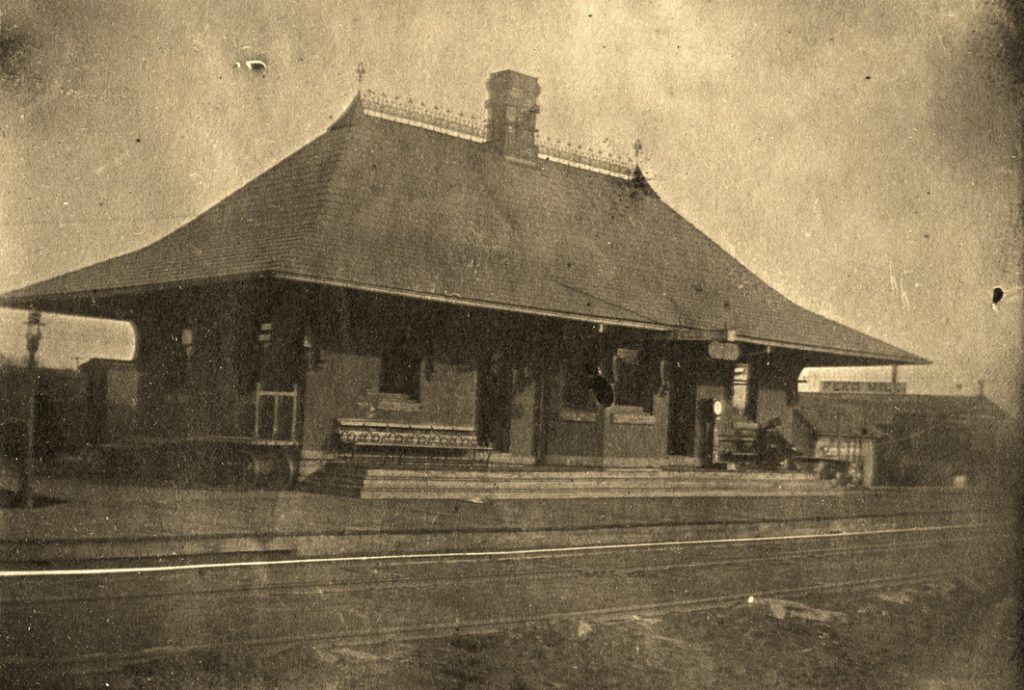
Modeling the Northfield Depot
Our test subject will be the historic Northfield Depot, a train station built in 1888 (slightly after our target date) and currently undergoing restoration through the efforts of the local Save the Northfield Depot campaign.
In previous iterations of this class, we have learned photogrammetry using MetaShape (formerly PhotoScan), the leading photogrammetry software. A demo mode is available for free that will let you try everything except exporting and saving your model. If you want to explore more, they offer a 30-day free trial of the full Standard or full Professional editions.
Northfield Depot by meDHieval on Sketchfab
To make a model like the one embedded above:
- Download the sample photograph dataset if you haven’t already.
- Follow the instructions in the Photogrammetry with PhotoScan Tutorial document.
SketchUp 201
For our class project this year to make a Game of LIFE style physical map of Carleton’s Campus, we are going to be cleaning architectural buildings in SketchUp that were made by hand from old photographs.
Match Photo
SketchUp’s Match Photo technique can be used to create models of historic buildings. Sadly, the tool is no longer available in the free, browser-based edition, but is still accessible in pro and older versions.
The clearest step-by-step introduction I’ve found to the Match Photo technique of geomodeling is several years old but the basic principles still apply. The first link takes you to step-by-step instructions for the process using a photo of a barn as an example, and the next two link to videos walking through the same example.
- Step-by-Step: Match Photo: Modeling from Photos
- Video Tutorials: Part I, Creating a new Photo Match and Part II, Modeling with Photo Match
The two videos below are more recent match photo tutorials that show how to incorporate multiple photos, but skip over some of the basic steps outlined above.
- Video Tutorials: SketchUp Training Series: Match Photo Part I and Match Photo Part II
Extruded Footprint
The other method often used to model existing buildings is the “Extruded Footprint” technique, which has the benefit of georeferencing your model with Google Earth from the outset. Again, this method has been lessened since Trimble acquired SketchUp, but the details are here if you want to try.
If your building is still standing and visible in Google satellite imagery, then this method might work as a starting point for you, but it won’t provide the level of detail we want unless you combine it with matched photos to add the photo textures and architectural elements. The video below offers an excellent introduction to how these two techniques can be combined to produce an accurate model, in the same way we practiced together in class.
- Video Tutorial: SketchUp Match Photo video combining Google Earth footprint and photographs
We are primarily interested in exteriors for this class, but if you find floor plans or architectural blue prints for your building in the archives and want to go nuts and try to start modeling a version with the interior walls, go for it. Here are a few basic resources to get you started.
- Quick how-to overview of the process: How to build a building starting from a floor plan in SketchUp
- Much more detailed and long-winded video on Modeling a floor plan
Finally, masterSketchUp.com has compiled a handy list of 10 tips every SketchUp modeler should know.
Exercise: Cleaning SketchUp models for 3D Printing
- Mount the shared GIS network drive at smb://storageserver2.ads.carleton.edu/GISVOL
- Navigate to the VirtualCampus > All Buildings directory
- Find the Final version of your building
- Save to your machine and Upload to your Google Drive folder
- Upload into SketchUp and explore the model
- Clean to
- Reverse Faces
- Close holes
- Export as STL