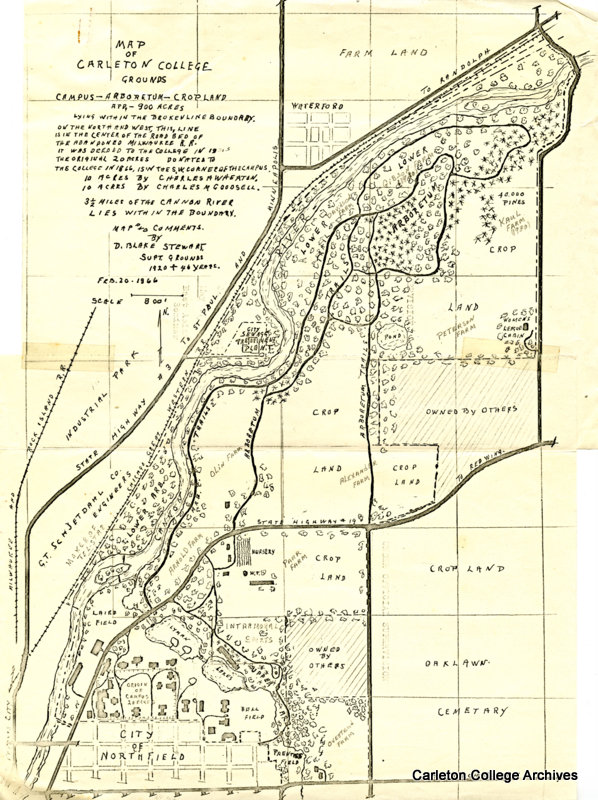
This tutorial covers how to resize an image with the online tool Waifu2x and digitally clean a scanned image in Adobe Photoshop. The example image that I chose to use for this tutorial is a map, as I feel like old maps are a good example of images that Digital Humanists would want to clean up to be more readable. Using this process to make primary source documents into something that is more easily readable for an audience is something that could be used by any Digital Humanist working with maps and images. Since accessibility is an important factor when posting things to the internet, making sure images are crisp and legible before incorporating them into Digital Humanities projects is an important step.
Step 1- Materials: Get both the image that you want to clean and a copy of Adobe Photoshop. I am working with a copy of CS6, but most of the processes that I use should stay the same on later versions (and seeing as my copy of CS6 is barely supported, I doubt too many people are working with earlier ones).
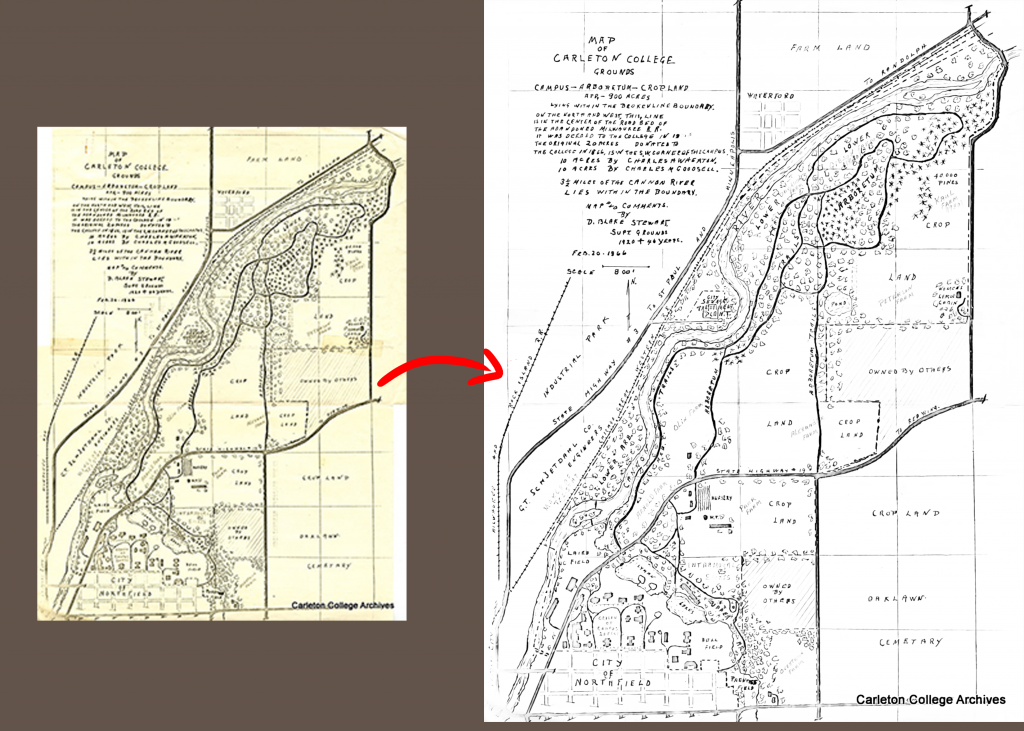
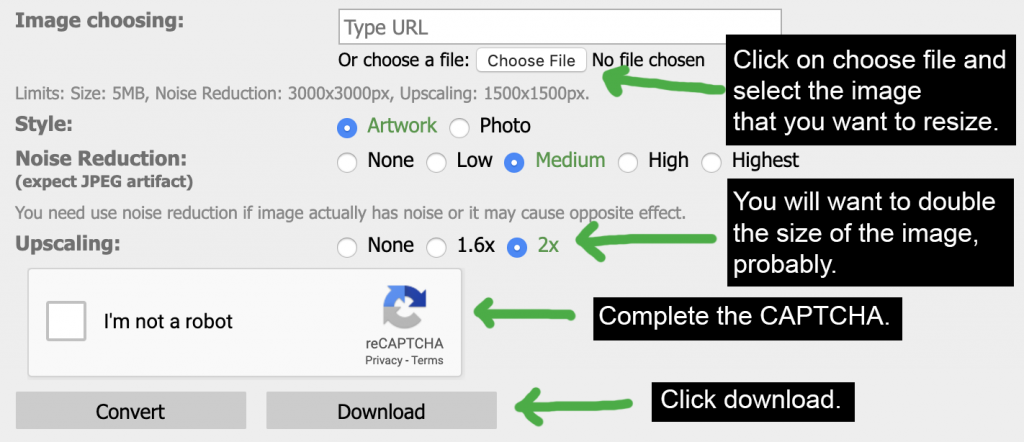
Step 2- Resizing: A lot of images that you might find on digital archives tend to be kind of small and of somewhat poor quality because of that (the way I judge something being small/low quality is if it starts to look pixelated after I zoom in only once). Luckily, there is a website out there that is better at resizing images than Photoshop’s built-in resizing tool (things tend to look very fuzzy after resizing in PS).
Go to http://waifu2x.udp.jp/ (yes, this is a program that was designed to resize people’s anime art. It is also the best resizing tool on the internet).
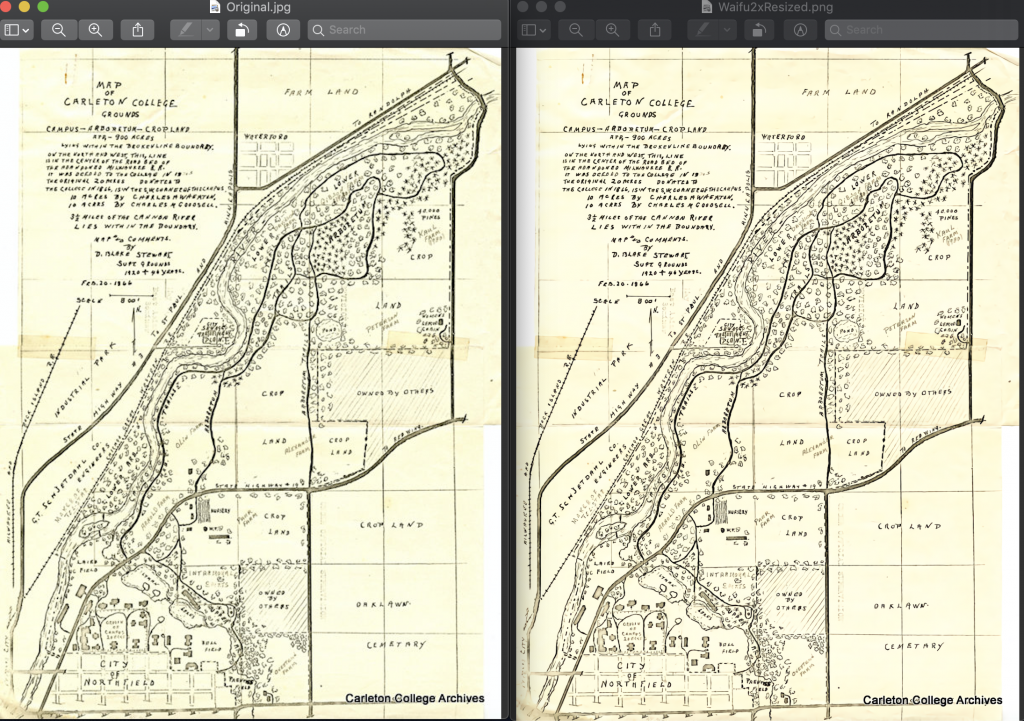
You will probably want to rename the file, since it will be a string of random letters and numbers. If you open it, it should be of noticeably higher quality than the original.
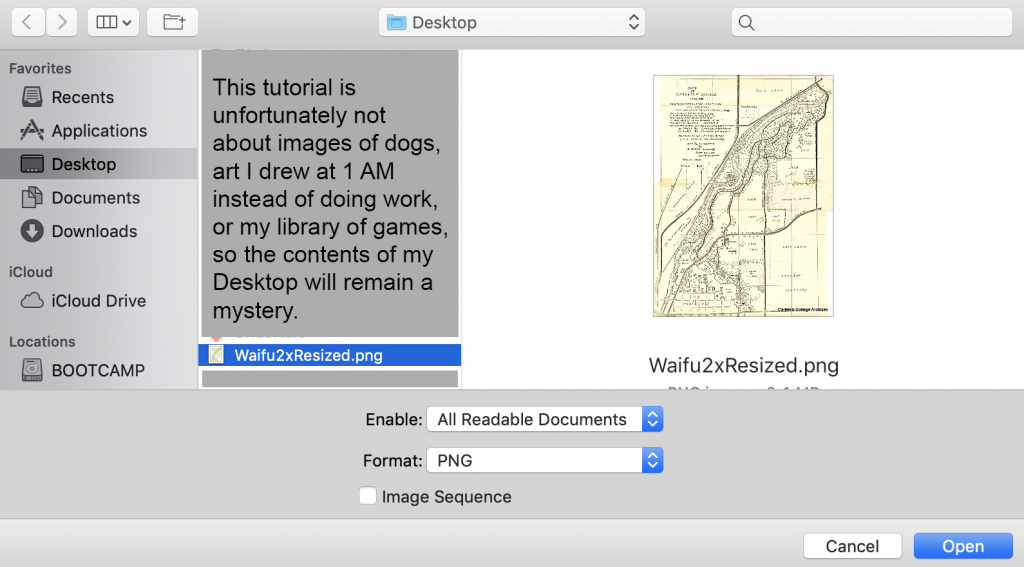
Step 3- Opening the Image: Now it is time to open the image in Photoshop. The best and easiest way to do this is to drag the image on your Desktop to the PS icon, which will open it as a new Photoshop Document. Additionally, you can use the command-O keyboard shortcut and select the image in the menu that pops up.
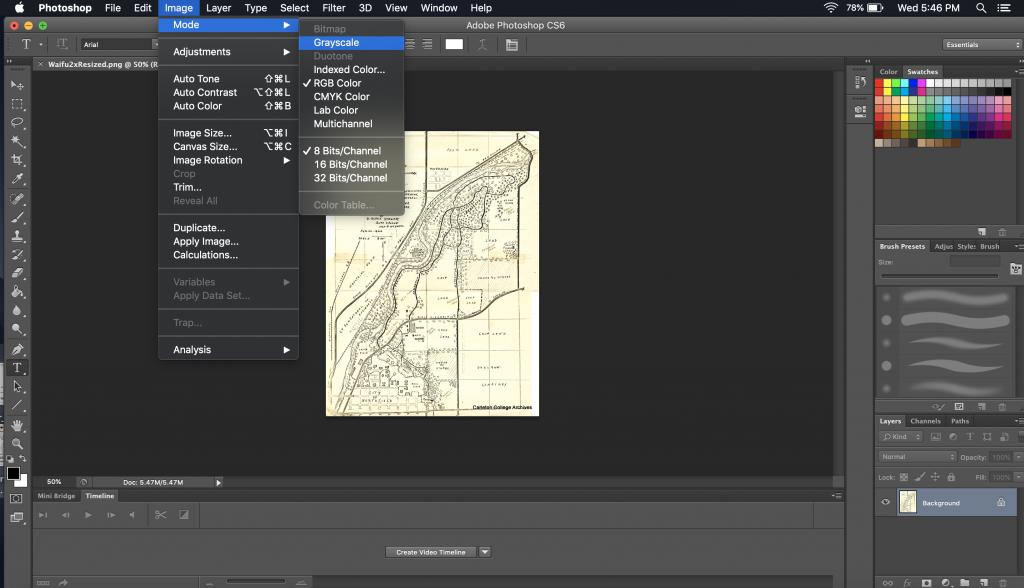
Step 4- Grayscale: For the method that we are using, we will turn the image into a grayscale image. This means that it is not a very good technique for images where color is important. Go to the “Image” menu, and under “mode”, select “Grayscale”. It will ask if you are okay to discard all color information. Click “Discard”. You do not necessarily have to use Grayscale, but I find it is a lot easier this way.
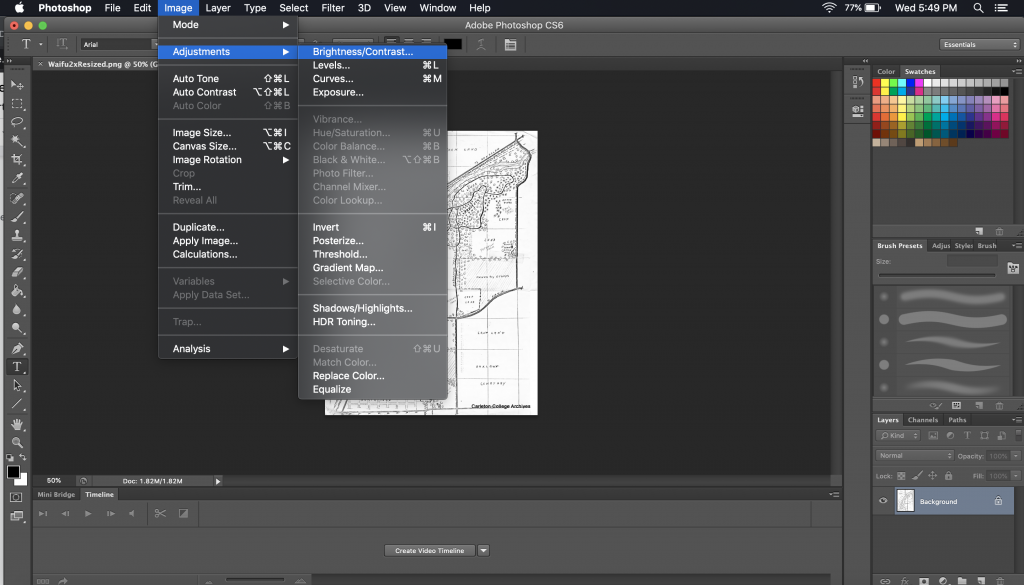
Step 5- Contrast: Again, go under “Image” and then “Adjustments” and “Brightness/Contrast”. This will bring up a window with two sliders.
It is up to you to play with the sliders until you find something that looks nice. What I was looking for on this particular map was getting to a point where you could see all the text and lines, but the two pieces of tape(?) that are about halfway up the images were no longer visible.
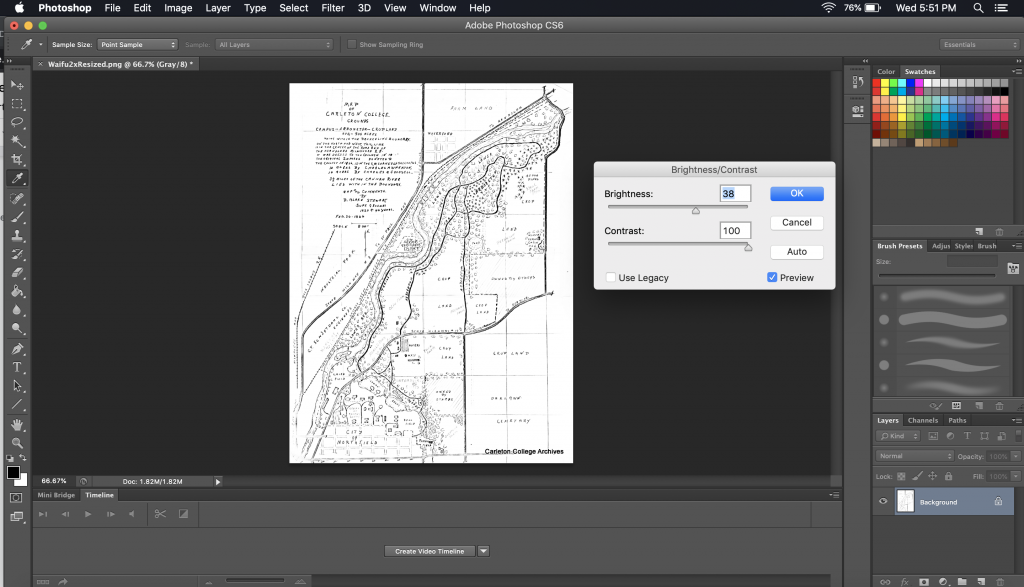
The reason why we do this is to get rid of some of the paper texture that is going to be on all scanned documents. Additionally, things like the tape on this map, things written on the other side of a piece of paper, or spills can be removed or reduced on this step so that all you have are the important lines.
Step 6- Clean by Hand: Even after the brightness/contrast adjustments, there will likely be some small leftover smudges and other things that you might want to get rid of. Since the background of the image at this point should be white (or very close to it), you can select the eraser tool on the left toolbar and manually erase any leftover marks without noticeable white marks across the map.
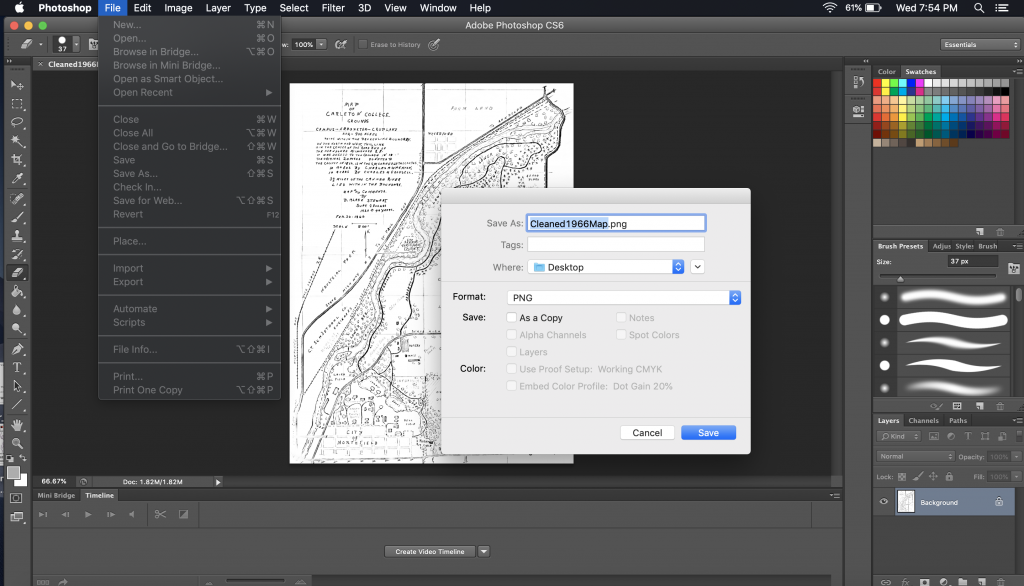
Step 7-Save: Go to “File” and “Save As” and save the image as a PNG. If you would like to save a version as a working Photoshop file, you can also save it as a PSD. If you want to edit it in color later on, you might want to switch the mode from grayscale back to RGB color.
Congratulations! You now have a cleaned version of the image!
Other resources:
Waifu2x does have a downloadable version that is available on GitHub here, but it does require significant setup to use: https://github.com/nagadomi/waifu2x
The link also contains more information on the software, as well as all of the code behind it, if you are interested.
This tutorial only covers cleaning up an image, but it is possible that you might want to make the lines on a separate layer from the background, if you wanted to have a color layer under the lines to show areas of the map or something similar. There is a very good tutorial that explains the next few steps of that process here: https://might-could.com/quick-tutorial-how-to-remove-a-background-from-line-art-in-photoshop/, if you are interested.
6 replies on “Cleaning Images in Adobe Photoshop”
I was surprised by how easy it was to use Waifu2x! I didn’t have to download anything, just plop a file in. I didn’t do the photoshop steps, but that looked relatively easy as well. All in all, a great tutorial for resizing with good image quality!
Wow, this is fantastic! I have no experience with Adobe Photoshop but this really demystified the process of transferring an image. Also, I had no idea Waifu2x existed, but it is a really powerful tool when working with images.
This is a very informative tutorial that is extremely helpful for anyone who hasn’t used this before. I was interested in this one because this is certainly a problem I’ve had in the past. You also do a good job explaining things succinctly yet thoroughly. There were no surprises and I knew what I needed right at the beginning of the tutorial.
This was really helpful. I’ve used photoshop a few times but I never really knew what I was doing. This is really cool.
I love Waifu2x. Like you said, I have no doubt that this is the BEST resizing tool on the web (much better than the other google searches I’ve found). Regarding photoshop, I doubt I’ll ever get into that much detail with that software, but I think the tutorial is super well written and is easy to follow!
Love your tutorial Emmy, its really clear and easily understandable and your images are easily followed. I think that this skill is also superbly useful, thanks for sharing this with us. Even though I rarely work with photoshop, I was able to follow along.