Needed: ArcGIS online subscription and working knowledge of the software. If you are a Carleton student, you can get access to ArcGIS by going to this link. Austin Mason and Wei-Hsin Fu are also great resources to learn more about ArcGIS.
Why StoryMap Journal?
Alongside other built in Web App that come on board the ArcGIS subscription, StoryMap is a great tool to display pre-existing maps into a coherent story. Though it’s most commonly used to show how different populations/land usages has changes over time (ex. displaying the area the Battle of Gettyburgs encompasses, showing how agriculture land around Carleton has changed over the years, etc….), there are almost undoubtedly other uses for it as well. The only limiting factor is your imagination. This tool simply makes it easy to display preexisting ArcGIS map in a cool-looking way without forcing users to learn any web-design skills.
How to use:
- Log into ArcGIS (either through an institutional or personal account)
- At the top of the page, locate Content
- Select a map (could be yours or organization’s) you’d like to make a StoryMap out of. Click on the map
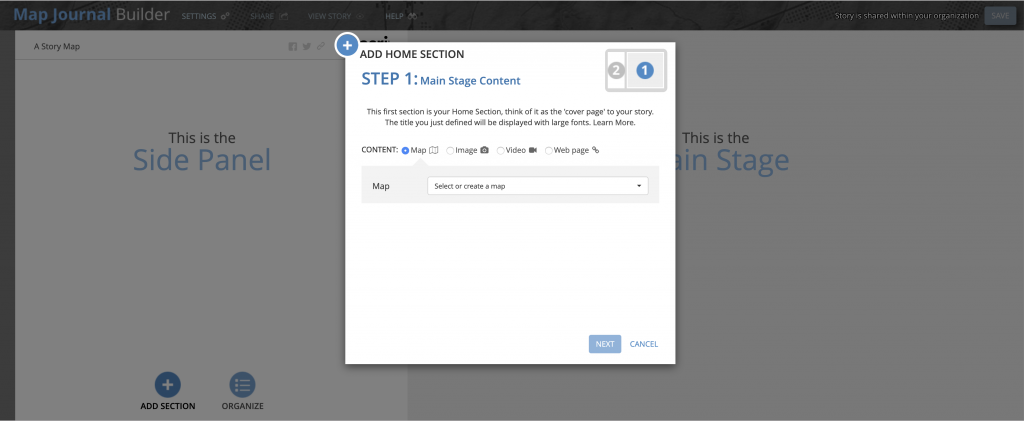
- In the right drop-down menu, select Create Web App. Though ArcGIS has a great selection of layout, we’re going to only focus on StoryMaps for this tutorial). Select Configurable App, Build a story map (left drop down on pop-up screen), StoryMap Journal, and Create web app.
- Enter a title and some related tags. Note: the software will not load without tags / titles, so think up some creative ones!
- On the next screen, you can choose either floating or side panels, both of which are simply just built-in eye candy for your app. I personally prefer side panel since it is more clean, but there are no functionality differences.
- Enter what you’d like to call the app (I’d recommend it being the same as your title, but again there’s no functionality difference). This will be the name of your app under content section. Hit the arrow.
From here on out, the app is entirely up to you to customize, thus I will not give step-by-step tutorial on what to do. Instead, I will outline for each functions I feel is most important. I will also include some tips and tricks I learned.
Main Stage: refers to the graphical side of the app, think of it as anything that’s not text-related. This is the area where you’d insert your maps, images, or embed videos to accompany your text. Link to embedding videos using Youtube here.
Side Panel: refers to the text side of the app, this is where you’d want to put your descriptive text and explains the content on the main-page (from the screen-shot above, this panel would pop up after you’ve selected content type and clicking next).
Edit function (pencil): At any given point, you can go back to a section and edit it using this tool. Simply click on the pencils (located next to the wall of text) and it will take you to the edit screen.

Add section (plus icon): use this tool to add more sections to your app. Pressing this tool will trigger the same pop-up as the one you see when the app is first created (figure 1)
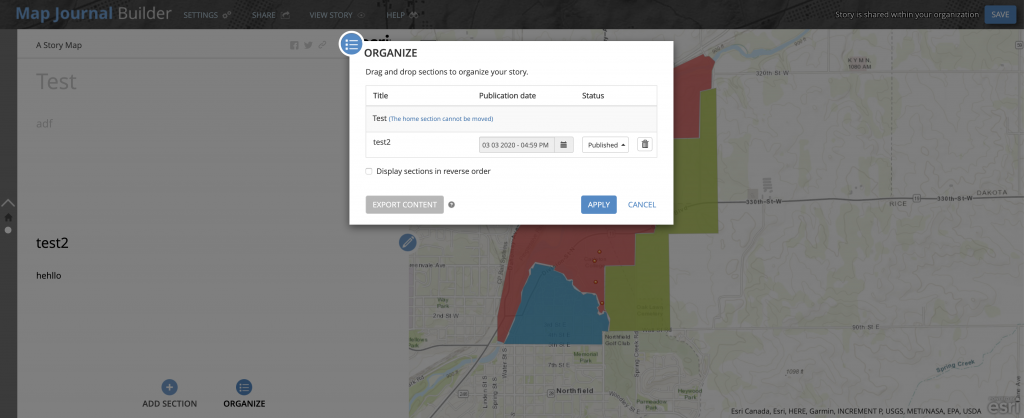
Organize (3 lines icon): use this tool to reorganize the order of your display content. Simply drag and drop previously created contents in any order.
Editing tips / tricks:
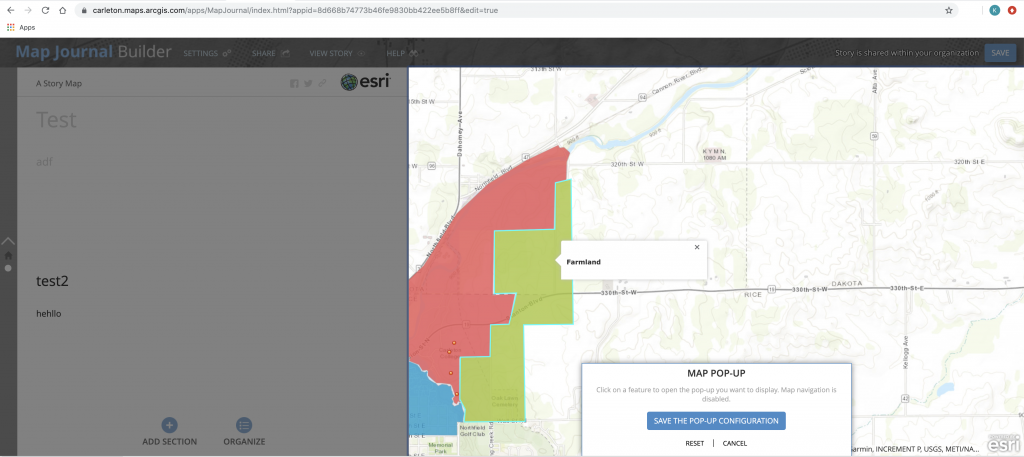
- In the main-stage editing menu, you can set how you’d like your map to be displayed without actually making adjustments to the map. This include always showing the map pop-up without needing to click on the map itself (pop-up: custom configuration and set how you’d want the map to look by clicking on the main-page section of the map itself. save).
- Adding legends will only generate the existing legend in your map, you can not create new legends within this app.
- On the Side-Panel edit page, there is an option to “create story action” (underneath camera icon). What this will do is that it’ll make the current main-page behave in a certain way upon clicking on the highlighted word (ex. I can make it so that whenever my highlighted text is clicked, the map will pan over to another area).