Hello! Sit down and get comfortable. I’ve decided to go meta and show you how to use a tool you can use to make a variety of things including tutorials! This post will give you a quick little introduction to Snagit.
So, what is Snagit? Snagit is a screenshot program that captures audio/visual output. It records your screen and saves the files so you can easily share them.
Why would I need Snagit? If you ever give a presentation and want to show clips of a video, chances are that you are working off digital media. The tricky thing is that it’s notoriously difficult to download content from YouTube, especially commercial videos that have a myriad of copyright protections and firewalls. Downloading the clips is not recommended, for a variety of legal and practical reasons. This is where a brief screen-grab works better.
I used Snagit to give a presentation where I was wanted to show example clips from several Björk and Janelle Monáe music videos. After about fifty different trials using countless approaches, I found Snagit. It was really easy to use, which was a blessing (I was in crunch-time).
Uses for the Digital Humanities: You can use SnagIt to show other people how to use other software…. meta… Thus making digital humanities tools more accessible! But in all seriousness, you can use Snagit to create a website compiling screen-recordings of the opening credits of 100 feature films, for example, for users to compare and contrast by scrolling through the particular segment of the film you’ve selected. This is a great way to give evidence and show small selections of films without having to overcomplicate your life through copyright restrictions and burning a disc.
Step 0. Download Snagit.
https://www.techsmith.com/screen-capture.html
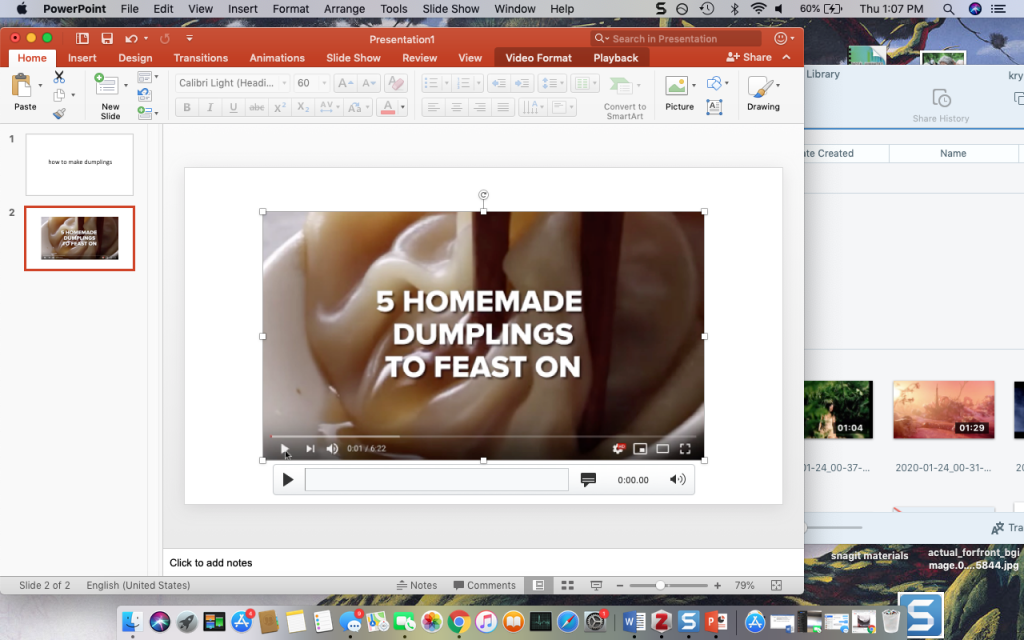
Step 1. Choose the video you want.

Step 2. Press the red “capture button.
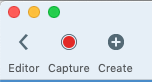
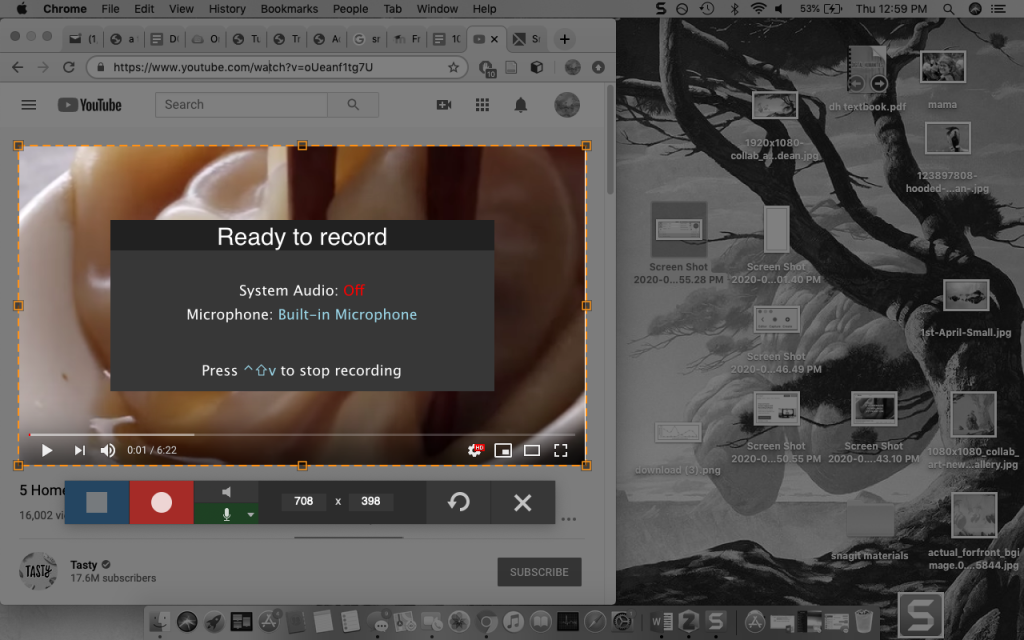
Step 3. Toggle your preferences. Do you want to capture audio or not? If so, you’ll have to allow Snagit to access your microphone. The same thing goes for the camera. Once you’re pleased, go ahead and click the huge red “Capture” button.
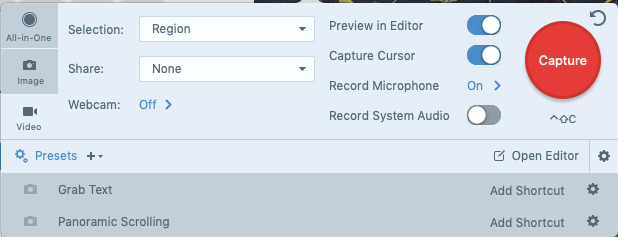
Step 4. Establish the parameters of your recording zone. Snagit gives you a highly magnified circle where you can specify your margins up to the pixel. This helps your video have clean lines and no pesky weird borders.
Step 5. Get ready to record! Press the red button.
Step 6. Record.
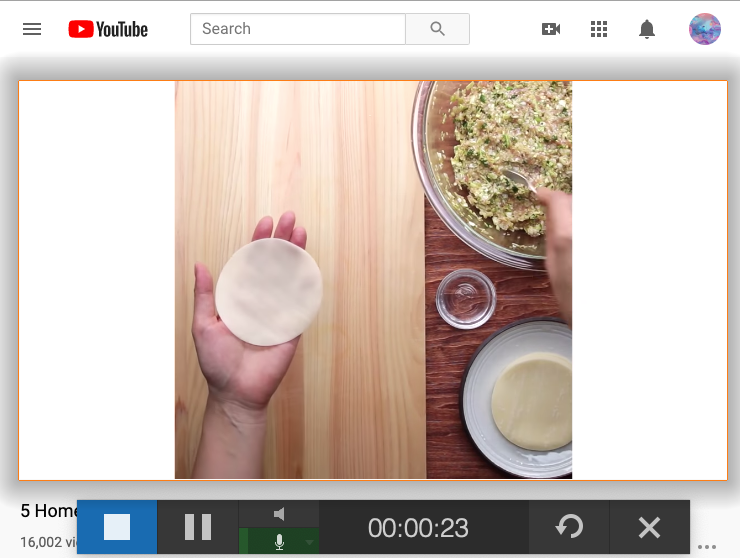
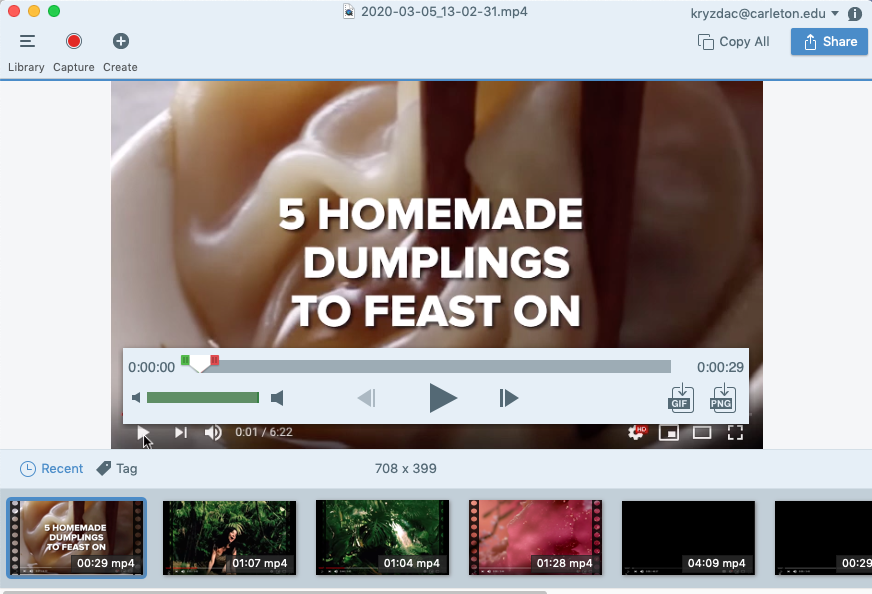
Step 7. Find your video. Once you click the blue square “stop” button, the video will automatically save into your Snagit files.
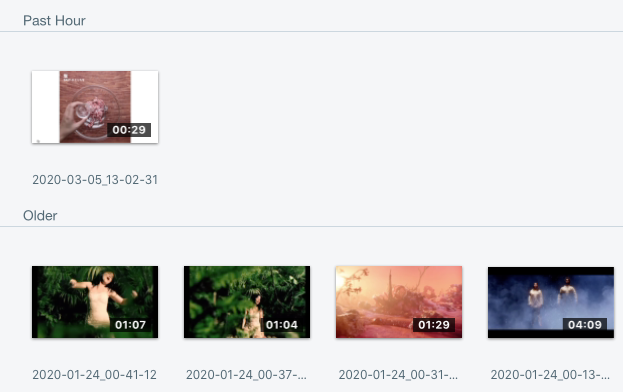
Step 8. Evaluate. Play through your video and see if it’s satisfactory!
Step 9. Open PowerPoint and drag your video directly onto a slide.
Step 10. Boom! It’s there and it’s playable!
More help:
6 replies on “snagit tutorial”
This is a tool I’ve not heard of before – very cool! How does it compare to Quicktime’s built-in screen capture on Macs? Is there a time limit or problems with various streaming platforms like Netflix (as in, can you screencap an entire movie?)?
Also I noted that you need to record audio with the mic, which tends to be pretty low-quality. Another option is to use another app to have the audio “loop-back” internally to the system – see https://rogueamoeba.com/loopback/ or https://github.com/mattingalls/Soundflower .
This tutorial was really cool. Quick and easy way to collect my favorite videos!
I found your tutorial really helpful and easy to follow! I feel like half of the battle for a good tutorial is having a software people will actually want to use, and you nailed that. If I were to offer a critique, it would be a recommendation yo include the fact that the trial requires a trial account, but this is such a minor concern I wouldn’t really worry about.
This was by far my favorite tutorial! Not only because the tools seems like a real life (definitely time)-saver, but also because I just flowed through each of the steps. Thanks to the initial mini prep-talk at the beginning, I felt encouraged and motivated to brave through the entire tutorial. Maybe it would have been interesting if you had included a snippet of that homemade dumpling?
Great tutorial! I ran into some trouble with System Preferences, but I believe that was just because I have set up my computer badly. Your steps are very clear, and the screenshots were very helpful for locating the panel and the preferences.
Wow! Snagit is so cool! Following your tutorial I have tried Snagit! It is very helpful especially for presentation and blog writing! Thanks for your step-by-step instruction!