
This past Tuesday, in my the first Hacking the Humanities class, I was introduced to SketchUp, a 3D modeling software. As I sat in my chair listening to my professor give an overview of the product, an series of thoughts and questions popped into my head. The most prominent being: how difficult will it be to navigate? Given that my experience with programs like SketchUp was minimal–I attended a library course for Scratch in the 6th grade, but that was about the extent of it–I was unsure of how well I would perform the upcoming task, but I was ready to learn! Within a few minutes of beginning the hands-on class tutorial, building a dog house, I was relieved when I discovered the ease that comes with using SketchUp and had quite a bit of fun too.
I started with the basics. This included, but was not limited to, making various shapes, transforming them from 2D to 3D, and giving them a bit of color and texture to serve as a nice finishing touch. After the completion of my first project, I was assigned my second project: building my childhood home from memory. This would be done on my own and would be due Thursday before class.
Later that night, I sat in the Nourse lounge, closed my eyes, and pictured my childhood home. I was kind of stunned at the fact that it was more hazy than I thought it would be, but I decided to start with what I knew and work from there. My house emerged from a rectangle, that was brought up to it’s 3D form by using the “Push/Pull” tool. Once I had that block, the base of my house, I moved on to putting some windows and doors on it.
TIP: If you want to make multiple shapes the same dimension, simply specify the feet and/or inches you would like your first shape to be in dimension box on the bottom left-hand corner of the screen and proceed to double click for every additional shape you make.
Once done utilizing the more basic shapes, I turned to the more advanced architectural features of my house. This included the odd shape of my balcony and certain pieces of the roof.
TIP: Start with the geometric shapes that are given to you, and use the pencil tool to transform your square into a triangle or any other shape you desire and erase any unwanted lines after.
One of the most problematic features to work on was stairs. I ran into various issues here.
What I did not know:
- what angle to use when drawing to make one stair align perfectly with another
- how to make my shapes appear as if they were floating
TIPS:
What I now know:
- If possible, choose a consistent angle for the section of the house you’re working on
- Once you have your shape, let’s say a rectangle, use “push pull” to make it even with your original shape (your first stair). Then, use the combination of “option” and “push pull” to pull up the second stair to the desirable height and erase the fist box, which served as a stepping stone for the second. Repeat until you have finished your stairs.
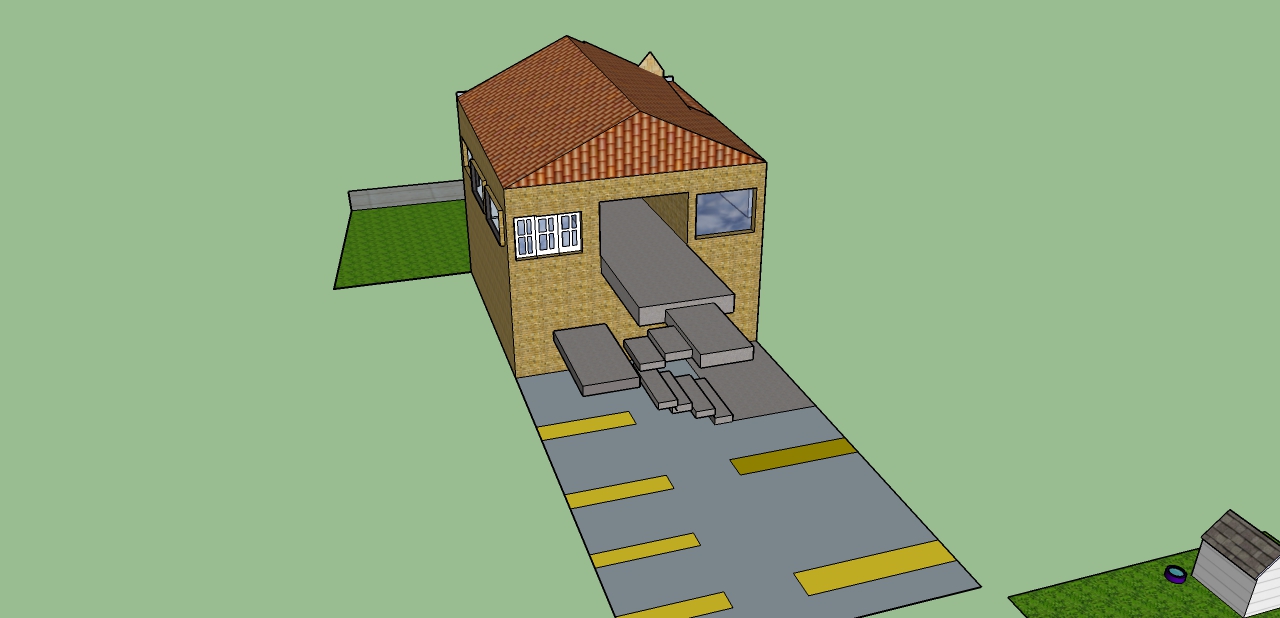
Lastly, I added color to make it more life-like; I added a brick texture to the base, red roofing, white window panels, translucent windows, green grass, and a concrete sidewalk, and there was my finished product!
The finished product looks pretty good! And I’m glad you found the process to be relatively painless and even a little fun. Your tips are helpful and it seems like you’ve made a great start on mastering the program.