WordPress makes creating a website much easier by removing the programming barrier. By using blocks, widgets, and menus one can customize various aspects of a webpage without ever having to interact with HTML or CSS. That being said, this comes with some creative limitations being that you are forced to adhere to the templates and arrangements provided by various themes. Instead of searching for the perfect theme, why not pick the theme you like and customize the aspects which you don’t? In my tutorial, I will be going over the steps needed to make small changes to a WordPress site using the additional CSS option.
First, it is crucial to have open either Google Chrome or another browser that supports developer tools. For this tutorial, I will be using Google Chrome. More importantly, once in the developer tools menu, click on the icon with a pointer to select the element inspector. (On macOS: Command + Shift + C) (On Windows: Ctrl + Shift + I)
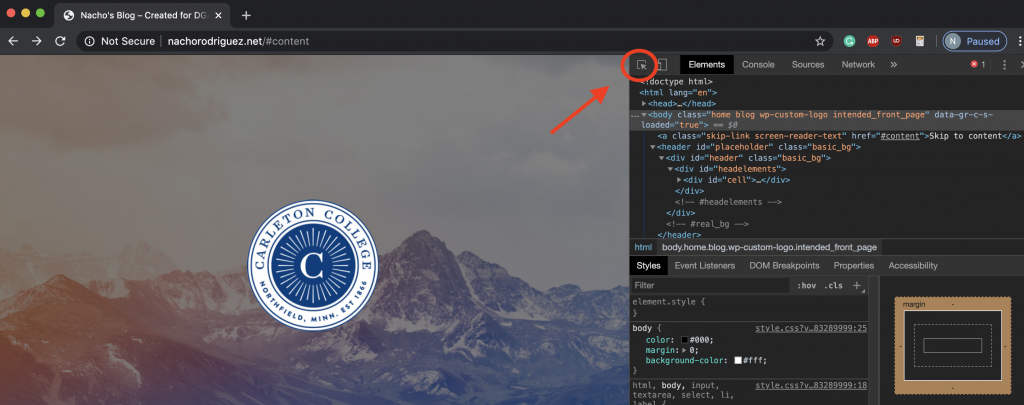
The element inspector can be used to highlight different elements on the page. This is useful for identifying which CSS selectors are needed to be targeted. There are various different types of CSS selectors, but I will be focusing on manipulating a class. Click here for more information on CSS selectors.
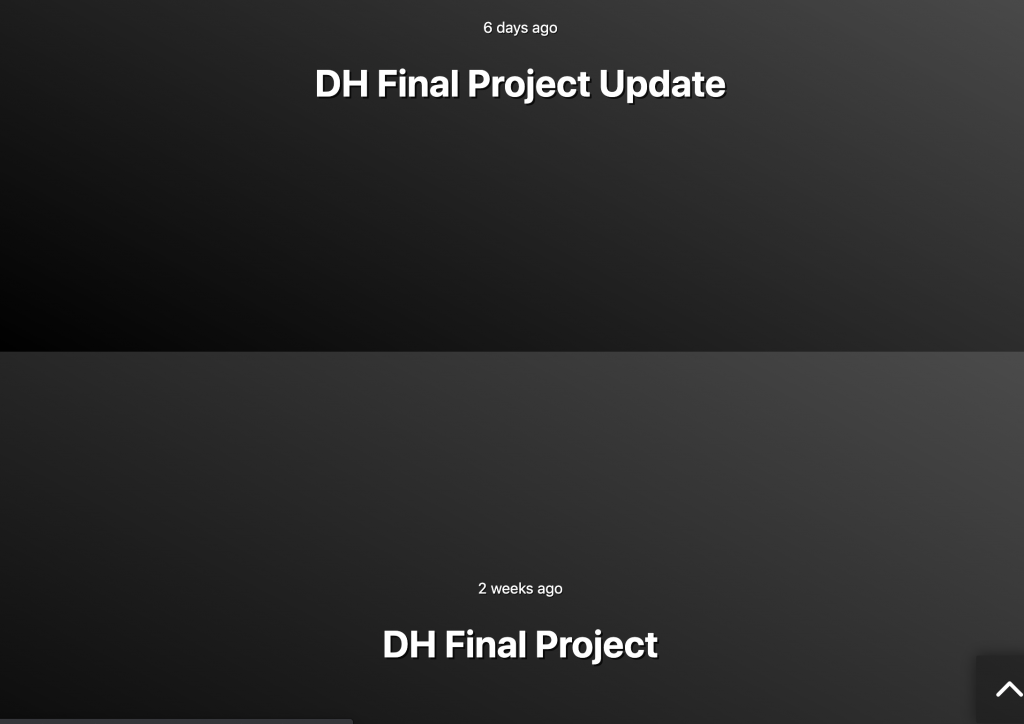
For this tutorial, I will be changing the color of these blocks on my page that show my most recent posts. This gradient color is set by default by the theme I chose and cannot be changed in the theme settings.
Step 1: Find the element you wish to manipulate by inspecting elements. Note: This may take some trial and error. Often there may be multiple divs attached to a certain area and finding the correct element might take some time.

Here the element is circled in red. By hovering over the DH Final Project Update block the element was highlighted on the page and made visible in the element display area. Extra tip: After clicking on an element, you can still hover over the other elements listed in the element display area and they will be highlighted on the page.
Step 2: After having found the correct element, we must now identify the CSS selector, in this case, the class name.
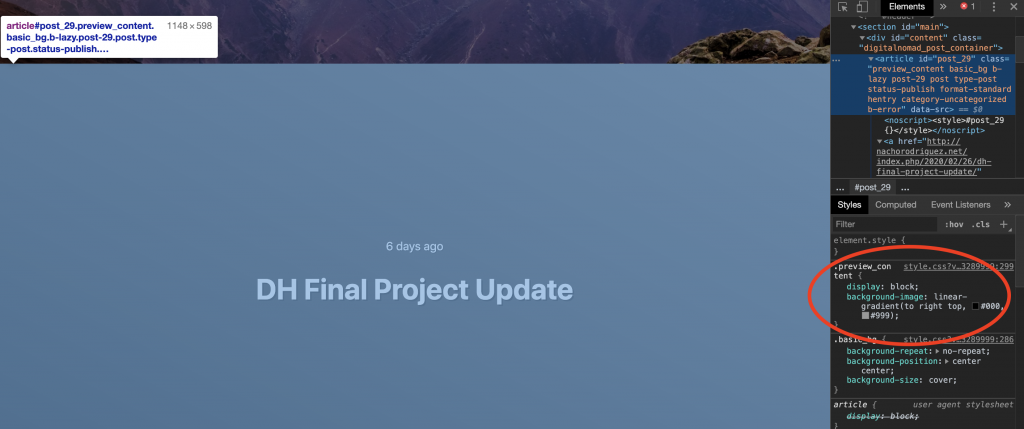
The class is circled in red and appeared after having selected the correct element. Note: There may be more than one selector within a given element, thus you may need to scroll within the styles window to find the correct class.
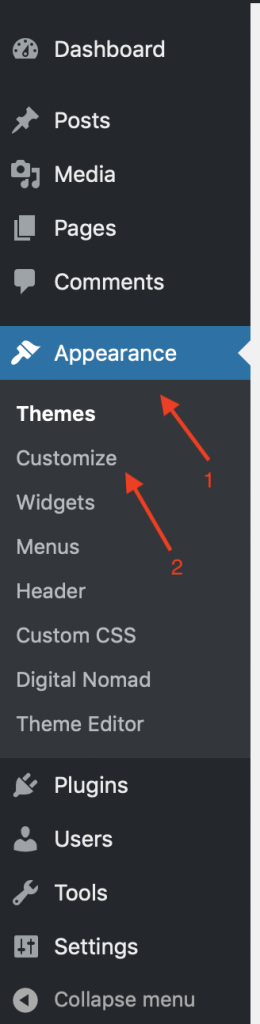
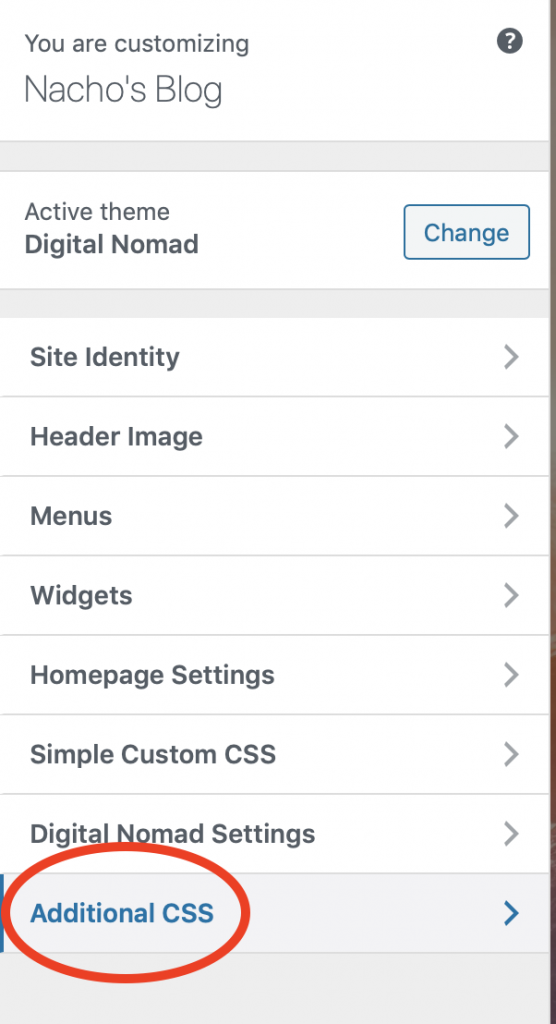
Step 3: In order to add additional CSS to the WordPress site, we will need to locate the “Additional CSS” tab under the customize menu of the web page. To do so, first hover over or click on the Appearance tab on the main admin dashboard of the WordPress site to reveal the appearance sub-menu. Then click on customize.
Step 4: Once in the customize menu, find the tab which is titled “Additional CSS”. Note: There are plug-ins that allow for adding CSS, however with my personal experience, the Additional CSS tab seems to work perfectly fine for the given circumstances.
Step 5: Now to put all of the information we have gathered together. First, we will target the selector by writing the class name with a period, like so: “.Classname”. Next, two curly-braces will follow the class name and between the curly braces, the styles you wish to manipulate can be added.
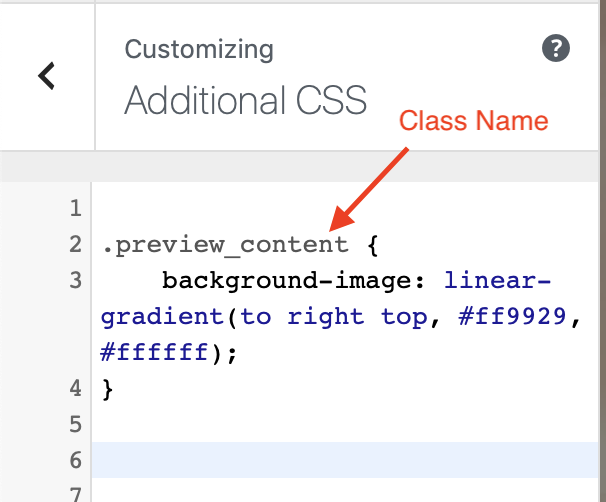
Note: The style within the .preview_content class is the same style which was in Step 2 when we found the CSS selector. I have simply changed the values of the colors to reflect the colors I wish to use.
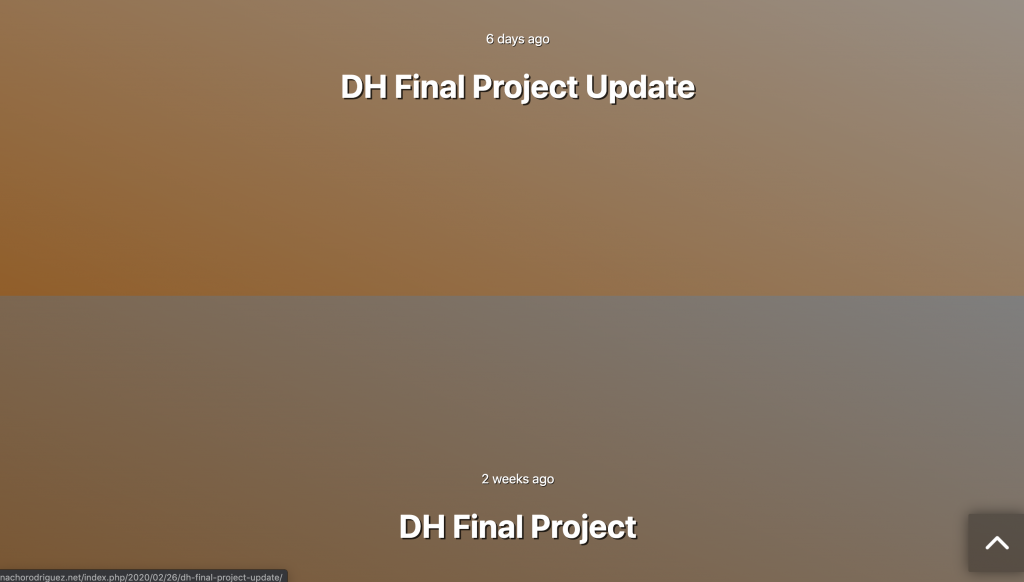
Step 6: Apply changes and make additional changes where necessary. Often, the first attempt might not yield any changes. Finding the correct class to manipulate can take trial and error.
Final Note: Changing certain aspects of a theme might yield small changes such as in this example. However, other changes might come into conflict with javascript or other aspects of the theme. Thus, it is always good practice to check all of the pages for potential changes that may have spread to areas you did not intend to change. Furthermore, for larger changes within the theme, one can also edit the theme CSS stylesheet directly.
Additional resources: W3Schools CSS Selectors, More advanced CSS tutorial for editing the theme stylesheet directly, WordPress support page for adding CSS
3 replies on “WordPress CSS Tutorial”
I know we were introduced to DevTools in class, but I never thought to combine the two! When we developed our websites a few weeks ago, I remember clicking on nearly every button on WordPress to try and find the header or sidebar I was trying to change. Once I thought I found it, I’d type the CSS and vividly remember nothing happening. Using DevTools to find the specific part of my website to change is super helpful in speeding up the process and eliminating my frustration.
As someone who is notably bad at coding, this was a really helpful tutorial! I never thought about using the element inspector to determine what part of the code needs to be changed. I think that will help me a lot with coding in the future, as I often get lost among all the text and elements.
I’m amazed that I actually could follow your tutorial and change the color of my website footer using custom CSS. Your instructions were easy to follow. The only hiccup was that I accidentally put a space after “linear-gradient,” so maybe make it clear that there is no space here. You’ve clearly demonstrated how to change your website theme colors in WordPress.