This week I completed a 3D model of the Elizabeth Cowling Recreation Center in Sketch Up. Overall, I am satisfied with how the model turned out. After well over 6 hours of work, assigning the textures was a great feeling; I felt very accomplished seeing the whole thing come together!
The building process was definitely a struggle but I just kept trying new techniques until I found something that worked. As a result of the challenges I encountered, I was able to practice, learn, and explore the tools and techniques such as components and groups in Sketch Up.
First and foremost, I had to wrap my head around how the axes represent dimension, particularly once I began photo matching my second picture. I had to move the origin and reset the red and green axis correctly otherwise the model would not be in the correct location.
 When I was making the doors, I initially made it by making one large rectangle with the 2 rectangles for the door inscribed within it. Then I created the rectangle shapes for the surrounding windows using the line tool. However, when I tried to make a copy of the component to put on the other side of the building, I couldn’t get it to turn the corner! After many attempts, I was finally able to get it to work by deleting the lines and making the entire component made out of rectangles.
 I ran into painting problems again this week. You can read more about what happened last time in my previous blog post here.
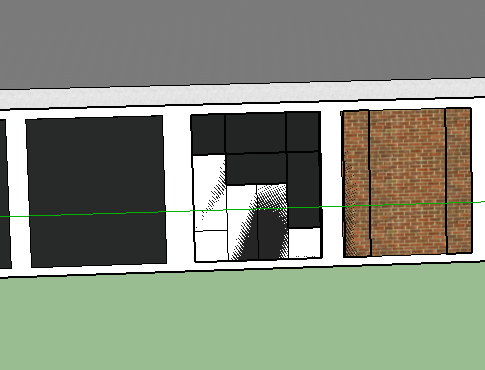
When I filled in the windows and small brick sections on the front and the side of the shorter section of the building, the texture did not appear as expected. It was weirdly distorted. After many attempts, I was able to get the door to take the texture by deleting extra faces I had accidentally stacked.
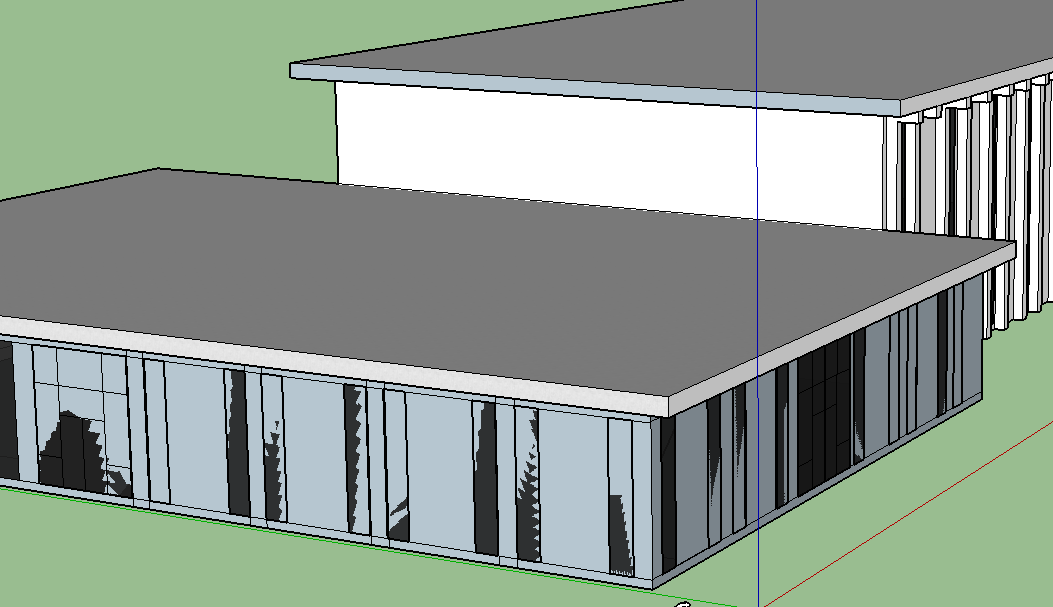
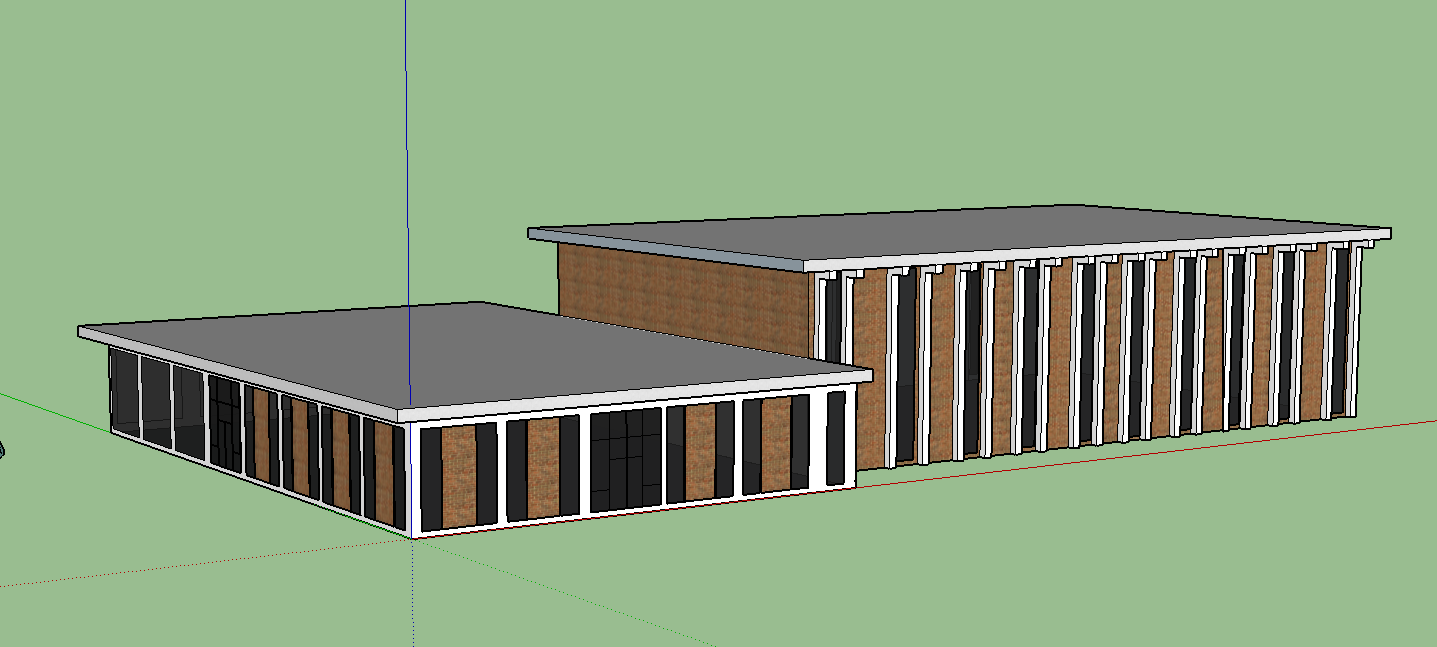
I ended up starting over on the windows. Perhaps it had something to do with the fact that those objects were components. Since a component is an exact copy, perhaps turning the corner had some weird effect on the texture in terms of direction vs. actual location. The distortion may forever remain a mystery. What’s not a mystery, though, is what the Cowling Gym looks like! Check out the images of the model below.
Front
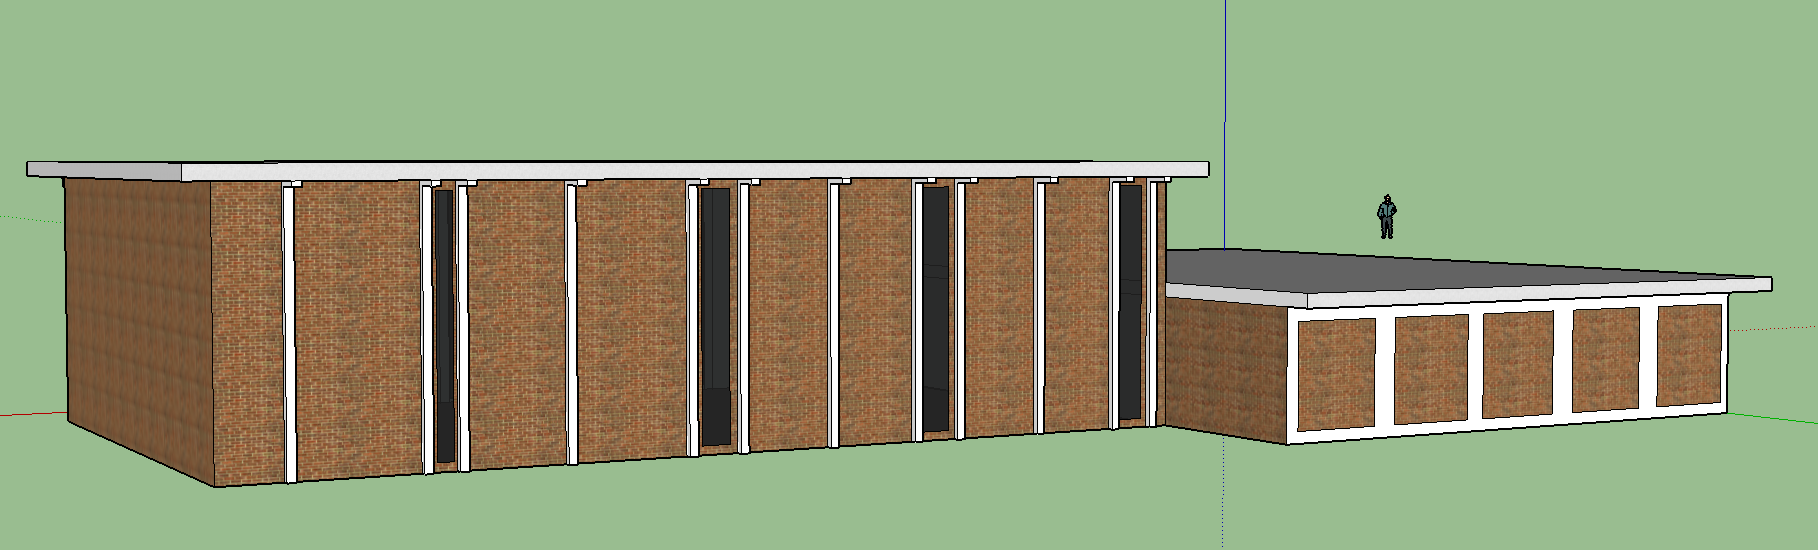
Back
Nice! I like your model of the Cowling Gym. Even though Cowling Gym is quite a blocky building, I feel that you have applied much accurate and precise details on your model and it is a pretty persuasive representation of the Gym. It is unfortunate that you can not match the texture of the building on your photos onto your model, as I also encountered this issue, and the numerous other obstacles you faced during creation. Still, it is a great improvement from your previous attempt and I consider it a great success! 😉
Whoa your final model looks amazing! Sorry to hear about painting problems. I had the same issue, and I had to delete all the objects to redo them.
I also spent a long time trying to figure out how to change the angles of components. I tried setting the component axis differently and changing what the component would “glue” to, but these techniques never really worked out for me either. Anyways, you seemed to overcome these problems because your model turned out great!
Nice work, Clarissa!
Your finished model does indeed look very much like the reality of Cowling Gym. The image distortion problems are common if frustrating ones, and the issue of getting components to stick can be resolved by the techniques Malekai mentions of change what objects glue to, but it is a somewhat mysterious process that is complicated by stickiness in the underlying geometry. Good on you for persisting and making a great looking final product.
I too sometimes had weird “ghost” textures disappear into the building I was modeling. Your realization that this issue can sometimes be caused by having multiple faces on an image was helpful to me as I was finishing up the project, so thank you!