In my previous post, I described why I chose to pick to model Davis Hall as my building to attempt SketchUp photo modeling. This process was far more technical that free form modeling, which gave users the ability to be more creative. However, with that said, it also gave a higher chance of achieving a better model.
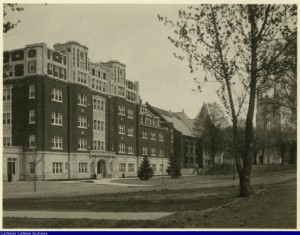
The first step was choosing which of my photos I wanted to attempt to mode. I chose one that:
- Had little to no obstruction of the building itself by other objects or people
- Featured multiple sides of the building, and, therefore, be a concrete representation of the building as a whole
In the beginning, I felt more confident opening the application and getting started, as I already knew how to navigate through a majority the tools. However, my first challenge arose with the new Match Photo window:
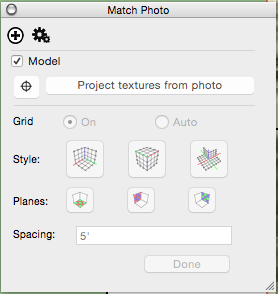
While the window itself is fairly easy to understand and navigate, it is accompanied by a series of blue, red, and green lines popping up on your screen. These lines are used to duplicate the position and focal length of your building.
Challenge #1: being precise with the placement of the lines
As I found out with my first attempt of the task, It is critical that one is exact with their placement of each one of their guidelines. If one is not, it is likely they will have to start over since their positioning will be off, and, therefore, their photo will not be properly matched.
TIP: Find two parallel, straight lines on each face of your building and place your markers there to ensure accuracy. Use the zoom liberally to double check this important step.
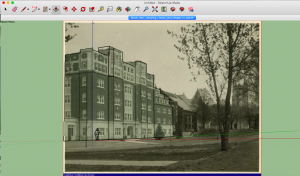
Attempt #1
The next step of the process was drawing lines with the pencil tool to make the various components of your building. Once that is done, use the push/pull tool to make it 3-D by extending those newly drawn faces outward or pushing them inward to mimic how the building would look in real life. Lastly, take any doors, windows, or other architectural parts that you would like highlighted and repeat the first two steps to make the model as life-like as possible.

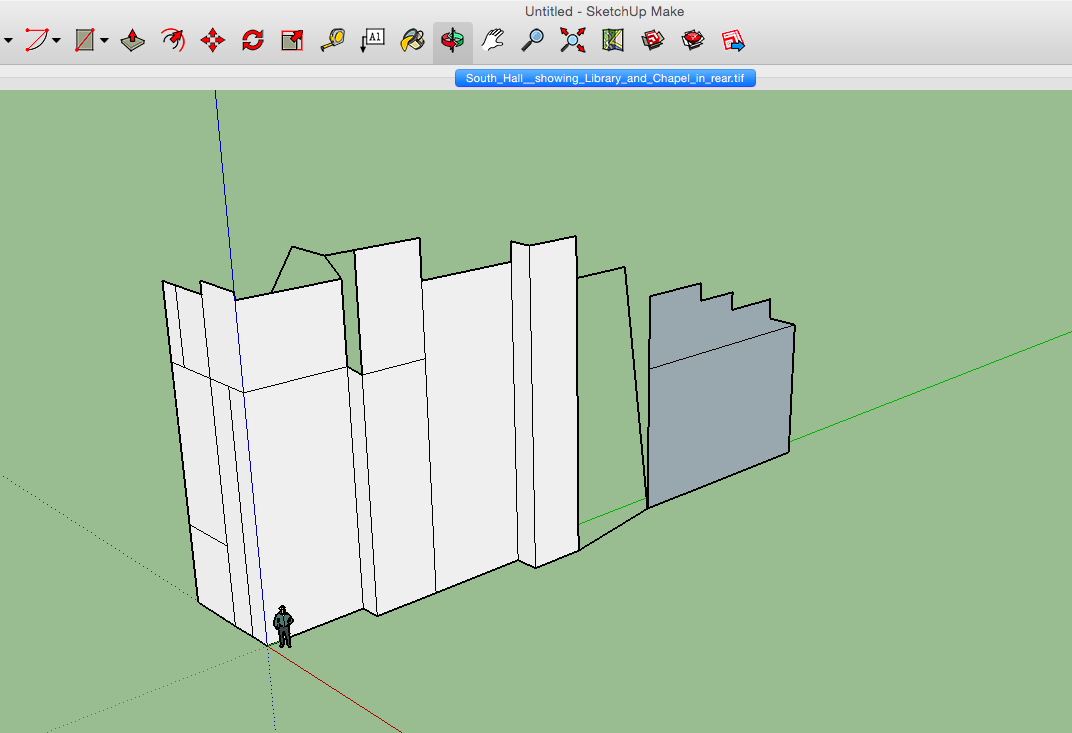
Attempt #2
My overall experience
Defeats:
- Properly matching my guidelines to my model to ensure accuracy of position
- The struggle of trying to erase lines, only to learn that I would have to start over and make a larger shape that did not include any lines at all
Triumphs:
- Seeing how my final product compared to my original picture
- Learning about building a 3D model and how much you learn about the representation of a building
- had to consider what tools would be most useful the audience in order to make it as close to how it would be during the early 1920s (when the photo was taken)
In all honesty, I think I could’ve had a cleaner model using free form modeling.
I do think that this tool and process of 3D modeling in general can make contributions to a wide range of scholarly projects; it provides a DH project’s audience with a visual aide to supplement their learning. However, it can be very powerful, as one’s own interpretation of the building influences the audience’s overall understanding. This is where people must take caution.
To be taken through this process step-by-step this link.
Tonya,
I completely agree that the photo match method is more challenging than freeform modeling, and it takes some getting used to. Your second attempt seems to have gotten closer to the basic massing of the building. The next step would be to add another photo from a different angle, as described in this video from about 2:30.