The tool I selected for my tutorial is called Autodesk Inventor. Autodesk Inventor is a computer-aided design application for 3D mechanical design. Whereas the SketchUp program we used was geared more towards architectural and interior design, Autodesk Inventor is geared more towards product design and engineering. Although it is geared more towards engineering, I have found that the application is also an excellent tool for recreational projects like creating a 3D puzzle cube. In the following tutorial, I will teach you how to make a piece for a 3×3 3D puzzle cube in Autodesk Inventor.
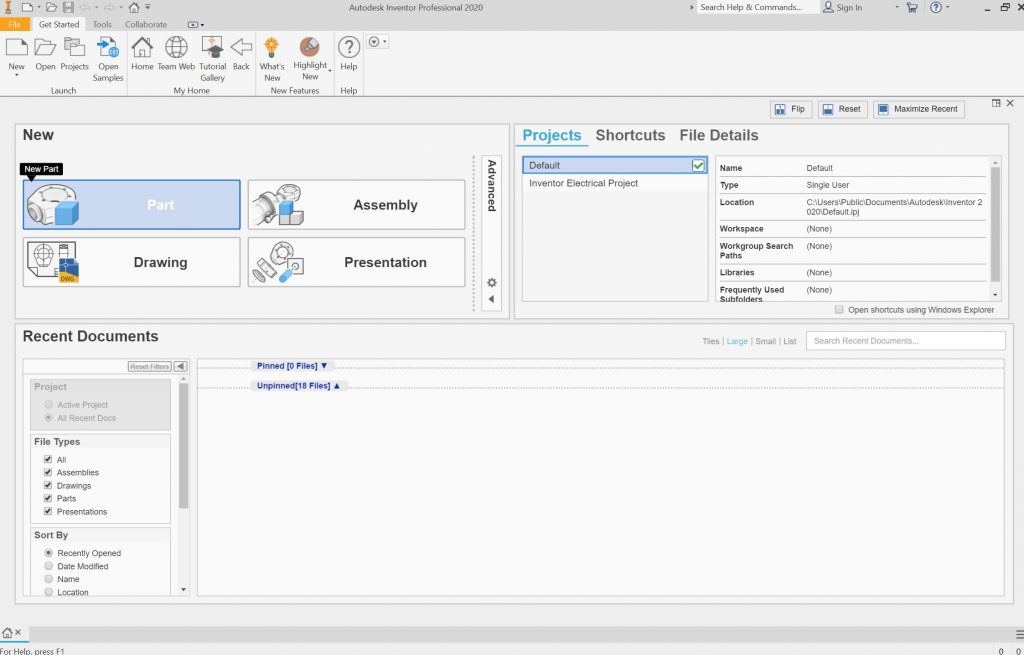
First, you must open up the application on your computer. Once the application is open click on the create a new part button.

Then on the left-hand corner click on the start a 2D sketch button. When prompted select the XZ plane. Now you are ready to sketch out your part.
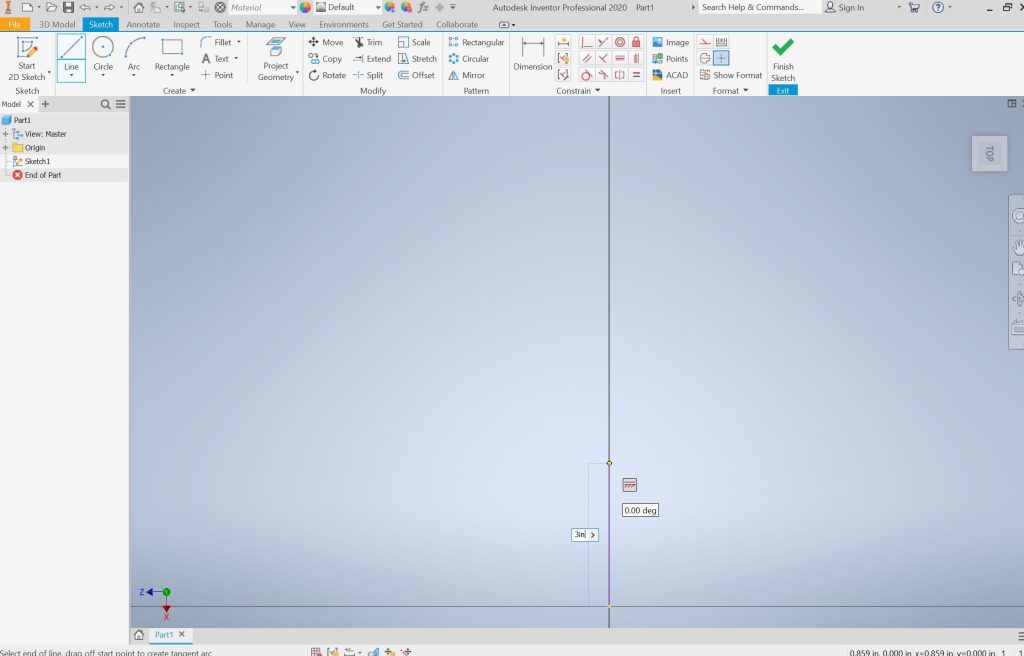
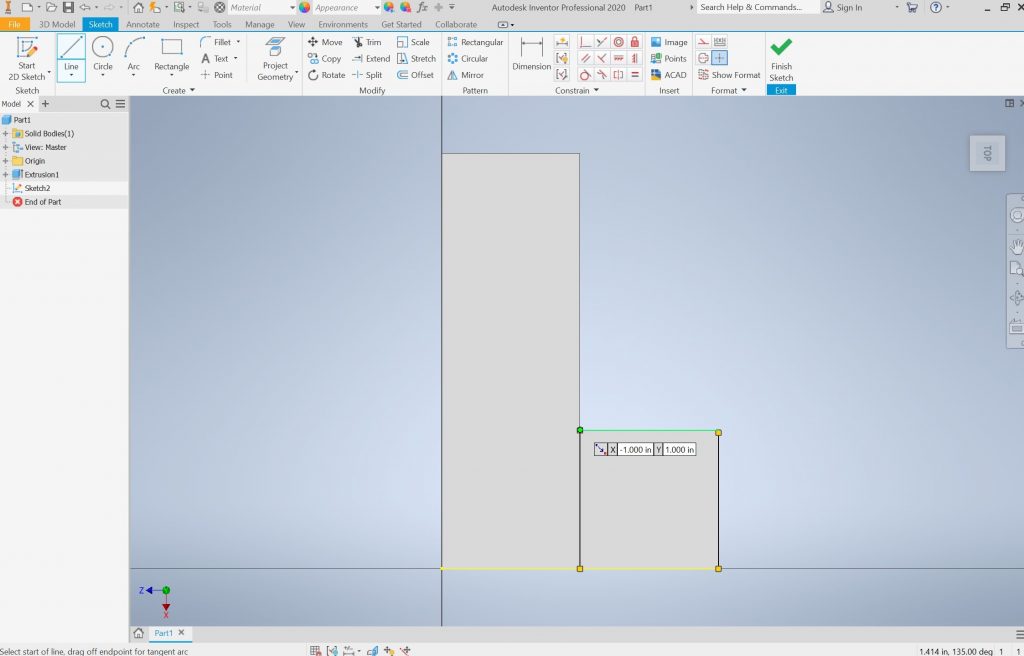
Using the line tool in the left-hand corner begin sketching an L shaped figure starting from the yellow center. As you create the first line type in 3 in and click enter. This will automatically make your first line 3 in long.
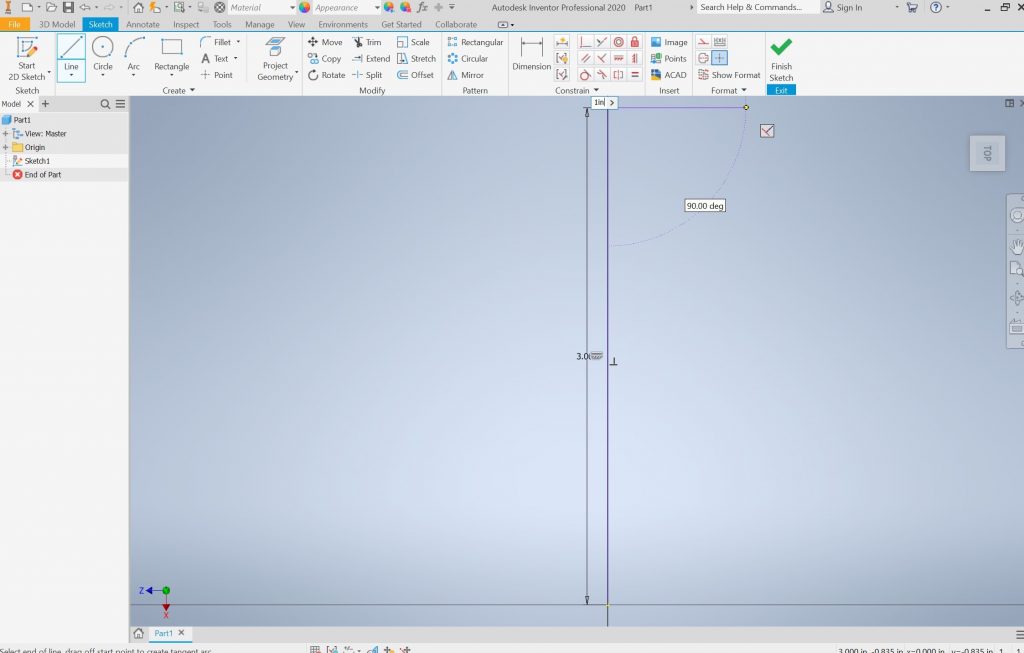
Now, for the next line drag your mouse to the right-hand side of the line you just created and make sure it is at a 90-degree angle, type 1 in and click enter.
Now, drag the line downwards at a 90-degree angle, type 2 in and click enter.

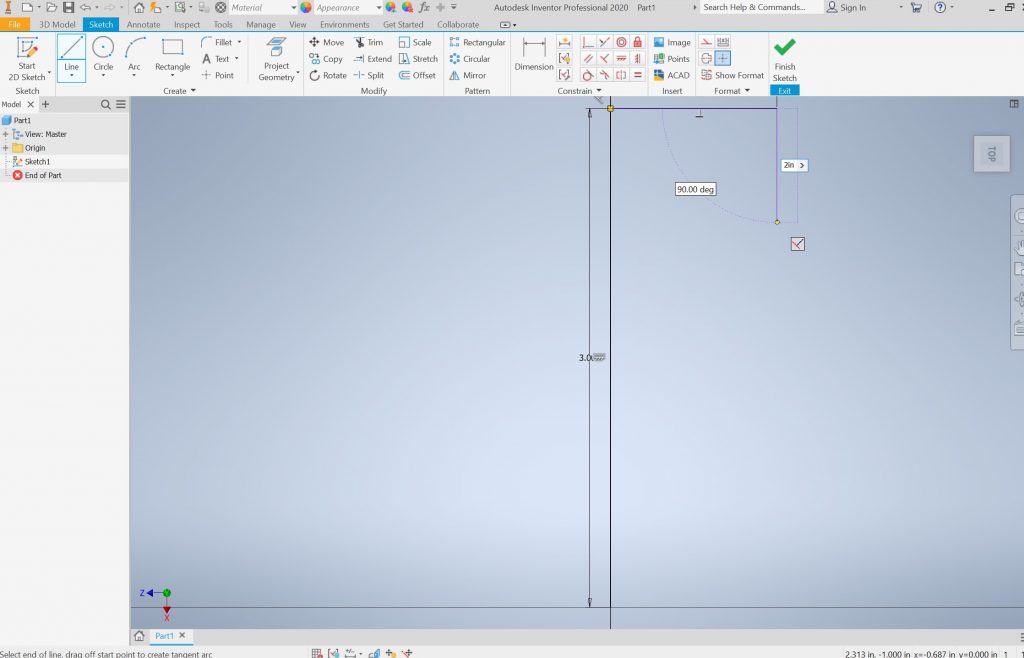
Next, drag the line to the right-hand-side, type 1 in and click enter.
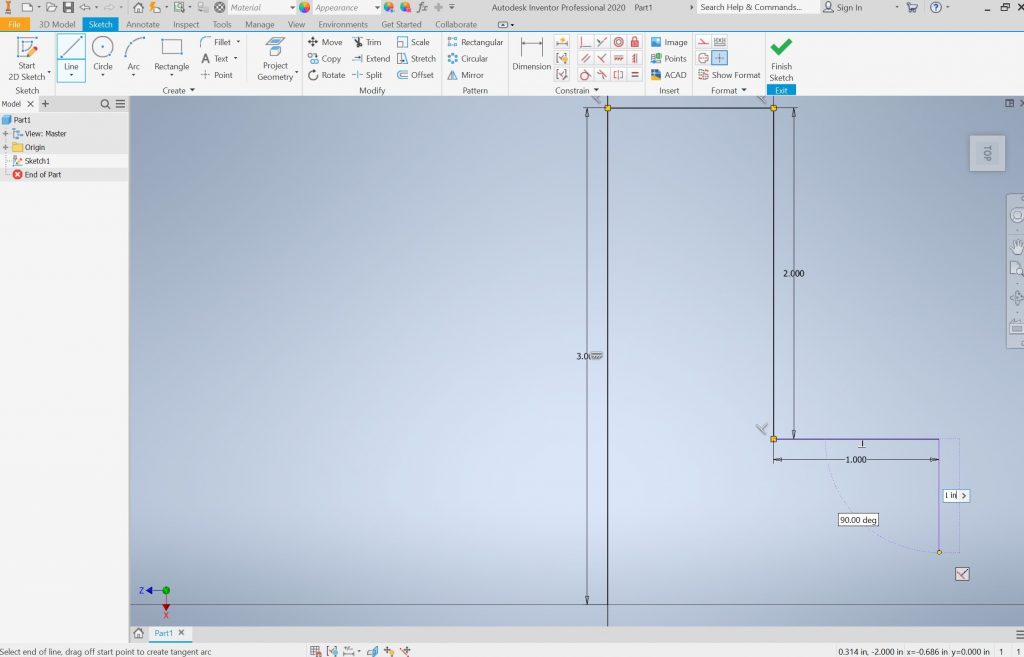
Now, drag the line downwards at a 90-degree angle, type 1 in and click enter.
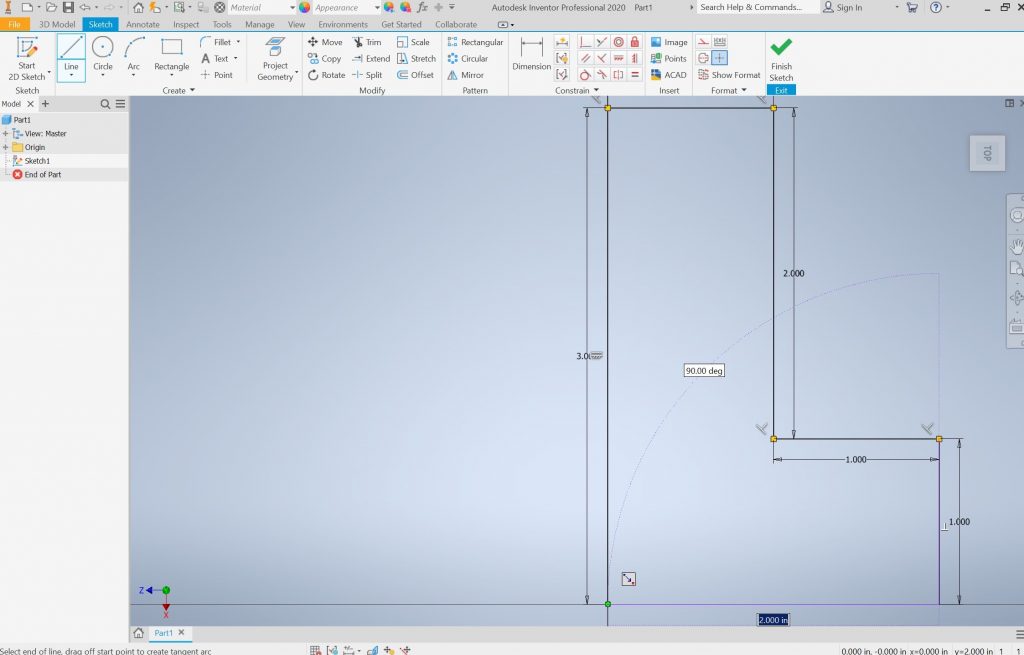
Now, simply connect the line to the center point in which you started. To finish the sketch click on the green arrow at the top.
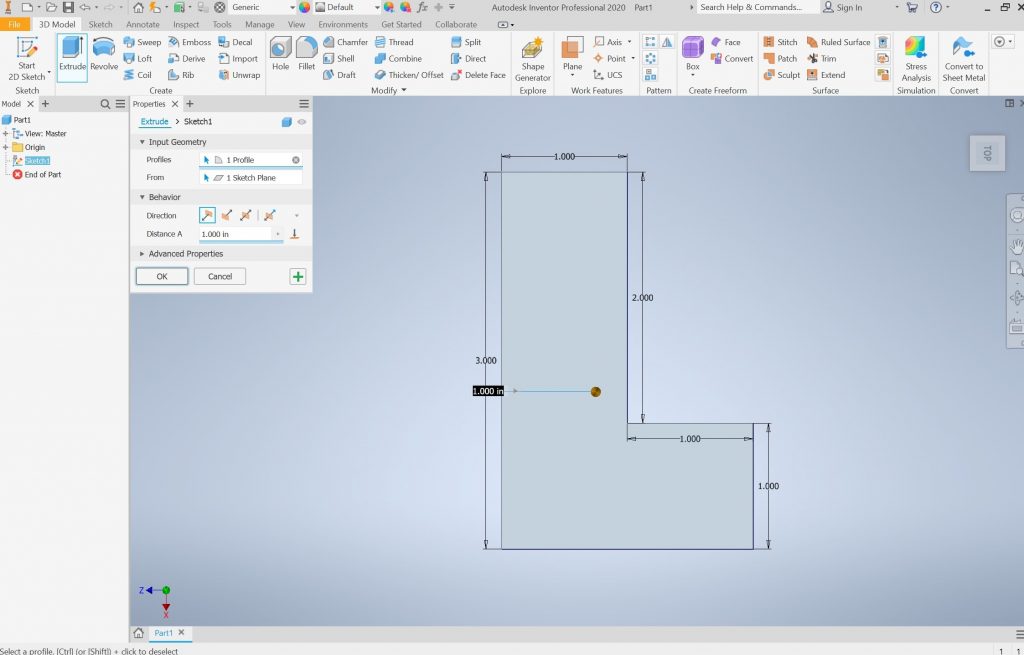
Now we will extrude the sketch you just created. To do this click on the extrude button in the left-hand corner. In the pop-up menu make sure Distance A is set to 1 in and then click ok.
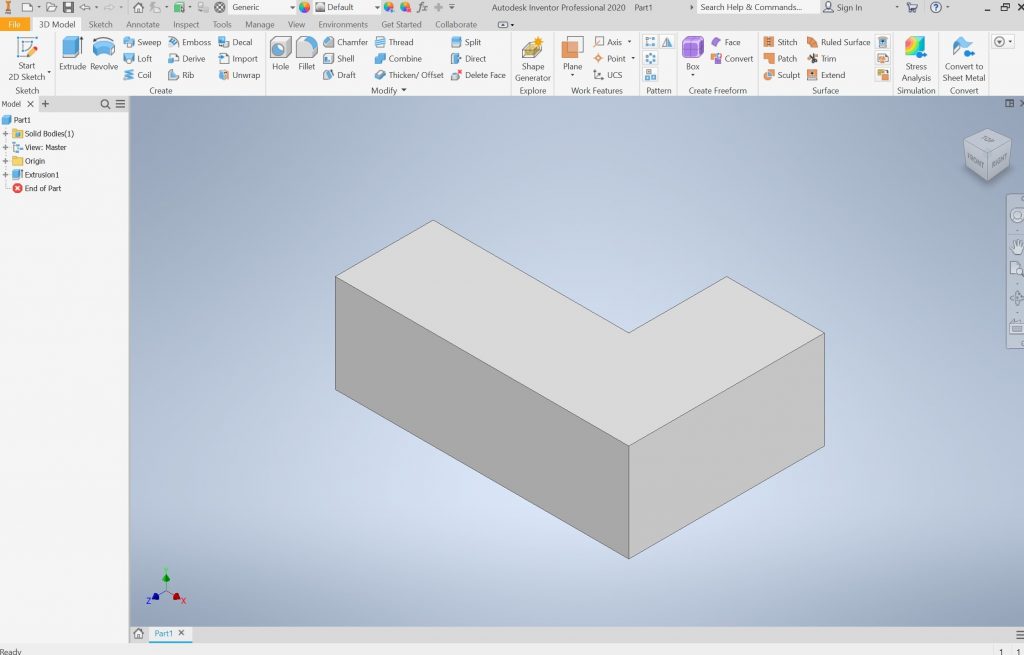
Your sketch is now a 3D object.
Click on the top face of your object and select the create a new sketch button. Use the line tool from before to create a square on the right-hand side of the L. Click on the green arrow to finish the sketch.
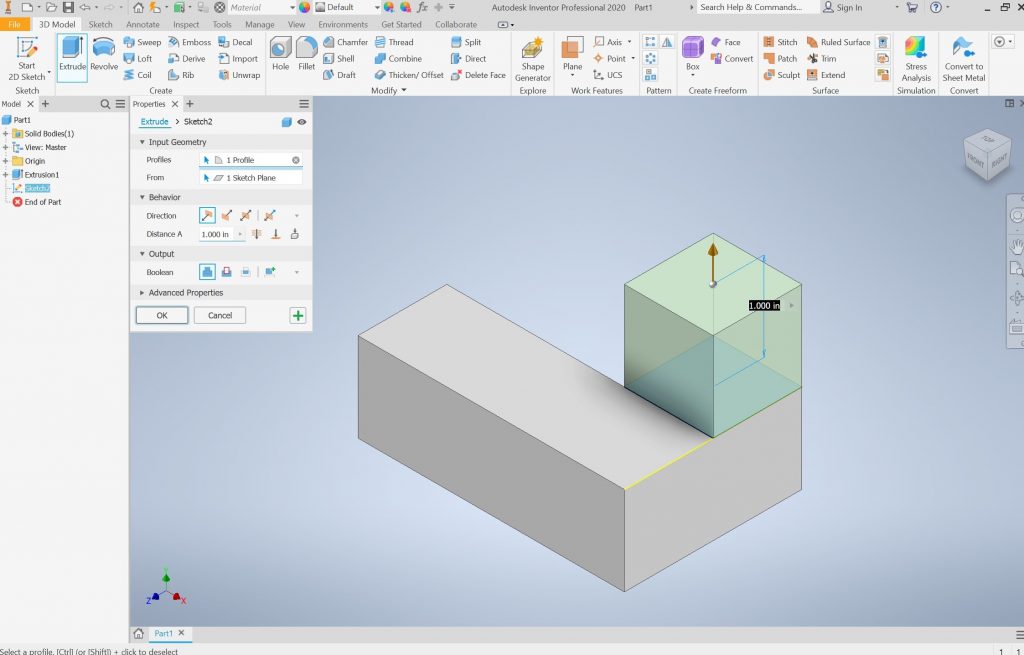
Just as before click on the extrude button to extrude your new square sketch on the existing L shape.
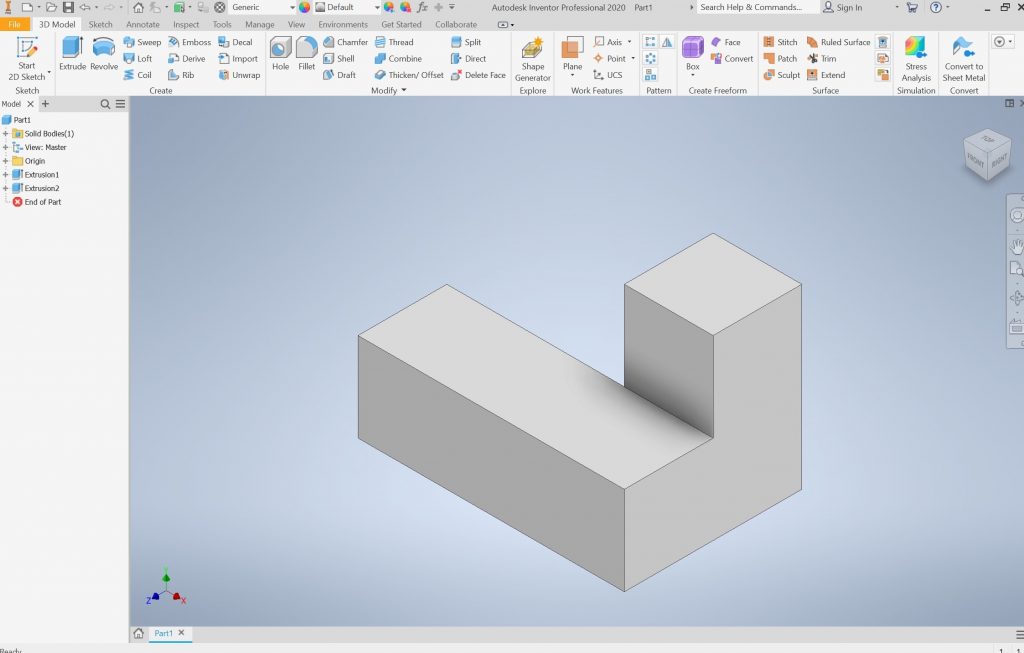
Finally, simply save your object as a .stl file. Your piece is now ready to be 3D printed.
Congrats you have officially created a puzzle piece on Autodesk Inventor! Using the basic skills you just learned you can now create all of these pieces and much more!
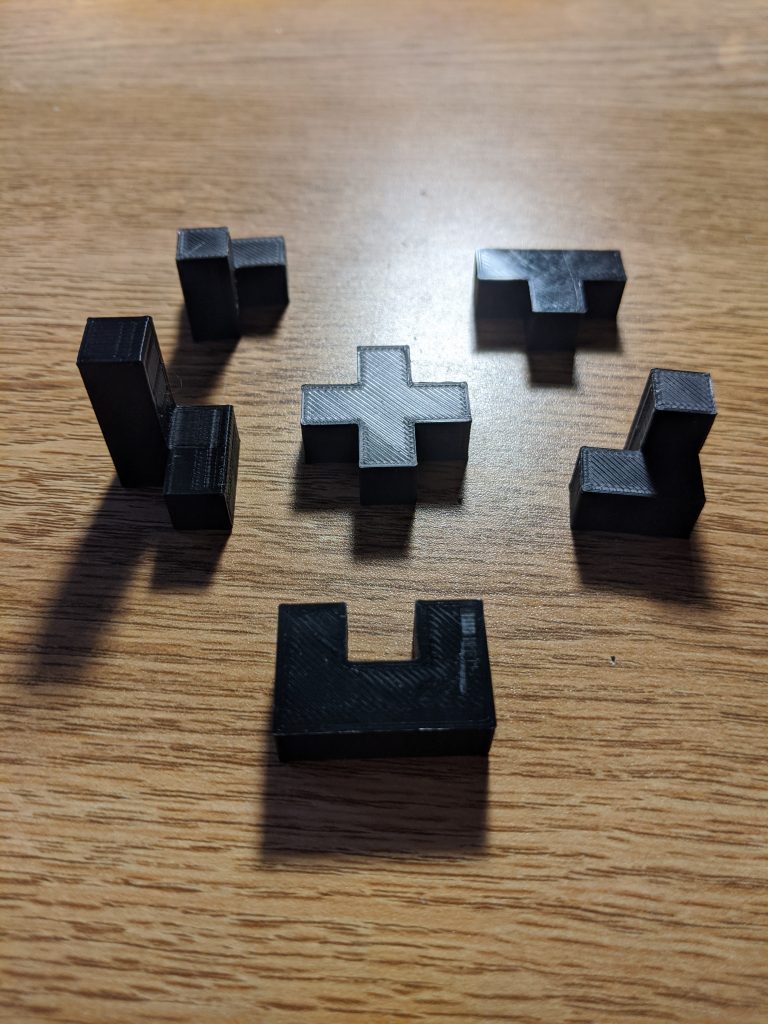
All the pieces of the puzzle cube 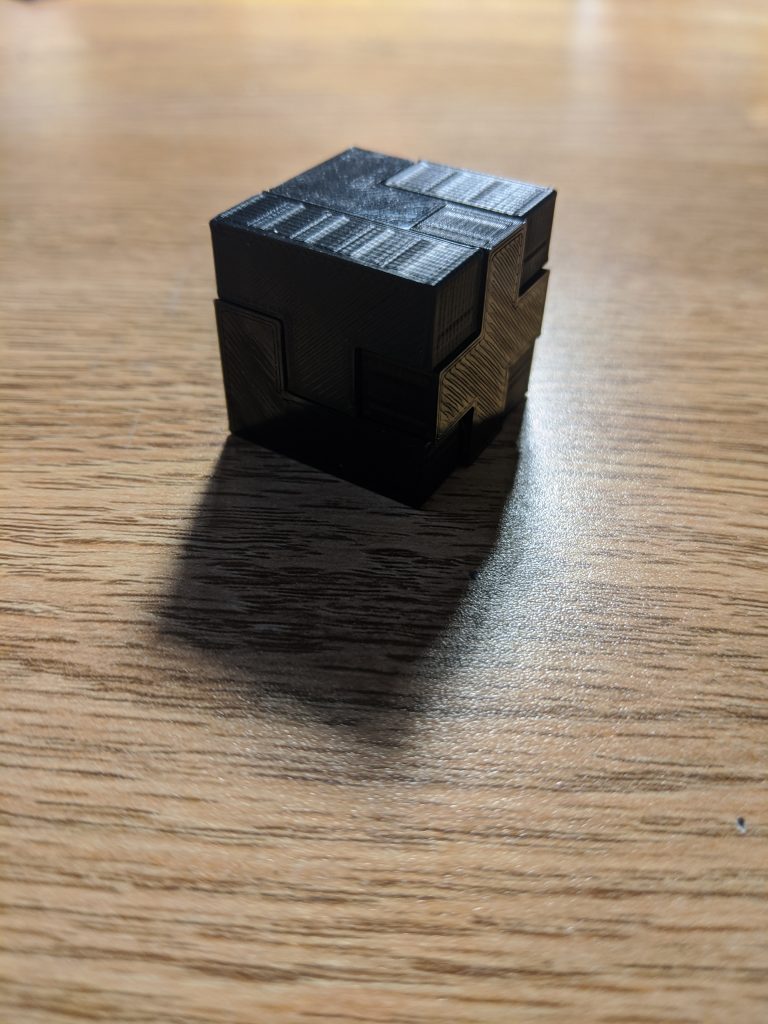
The puzzle cube
If you are looking to create more complex items make sure to check out these tutorials: Learning Autodesk Inventor and Autodesk Inventor 101.
Note: As a college student, you have free access to this application and many other applications offered by Autodesk. If you would like to learn more about these applications check out the Autodesk student website.
5 replies on “3D Puzzle Cubes with Autodesk Inventor”
This tutorial is super helpful and cool! I hate the puzzle block you made, but only because I can’t solve it — a sign of good craftsmanship! In all seriousness, the tutorial makes clear exactly how to use the tool. However, I was unable to use it — after making an account and verifying my email address in order to try to get the free software, I realized that they only have a version available for Windows OS, so I could not even attempt to download it onto the lab computer. The tool still seems great and helpful, and your explanation is extremely well done, but I would definitely add those stipulations to your description of the program so that people do not have to make an account only to realize their computer will not support it. Great job and please help me solve your puzzle now!!
Diana, this is amazing. I think it’s so awesome that you polished off this tutorial with 3D-printing the final product! The next time my cousin asks for a lego set for Christmas, I’m going to print up one of these bad boys for him. (I’m kidding. Or am I?) Seriously though, I think it’s cool how you can already see stuff like this being used for more intricate puzzle cubes with more pieces, or for other projects. Thanks for making this!
This is a really in-depth tutorial. (Loved the puzzle block you made). The fact that we can get Inventor for free as students is the most amazing part, since these kind of software cost a fortune a piece. I’m excited to try modeling curves in this software. Wish me luck!
I love this tutorial so much. It’s amazing that you went through and printed the images and knowing that you did so motivated me to want to follow the tutorial too. The layout of screenshots and instructions on the side was super helpful in keeping the reader’s attention focused on the screen and reading. This is the tutorial I did not know I needed!
This is the best tutorial I have read. You not only considered how to explain each step in a relatively easy way for a greenhand like me, but also practically make the cube as a result presentation! This is very convicing and I would like to use this tool to my own one! Nice job!