One powerful tool you can use to build automated applications and workflows is the Automator application built into every Mac. In this tutorial, we’ll talk about how to use Automator to manipulate text and PDF files.
Automator is good for doing repetitive tasks very quickly, and on its own. For this reason, it is best used in situations when you would want to make some kind of simple change to a very large number of files. In this tutorial, we’ll be using a sample of PDF versions of all published pages of the Carletontian from 1920.
Step One: Start a workflow
Once you open up Automator, the first step is select a “workflow” as the type of document you’d like to create. As will be explained shortly, a workflow is a series of commands which run from directly within the Automator window, at your command only. Other kinds of files Automator can build, such as applications, services, folder actions, or calendar alarms, are triggered by other events in the MacOS environment, all of which are explained in the new document window of Automator.
Once you create your workflow, the Automator window will look something like this:
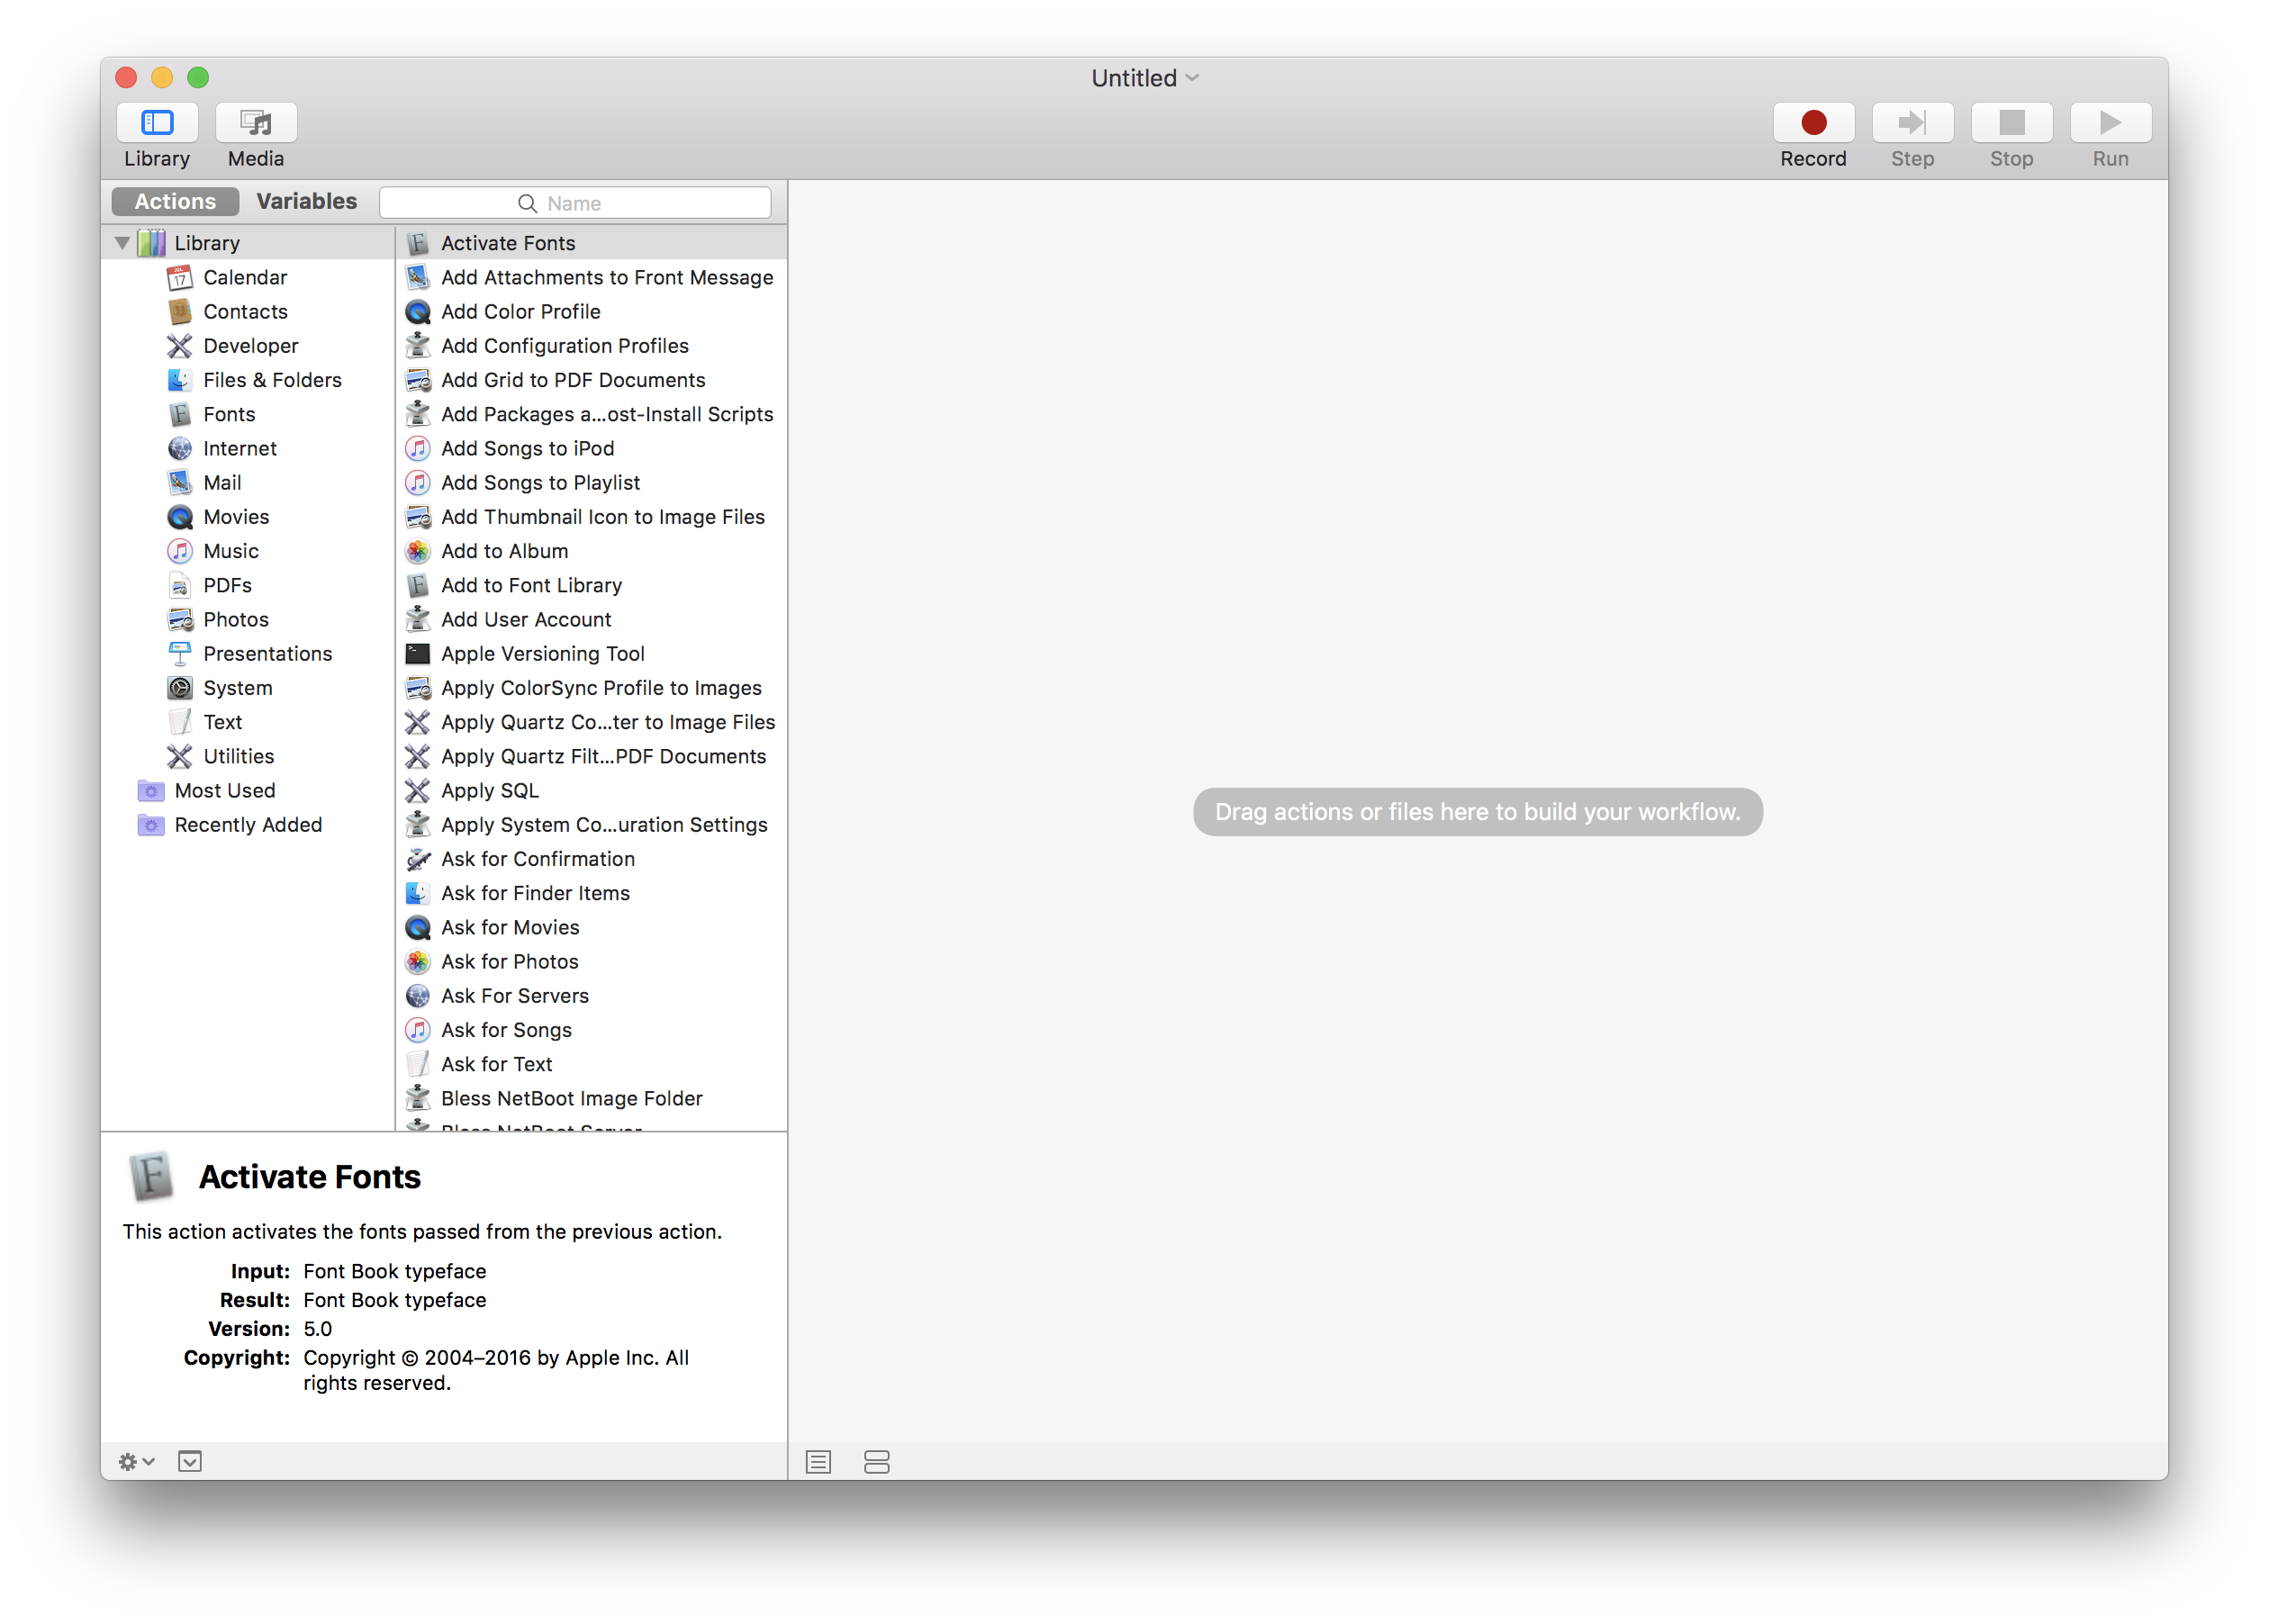
On the left, you’ll see a list of actions you can add to your workflow. On the right is the space in which you will build your workflow. Automator workflows works like a script — it executes a set of actions in a specified order, passing data through each action and into the next. You can think of these actions like functions or methods of a program, where each one will manipulate its input data in some way and then pass it on, or “return” it, to the next action. To explore the possible actions, simply scroll through the menu on the left, and read about each action’s function in the box below once you select that action.
To start building your workflow,drag a beginning action into the space on the right. Typically, this first action should feed the workflow with the files you want to manipulate. In our project, we want to select the PDFs from the folder where they’re stored. So, we’ll drag the “Find Finder Items” from the “Files & Folders” category into our workflow, like so:
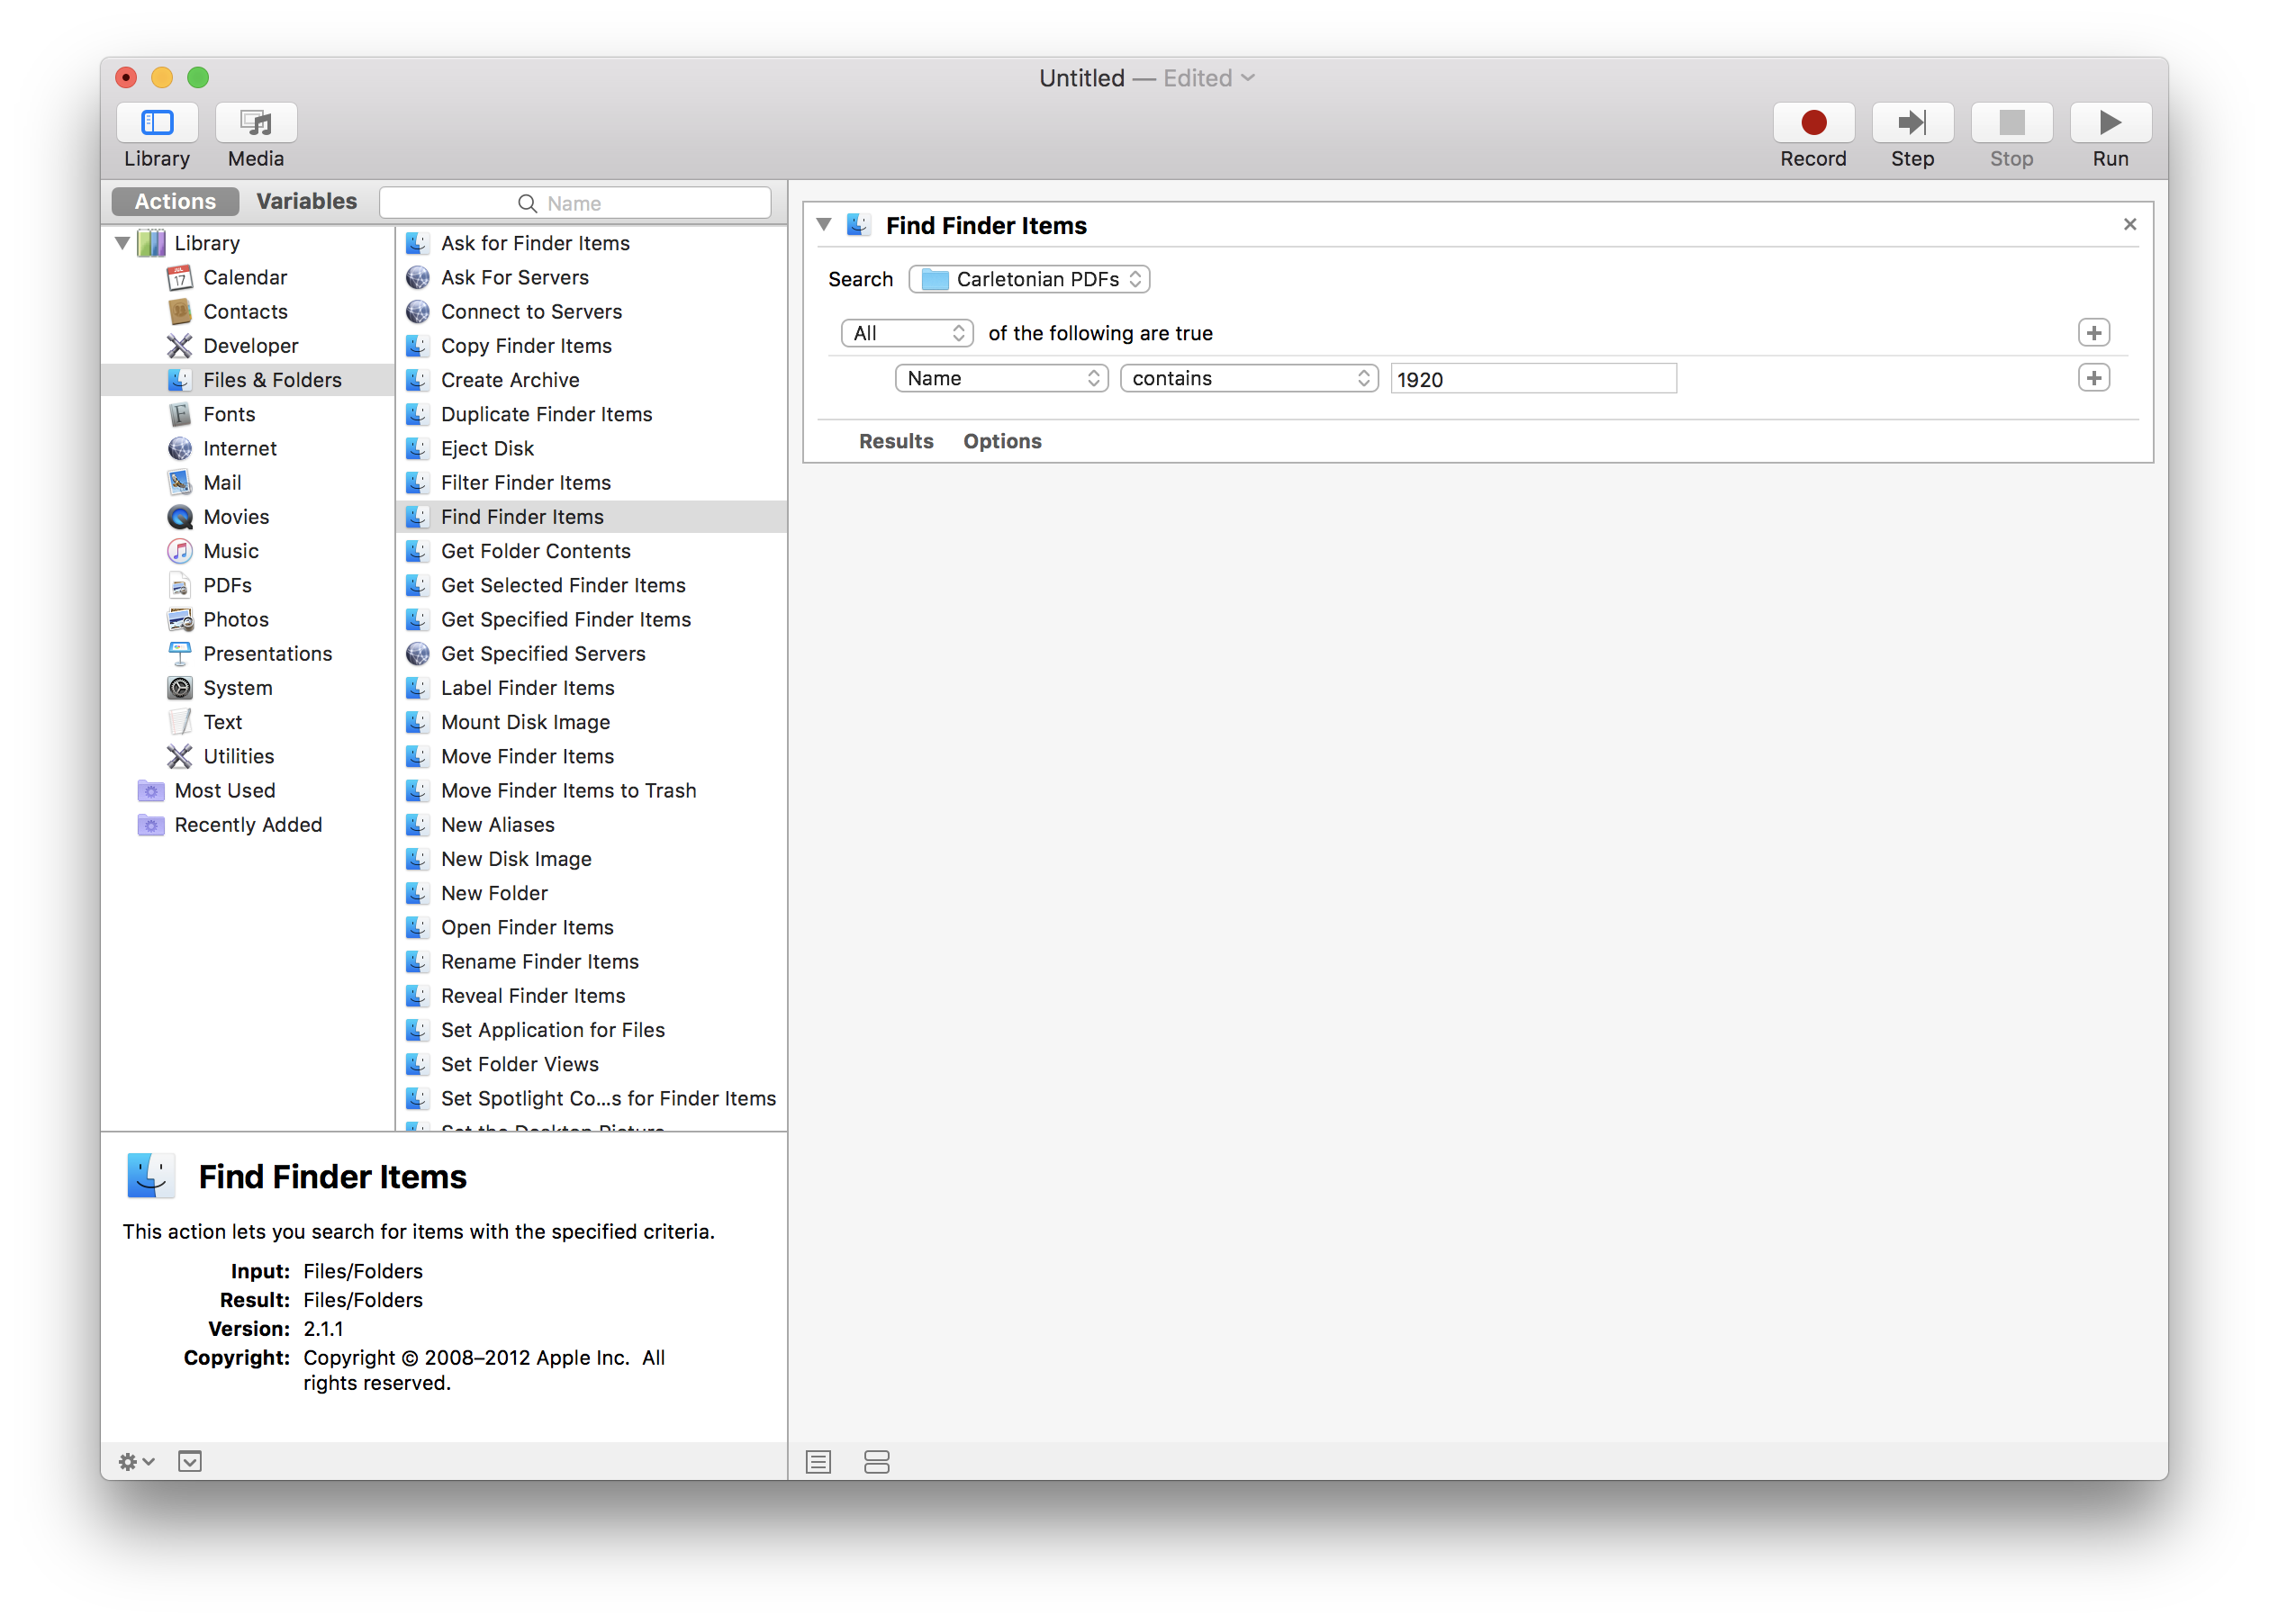
This action will simply grab all the files from the specified folder that meet the given criteria. Because all Carletonian pages from 1920-1940 are stored on my computer in the “Carletonian PDFs” folder, and we only want pages from the year 1920, I instructed Automator to only grab files whose name contains “1920.” There are plenty of other actions which can be used to get files instead, such as “Ask for Finder Items” which will simply generate a window asking the user to choose files manually.
Step 2: Add an action to manipulate the data
Once you’ve instructed Automator on how to grab the right files, you want to pass them off to some action that will manipulate them in the desired way. In my sample project, I want to convert all the PDF files into .rtf files they can be more easily read and analyzed. So, I will drag the “Extract PDF Text” action from the “PDFs” category into my workflow, and configure the settings like so:
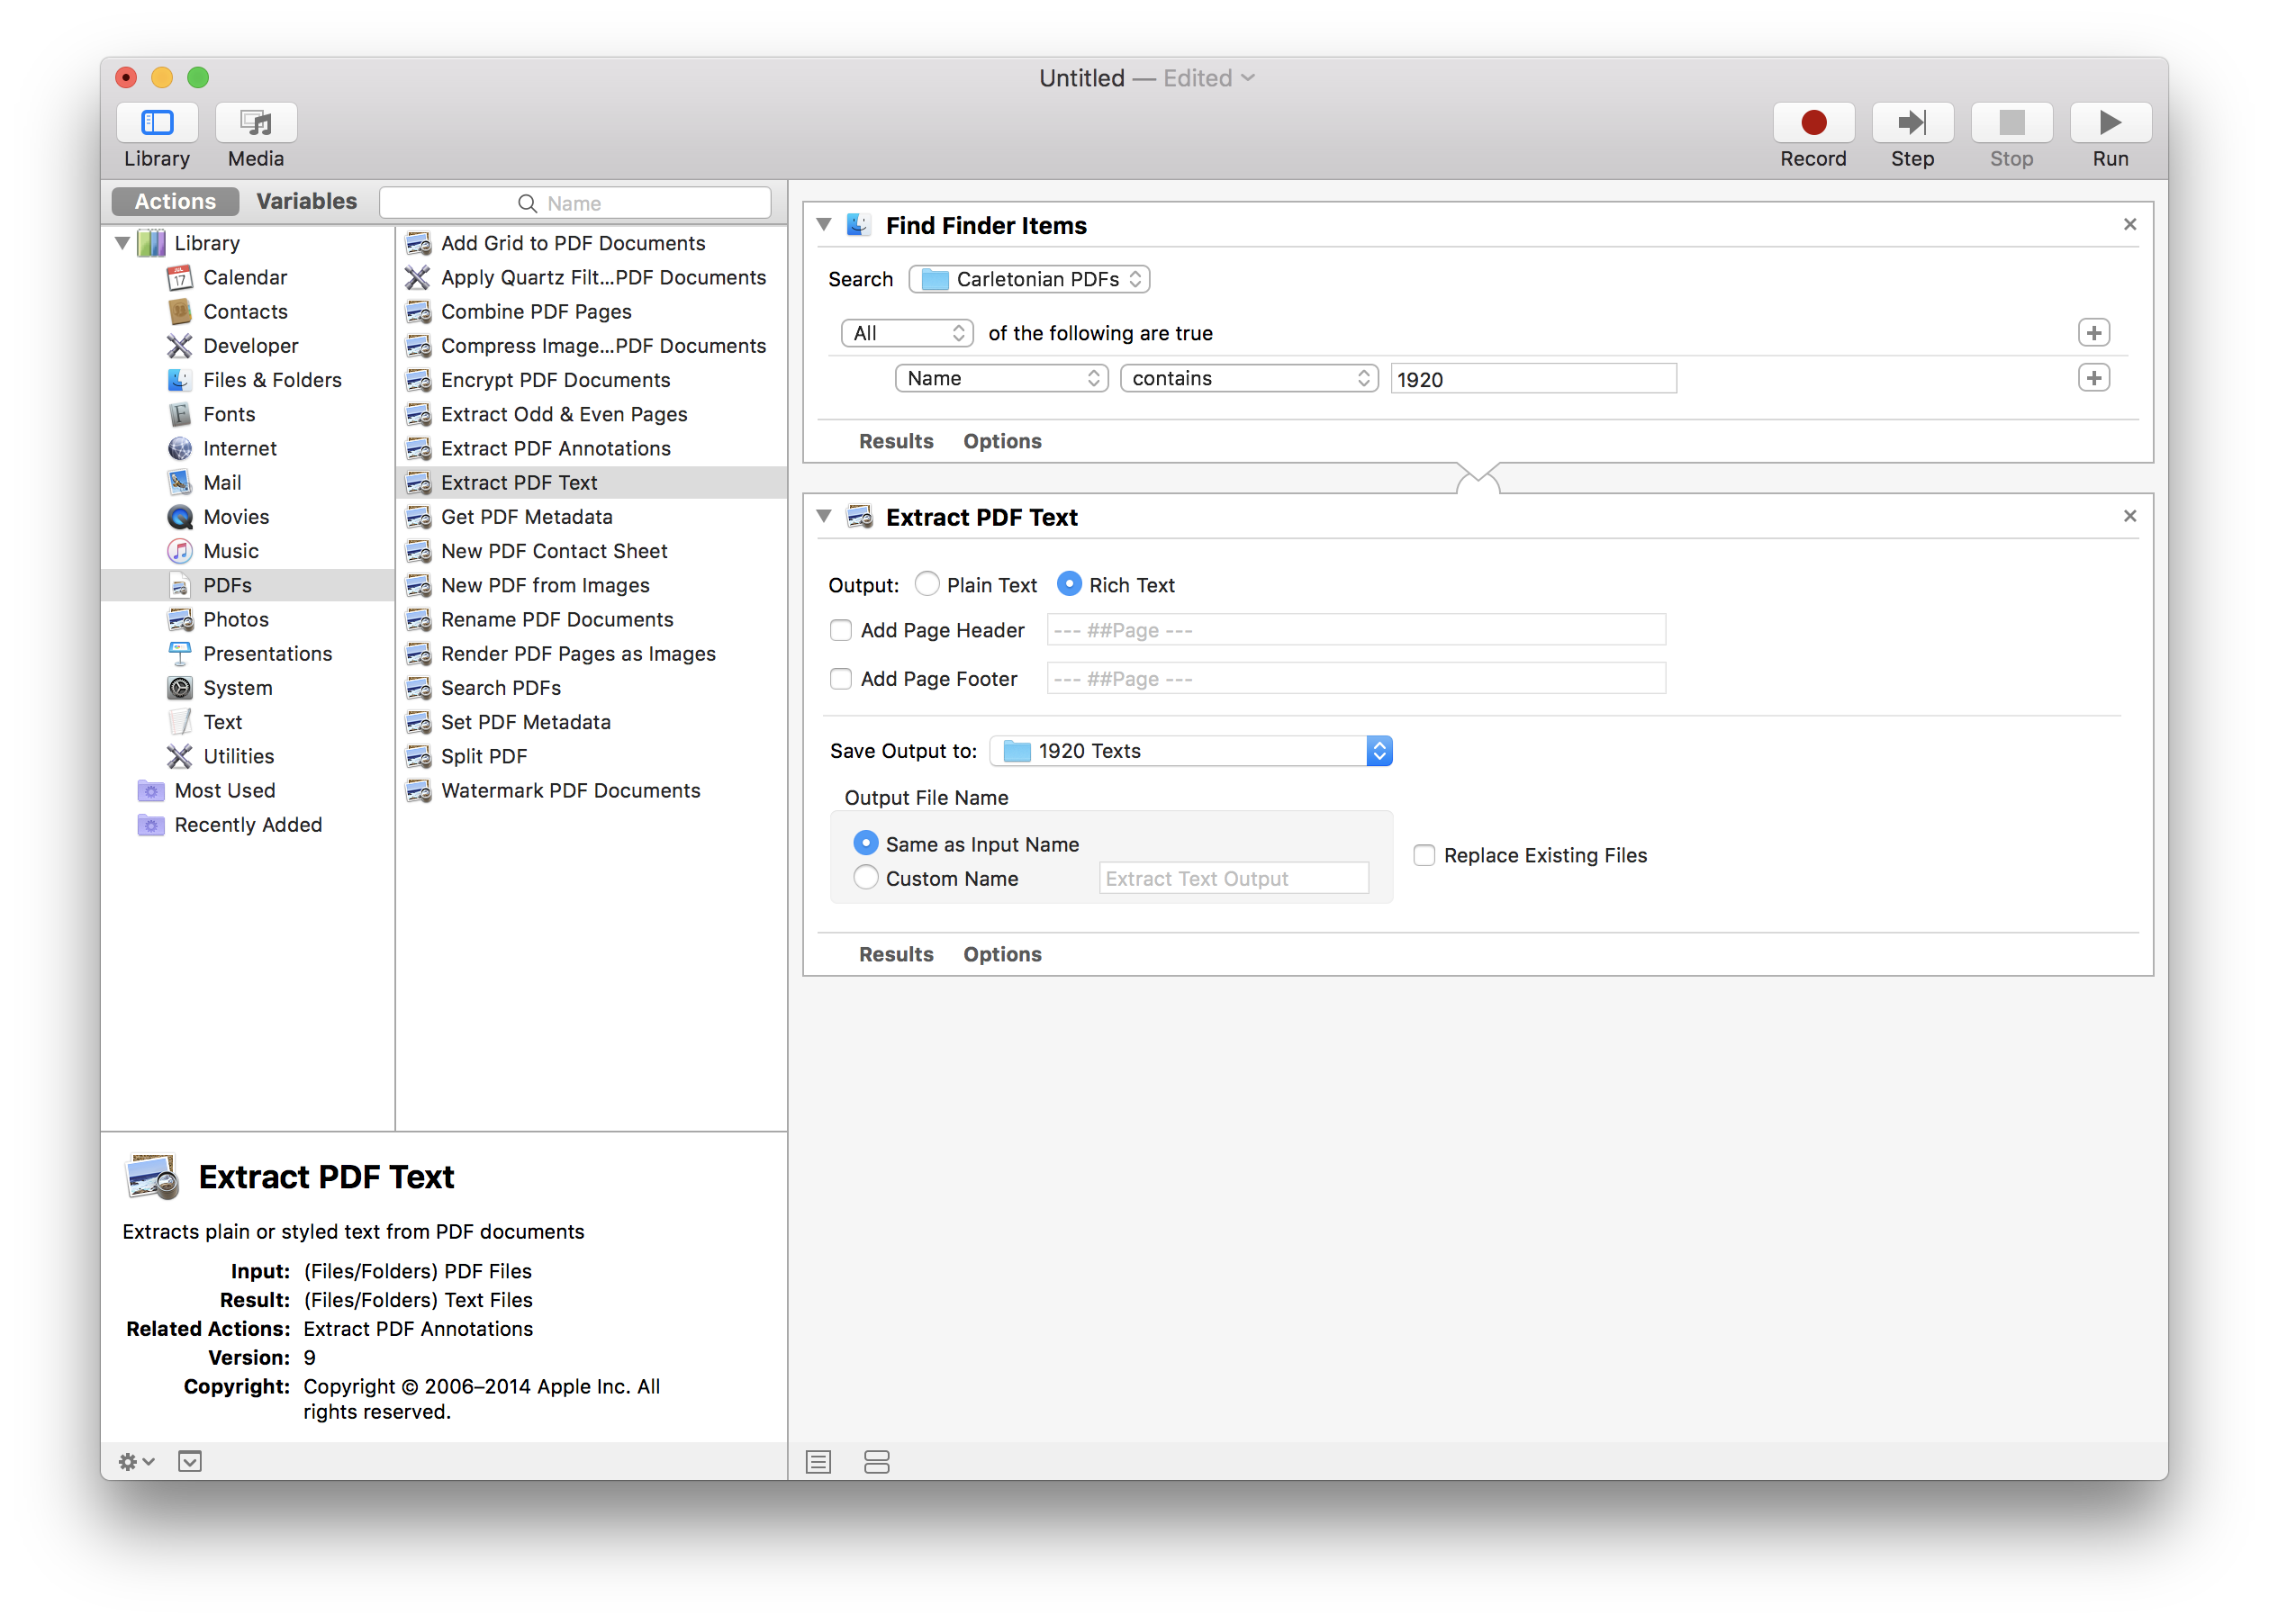
I chose to convert my PDFs into rich text files, to preserve some of the text’s formatting, but you can also choose to convert to simple .txt files. I also chose have Automator save the converted files in a folder called “1920 Texts,” and to keep the names of the original PDFs. So, this action will take the PDFs file passed to it from our beginning action, convert into .rtf, and save them with their original name in the specified folder.
Of course, you could use any relevant action available to manipulate your data. With PDFs, some of your options include “Get PDF Metadata,” “Extract Odd & Even Pages,” and “Render PDF Pages as Images.” You can also add multiple actions in a row.
Step 3: Add more actions!
Of course, Automator would not be so useful if it could only perform one manipulative action per workflow. The most attractive feature of Automator is actually its ability to do multiple actions in a row. For my project, I added the following actions to the workflow I began above:
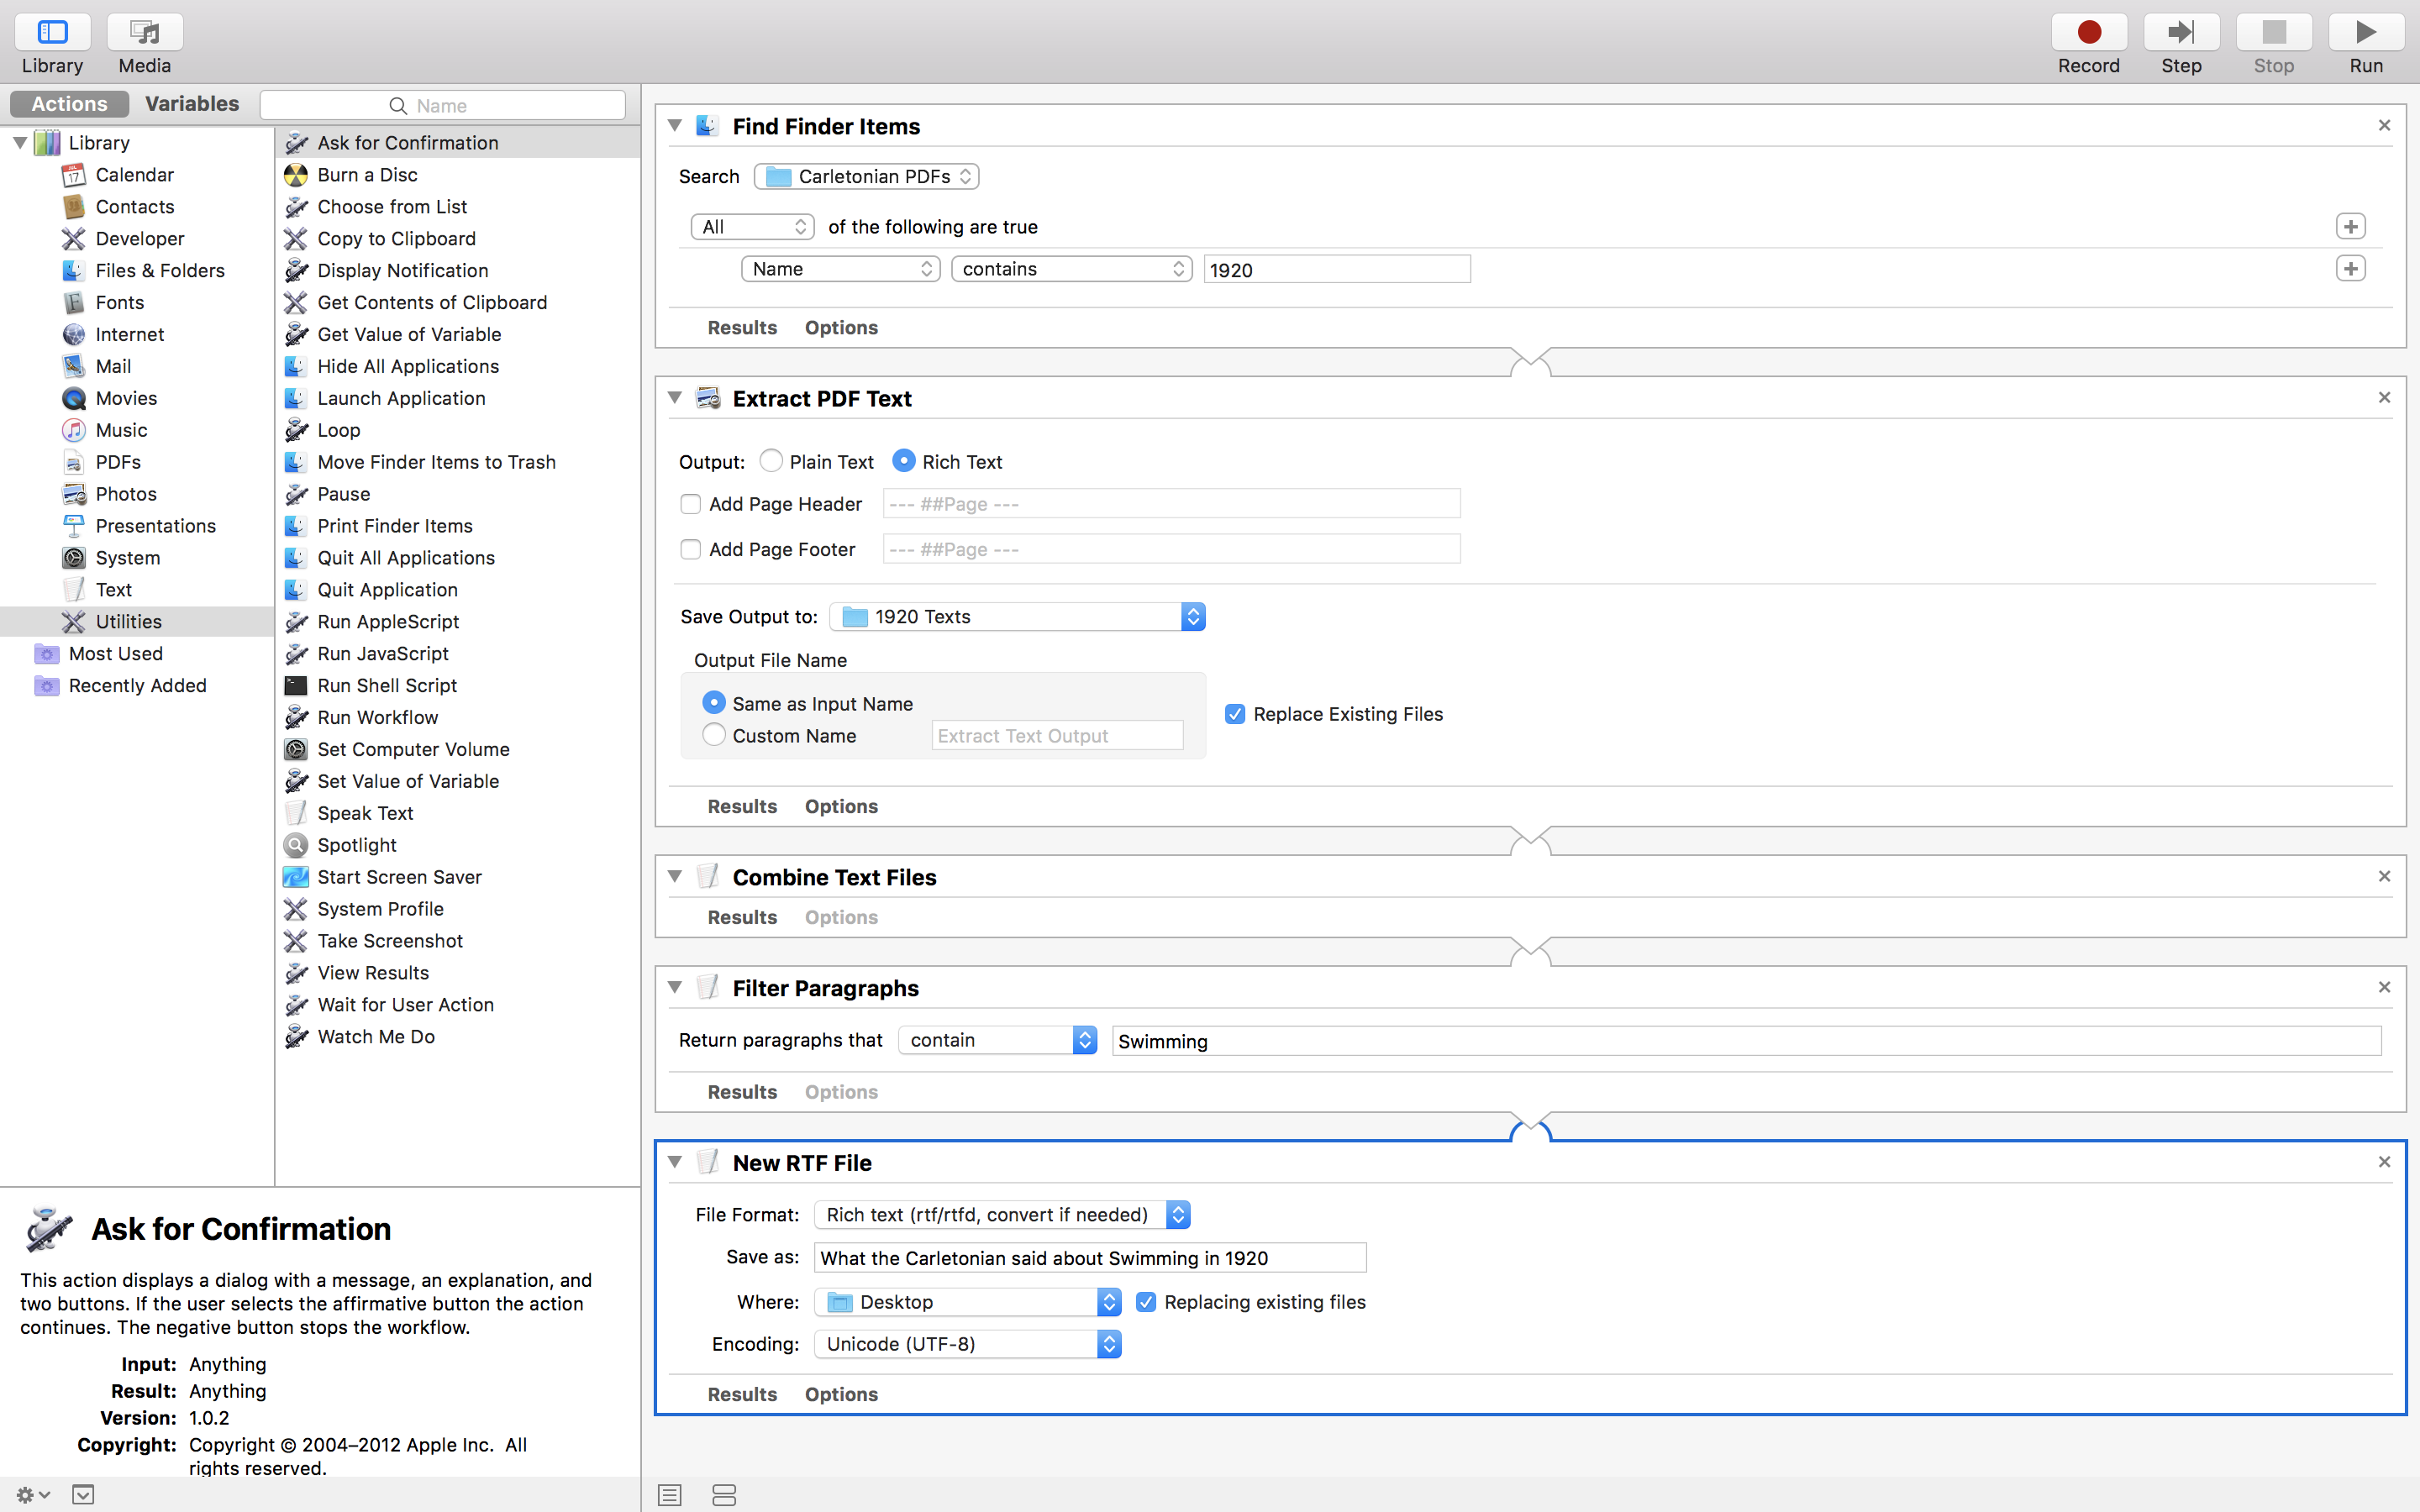
Now, my workflow runs the following actions in order:
- Find Finder Items – selects the PDFs and feeds them to the workflow.
- Extract PDF Text – converts the PDFs into .rtf and saves them in the folder “1920 Texts.”
- Combine Text Files – combines all .rtfs into one text file, which it passes on to the next action.
- Filter Paragraphs – only passes on the paragraphs from the combined text file which include the word “swimming.”
- New Text File – saves those paragraphs in a new .rtf on the Desktop with the name “What the Carletonian Said about Swimming in 1920.”
Of course, in your workflow, you can choose from the myriad options of actions to create the workflow that suits your needs. If you feel especially comfortable with programming logic and/or scripting, you can make use of the more advanced but more powerful “Loop” and “Run Apple/Java/Shell Script” actions in the “Utilities” category, or the variables found under the variables tab above the action list.
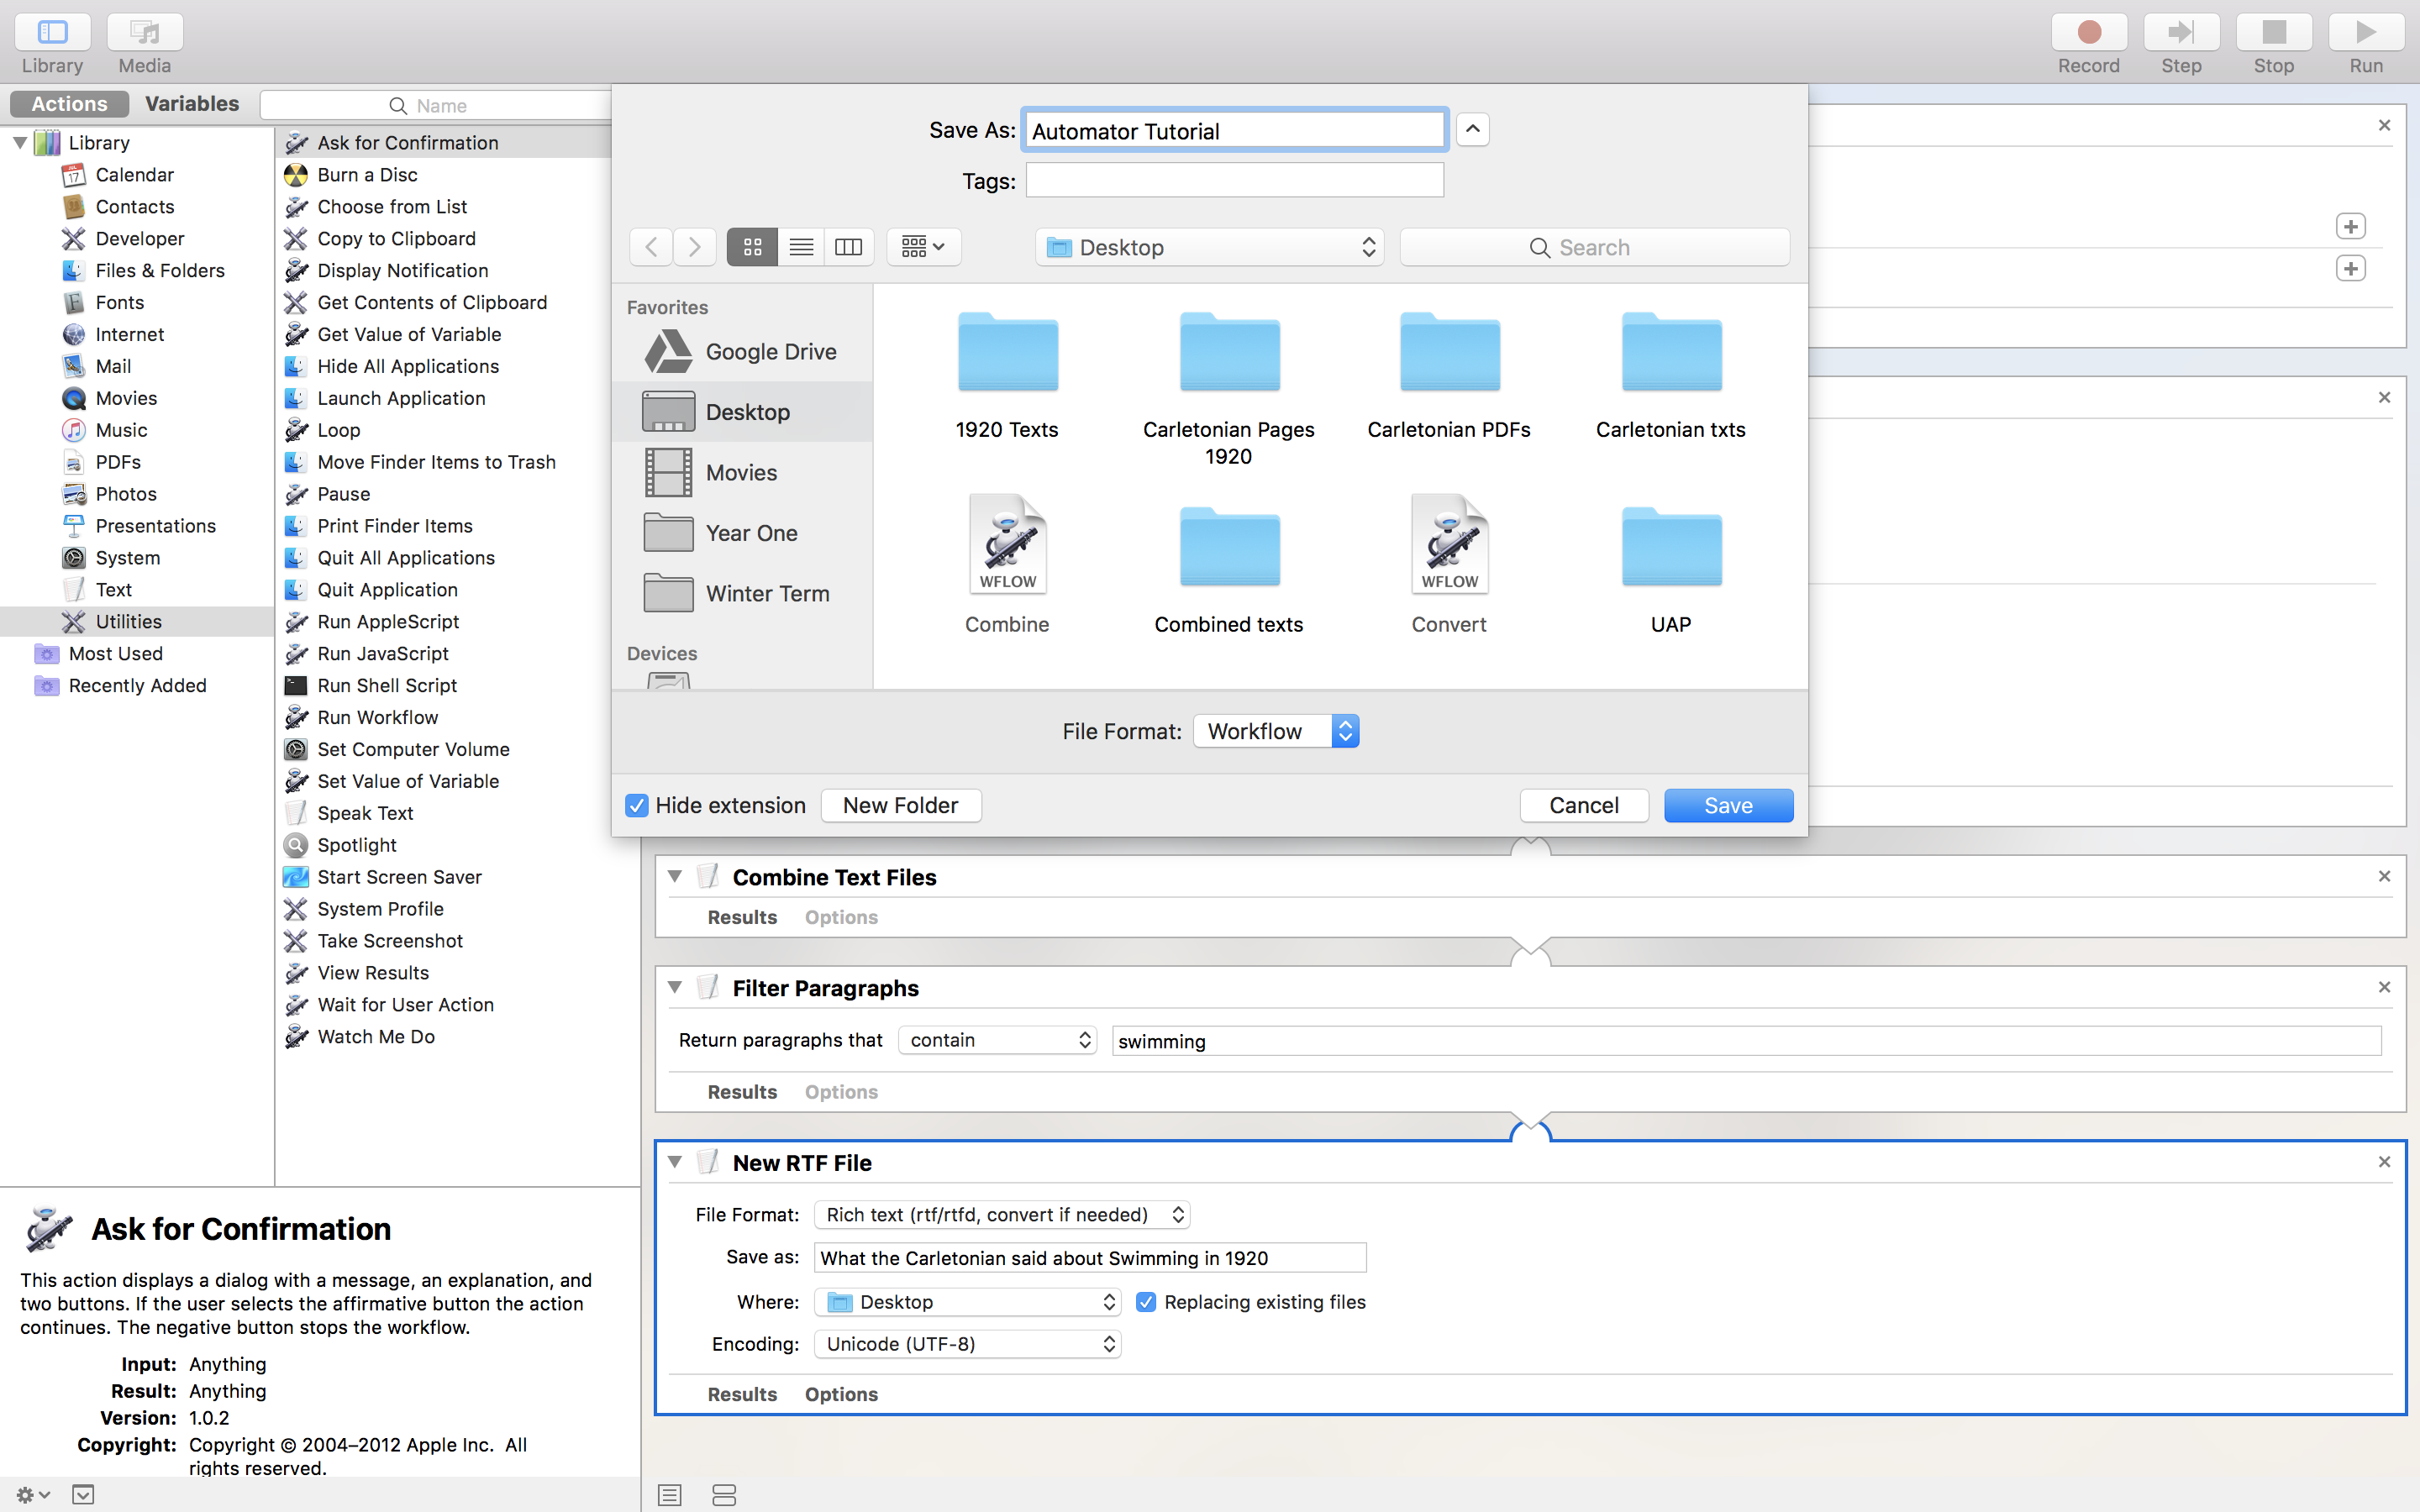
Step 4: Save your workflow
Although it sounds trivial, saving your workflow is very important. Otherwise, you won’t be able to access the tool you created more than once. Similarly, if you choose a different type of Automator document, especially an application, saving in an accessible location makes it easier to drop files into – where you save matters for how you want to trigger the Automator document you’ve built.
In our project, we simply want to save our workflow like any other file. I chose to save on my desktop, where I can find it easily later. To save, simply use the menu bar to go File > Save, and select your desired location as you would with any file.
Step 5: Run the workflow!
The final step, of course is to run your workflow. Simply click “Run” in the top right corner, and watch the magic happen!
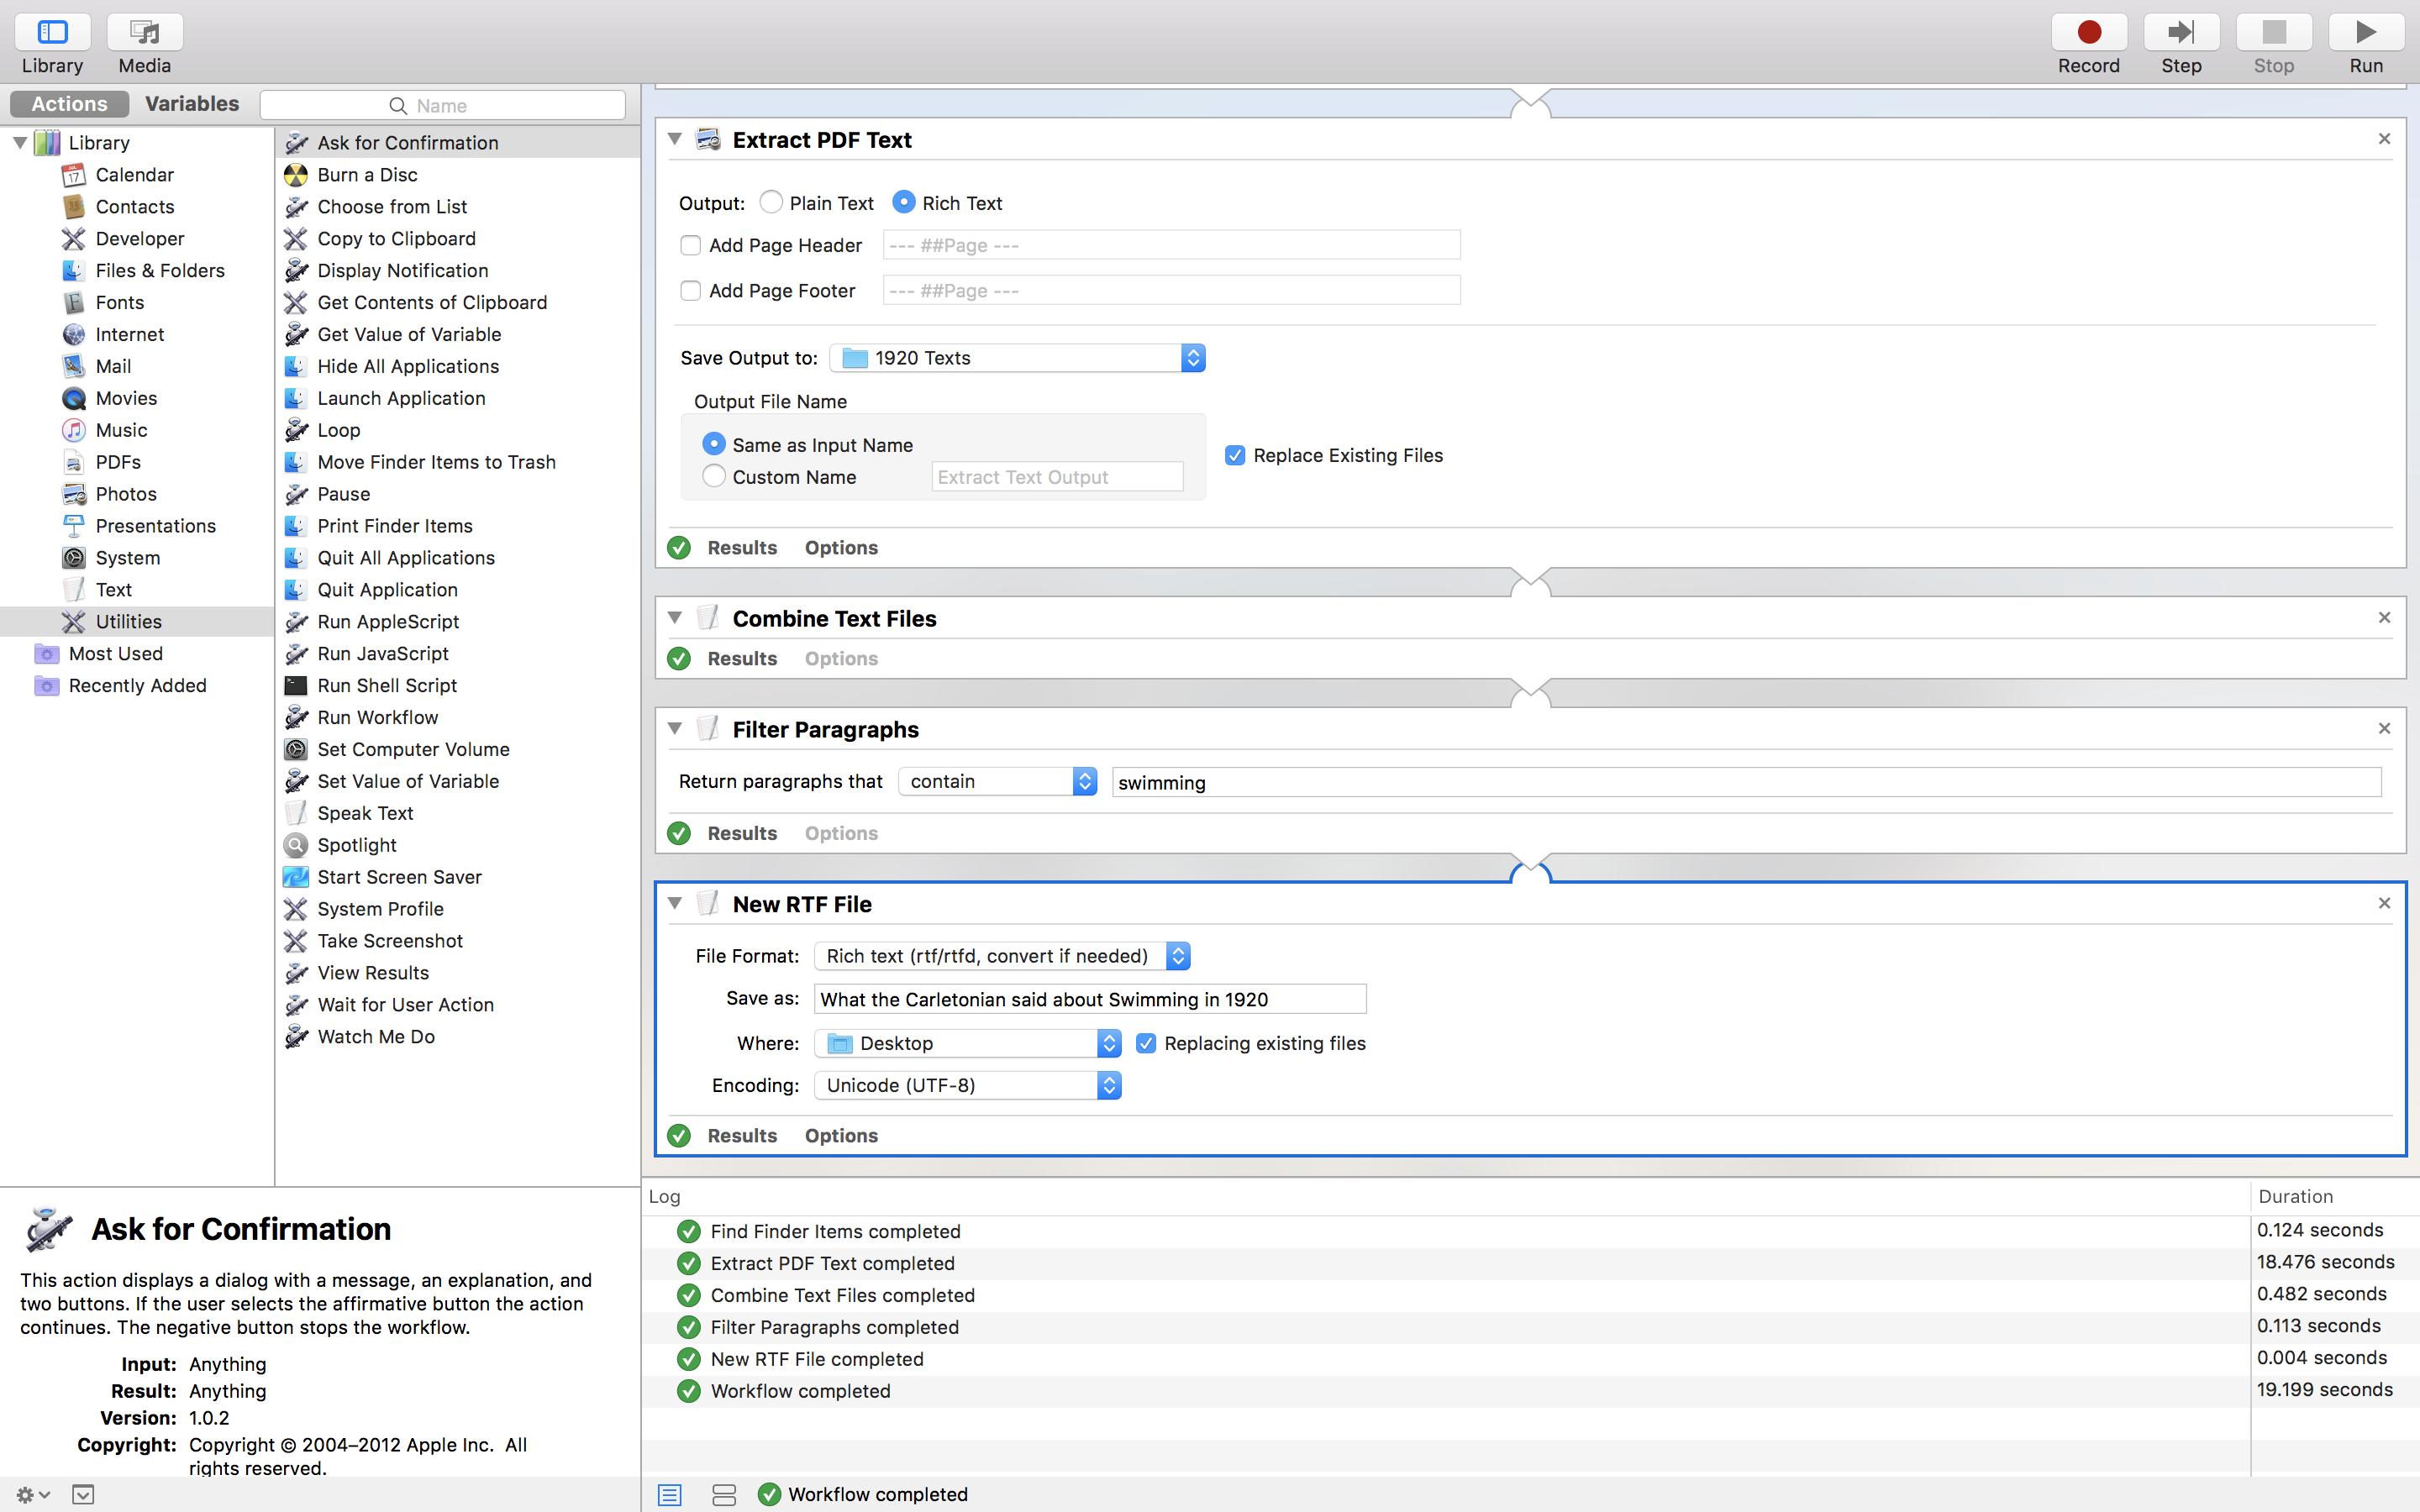
As each action is executed successfully, a green check will appear next to it. If you want to see a list of all the completed actions, use the menu bar to click View > Log to show a small window beneath the workflow area which lists actions as they are executed.
If something goes wrong, such as if an action is fed the wrong kind of data, or cannot complete its task for any reason, the workflow will stop running and a red x will appear next to the action in the Log. If you encounter an issue like this, simply check the settings on the buggy action to make sure they are right, as well as the settings of the actions before and after it. If you cannot find the bug, read about the action in the help menu or Google “[name of action] apple automator” to find details about how the action works and its proper usage in a workflow.
Automator, of course, can be used for far more than just manipulation of PDFs and text files. If has default actions to perform both simple and complex tasks automatically on a calendar, on music files, on images, in an email app, on movies, on web pages, and plenty more. Essentially, any digital task with multiple steps that you would need to perform multiple times manually is an excellent opportunity to use Automator to save time and reduce error. If you’re interested in using Automator in a more complex way, or want to see examples of more advanced workflows or application, visit the Automator website.
Author: lieberkotzo
http://orenlieberkotz.org/