Do you ever find yourself doing repetitive things online? You might be copying and pasting several things from a google doc to a spreadsheet. Or you might be manually tweeting every time you finish a blog post. Do not fret! Zapier is the ultimate tool to automate different web apps. Zapier can be useful in several other contexts as well. It can connect with 100s of different web apps to do very specific things such as notifying your Slack channel about an upcoming Google Calendar event or automatically collecting feedback from users into a neat spreadsheet. It can also be linked with text analysis apps to help you contextualize your data. Here are a few more nitty-gritty things about Zapier if you are interested*(footnote below). Below, I will show a brief tutorial on how to set up your own Zap. We will do a simple Zap that will automatically post your WordPress blog posts to your Twitter account.
1. Create a Zapier account at this link.
2. Once you are registered, click “MAKE A ZAP!” at the top of your screen.
- Each Zap must have a trigger (which prompts the Zap to begin) and an action (what to do once you Zap is triggered)
- The Zap in this tutorial will post an update to Twitter whenever I publish a WordPress post.
3. Then you will be directed to a screen which looks like this: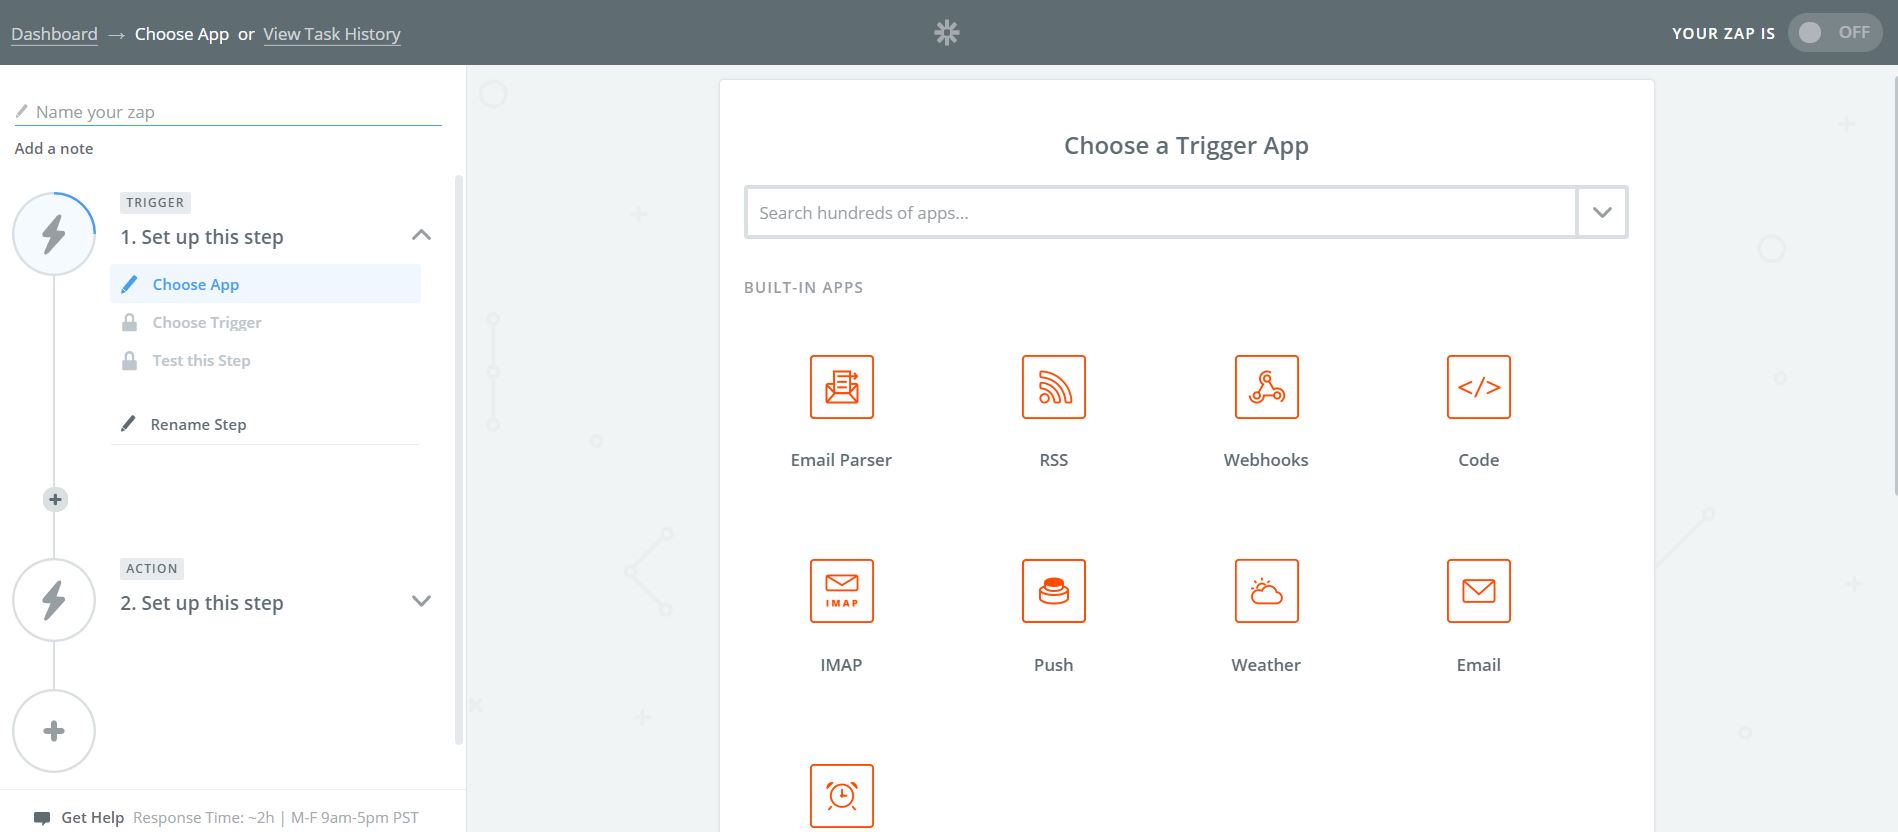
- Here you will first choose a Trigger App. You can either search for an app or, you can use a built-in app. I will be using WordPress as the trigger by searching WordPress in the search box.
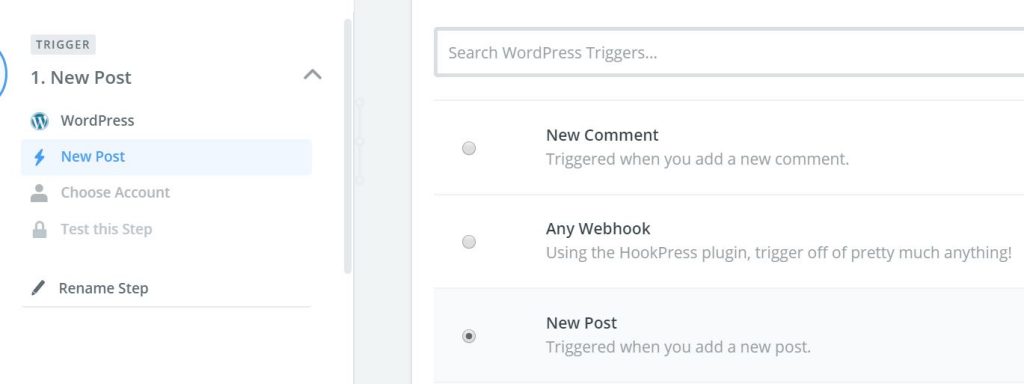
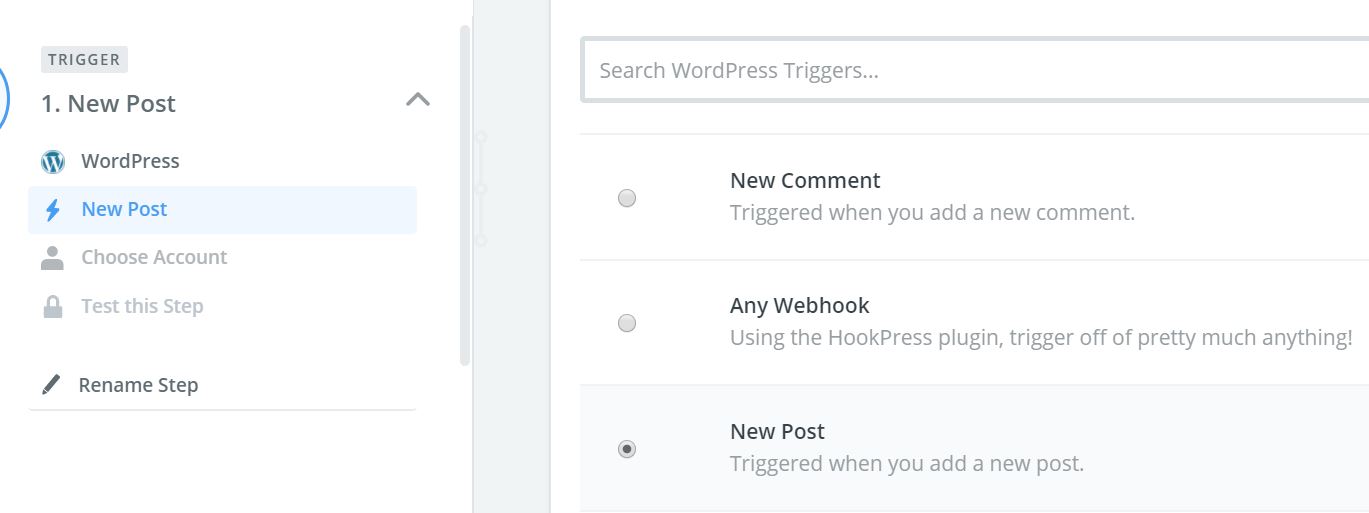
4. Then we will put in more details about that trigger.
- Select New Post and then select continue
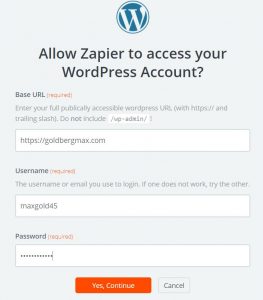
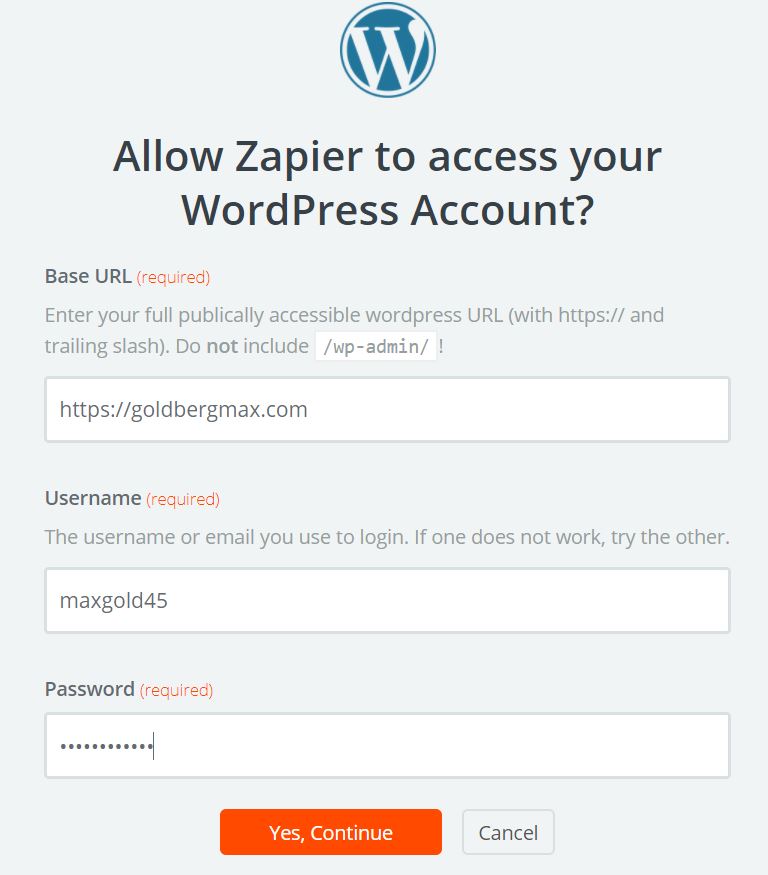
5. Now you will connect your account
- Your website will only work if you type https:// or http:// before the URL!
6. To finish up with WordPress, you can select whether you only want this to work with Published, Private, or Draft… I selected Published. Also, you can choose if you want this to work for Posts, Pages, or Media. I selected Posts. Then press continue. At this point, you can test the WordPress functionality by adding a new post to your site, but it is not entirely necessary.
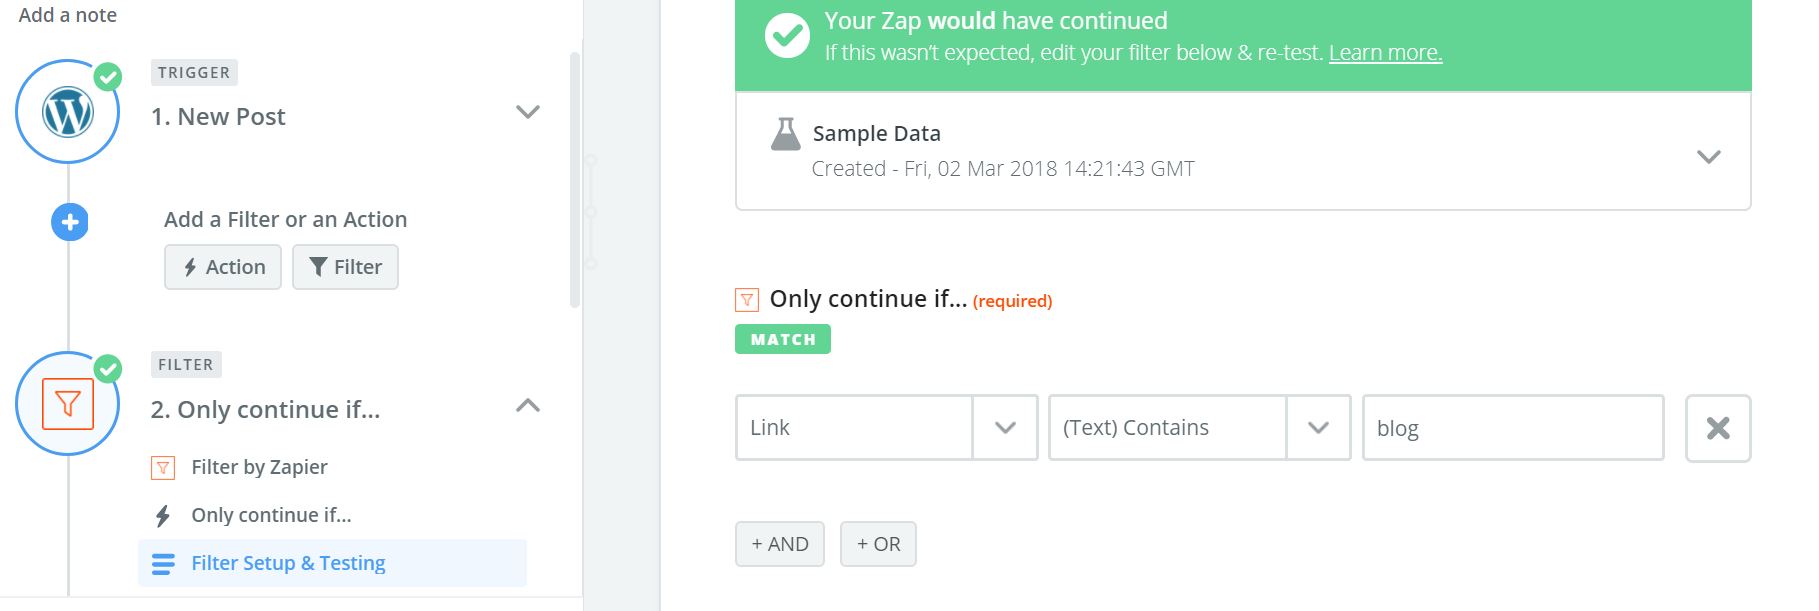
7. At this point, we can create a filter. A filter is a type of control flow (if/else).
- You will click the + right under the WordPress symbol and then select Filter. For my filter, I decided to only continue if the WordPress link contains the phrase “blog.” (“blog” is a category which all of my blog posts have)… So now, the program will only continue if my new post is a part of the blog category.
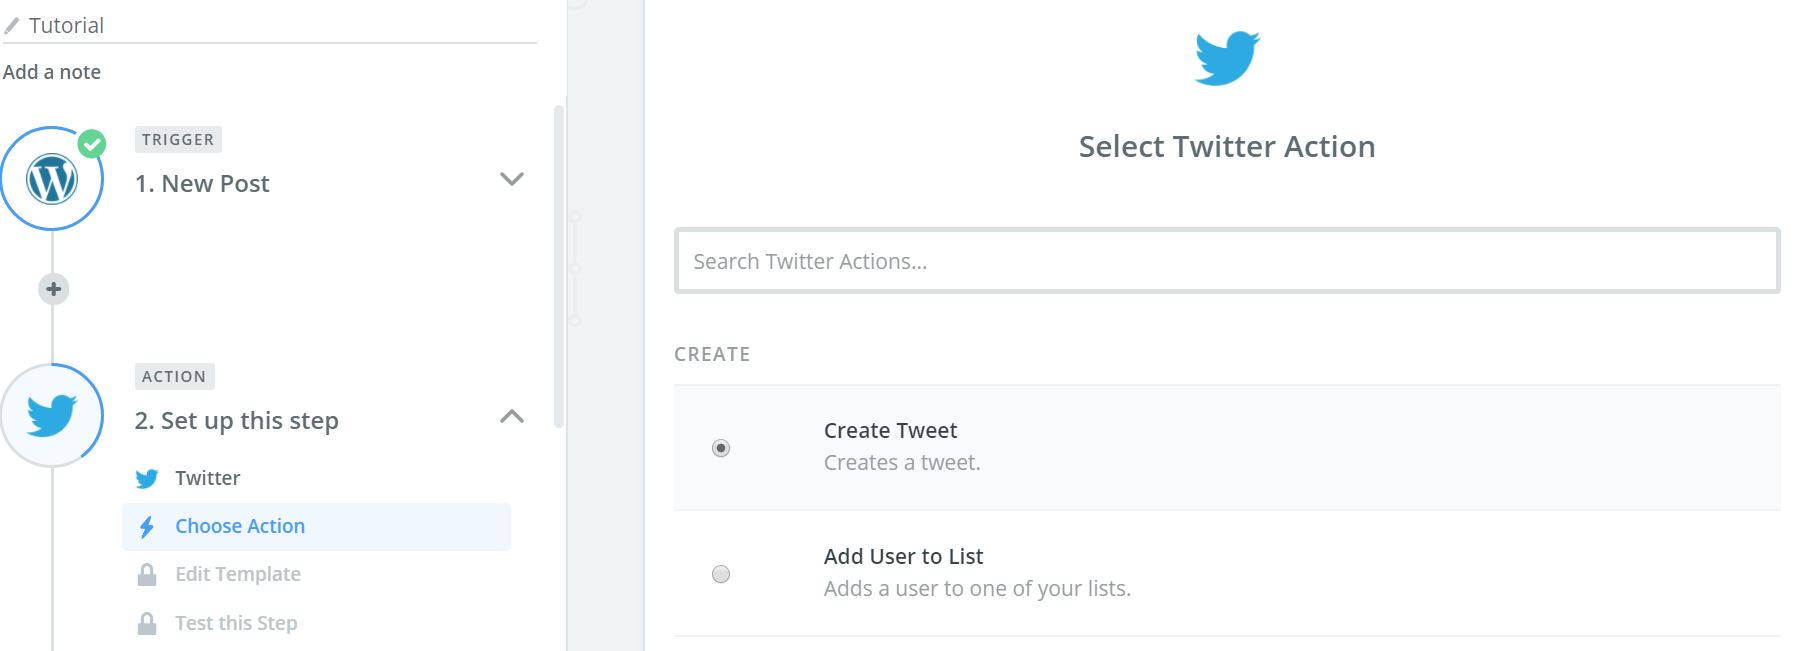
7. Now we will add our action. Remember, you can have more than one action! I selected Twitter, and then “Create Tweet” then continue. Now, you will have to connect your Twitter account. You will follow the steps as they come up, then click “Save + Continue”
8. Now we get to create our Twitter message. If you press ![]() in the top right corner of the text box, you can select different variables from your WordPress post. I used “Post Title” and “Link”. My Twitter post message looks like this:
in the top right corner of the text box, you can select different variables from your WordPress post. I used “Post Title” and “Link”. My Twitter post message looks like this: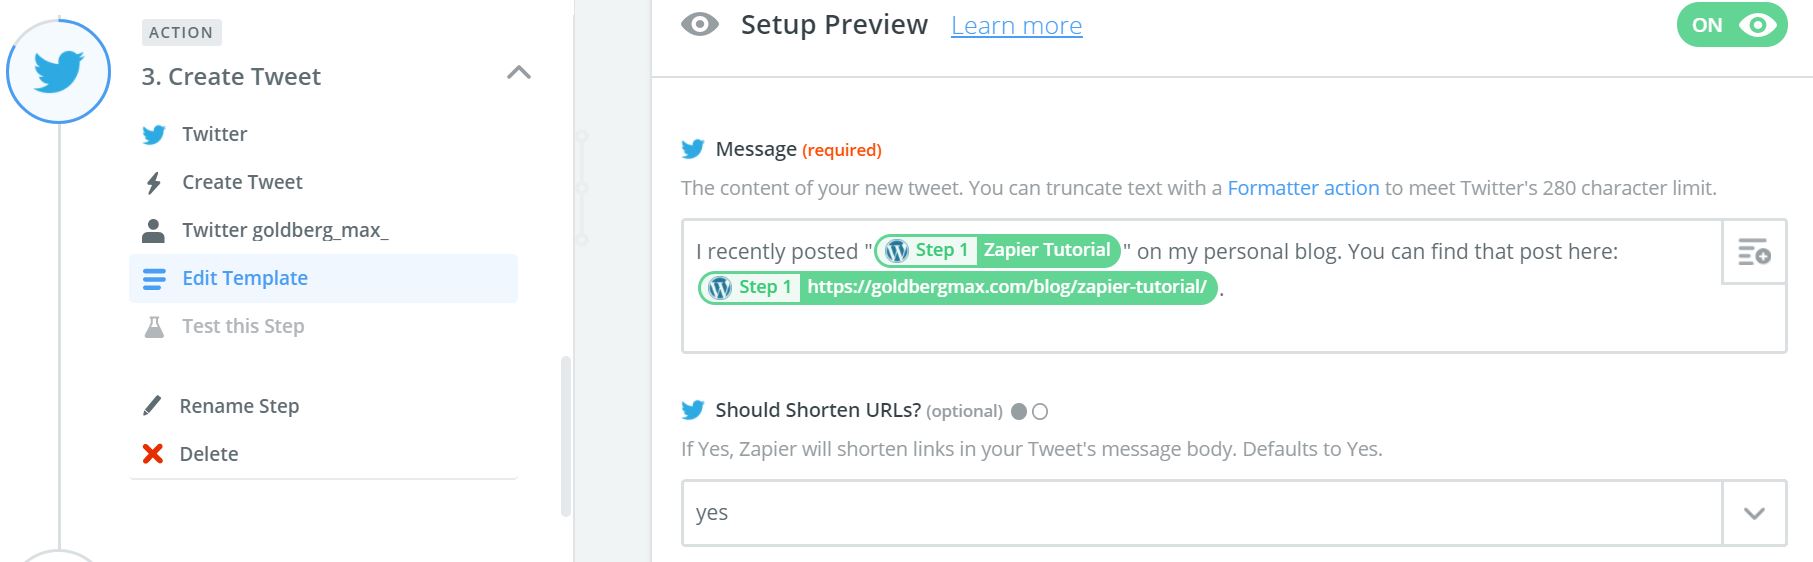
9. And when I test it, it looks like this.
10. When you are ready, you can turn on your Zap by pressing the switch.
*The free trial lasts for two weeks. After that, you are limited to 20 Zaps running at a time.
EXTRAS:
+ If you are in need of a more thorough tutorial, you can view Zapier’s seven-chapter version here. It is also a great resource once you become more familiar with the tool.
+ Here is a short video tutorial by DottoTech, he has a thorough presentation which can also help answer your questions.
+ Also, don’t forget to leave comments or questions below, I am happy to answer them or edit the post if necessary.
Author: Max Goldberg
http://goldbergmax.com/about/