Project ROME is a piece of software that can be used to create many different kinds of digital media. In this tutorial, I will be going over how to make a simple interactive infographic. The infographic I created as an example can be viewed on my WordPress blog here. Interactive infographics created in Project ROME are flash files: you can choose to put it on an online site or insert it into an interactive PDF.
Project ROME was created by Adobe, the makers of Photoshop, but it was officially retired about 5 years ago. The good news is that you can download the commercial version of project ROME for free by clicking here for windows and here for mac. As you may notice, the installer is a .air file. To open it you will need to have Adobe AIR on your computer. You can download Adobe AIR here. Rest assured that Adobe AIR is also completely free.
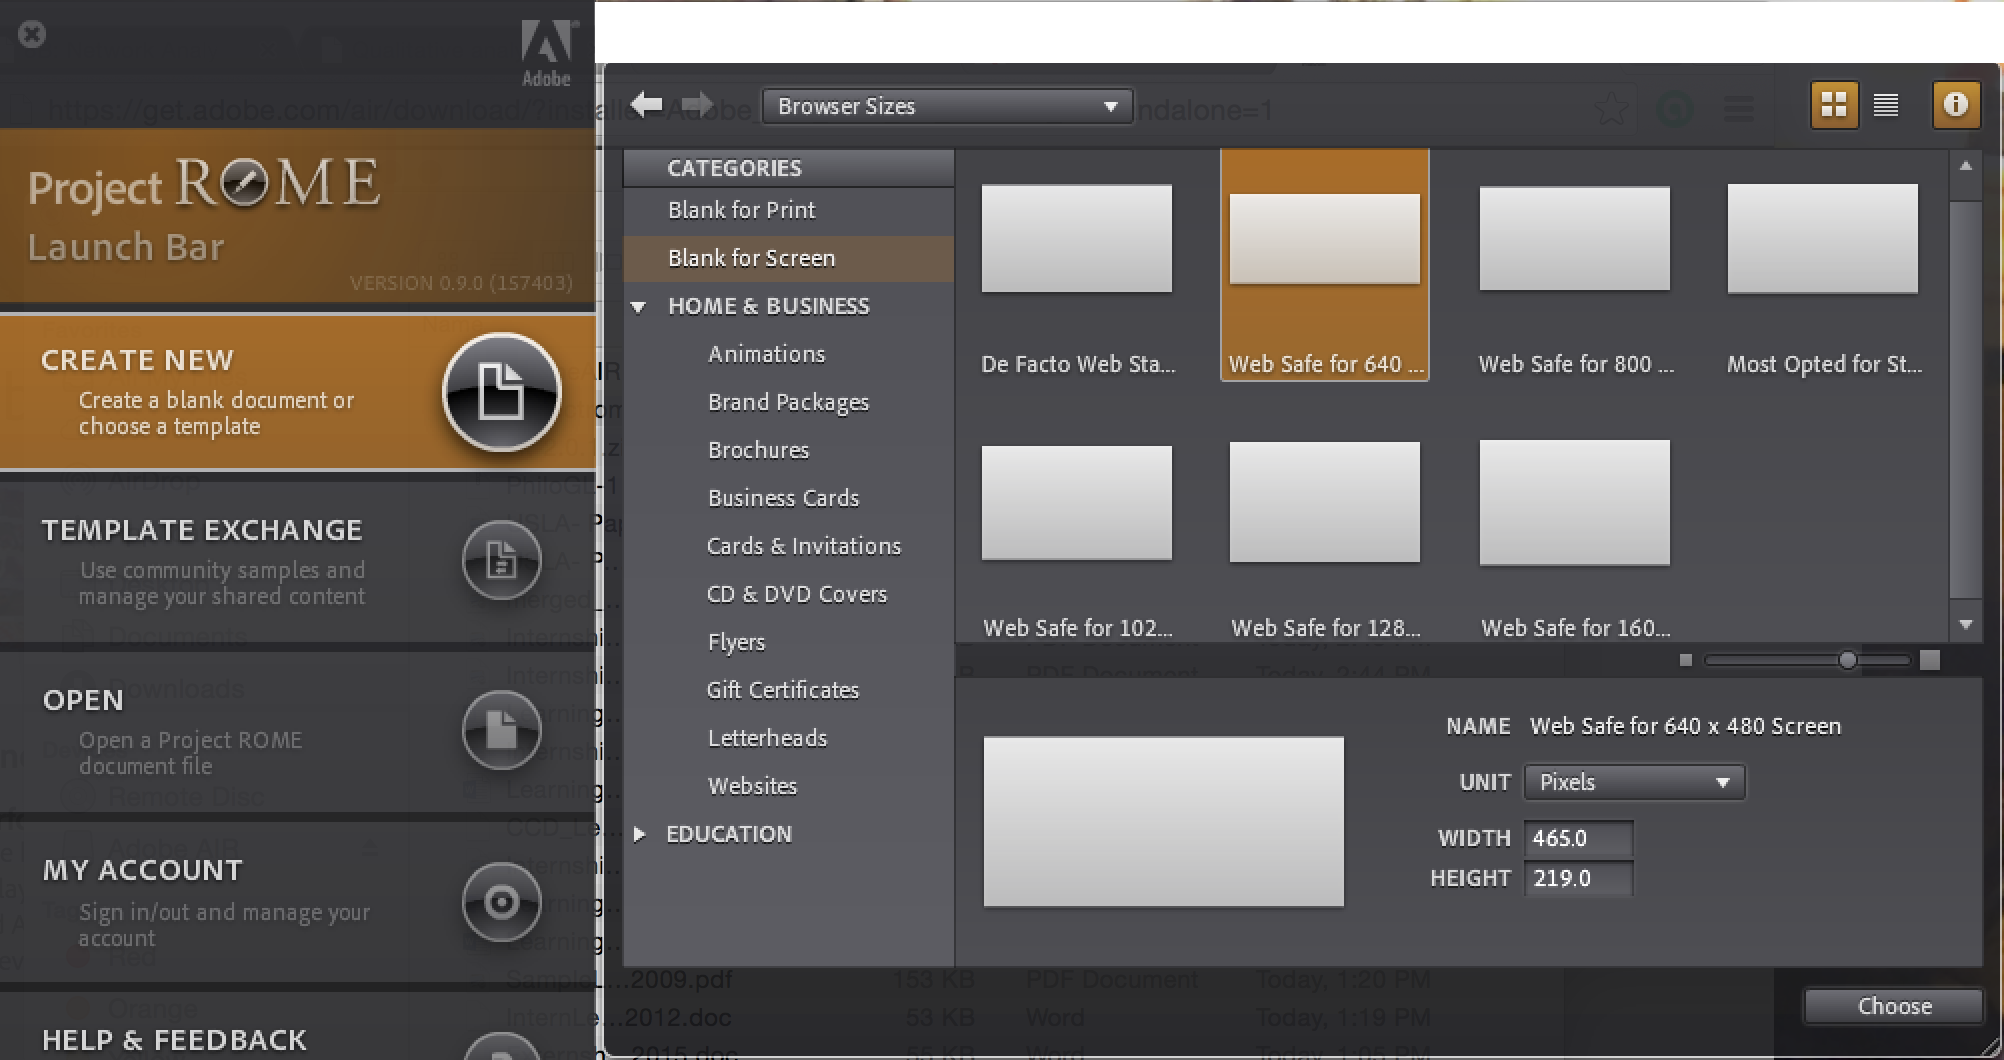
Once you’ve successfully installed the program, open it and choose a size for your blank canvass.
A Sheet is a page for you to arrange your content. You can link in between the different Sheets you create. Each Sheet is displayed on the right. The order of the Sheets matters: I made sure that the Sheet I designed as my “main menu” was always at the top.
You can insert shapes, text boxes, action buttons, videos, photos and more onto your Sheet. These are your Objects. Go ahead and design the Sheet to suit your personal needs. Making changes to the Objects on your Sheet can feel a little tricky at first. Although you may feel intuitively compelled to right click on items to reveal more options, clicking on the pencil, or the ROME icon, is what will makes the little menu with more options pop up. You can see how I used the ROME icon menu to adjust the opacity of an Object in the screenshot below.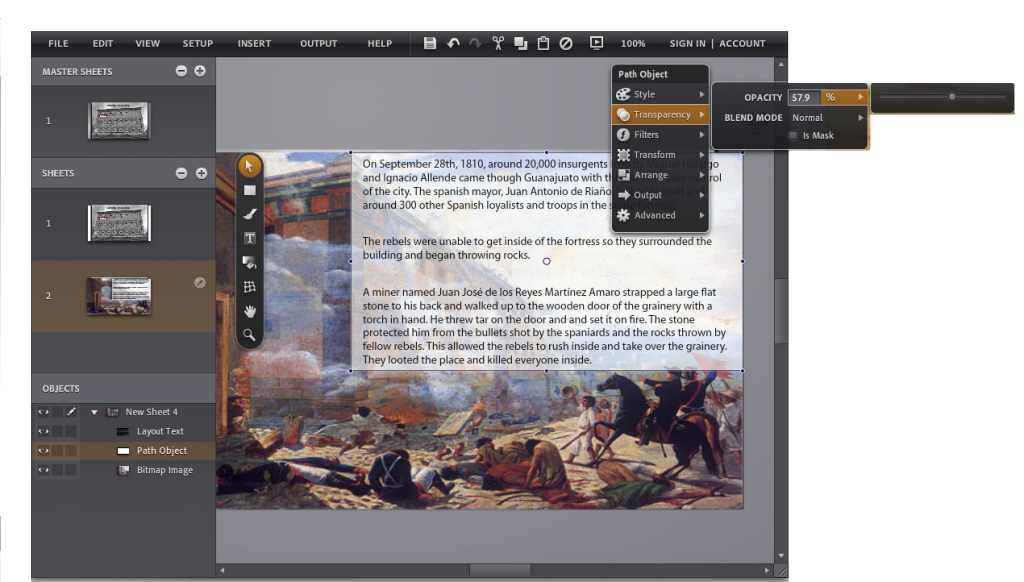
On the Sheet above, I first inserted a picture and then I inserted a text box on top of it. After typing in my paragraphs, I decided to insert a shape to serve as a background for my text box. If your text disappears after adding a new Object, have no fear! It is just hiding behind the Object. Select the Object (in this example, the white rectangle) then click on Arrange and then Send Backwards in the pop-up menu.
The feature that allows us to make our sheets interactive is Event options. First, select an Object in your sheet. In this example, I selected one of the red Action Buttons. Next, click on Advanced, and on the next menu that pops up, click on Event Settings and then Custom Events. From now on, the Events option will always show up under the Group’s menu bar.
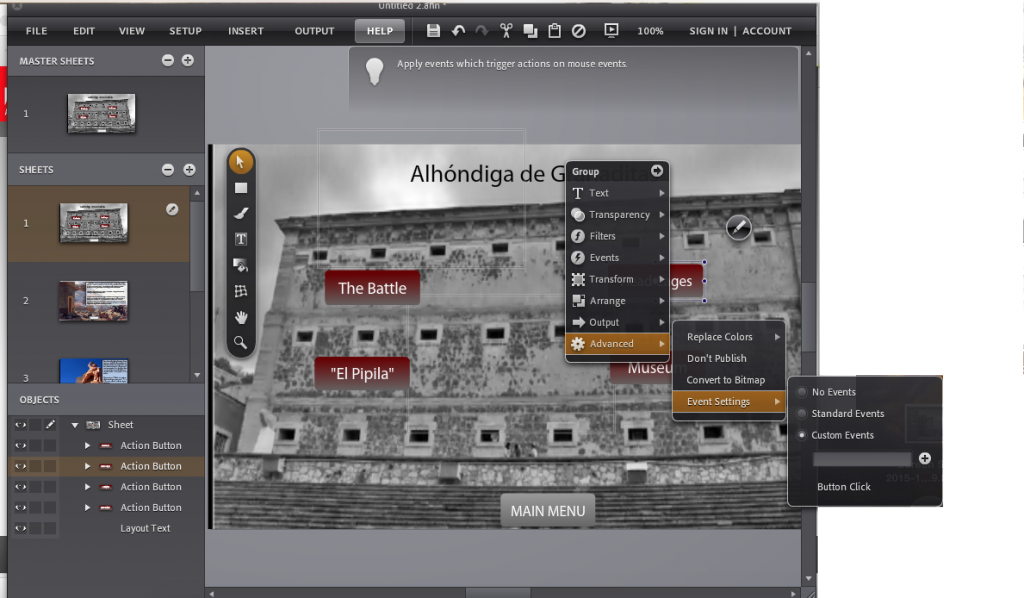
Next, you have to choose an Event. Events describe possible mouse cursor movements or actions. In this example, I want something to happen when a viewer clicks on the Action Button so the event I chose is Button Click. From now on, whenever someone clicks on that button, it will prompt an Action to occur.
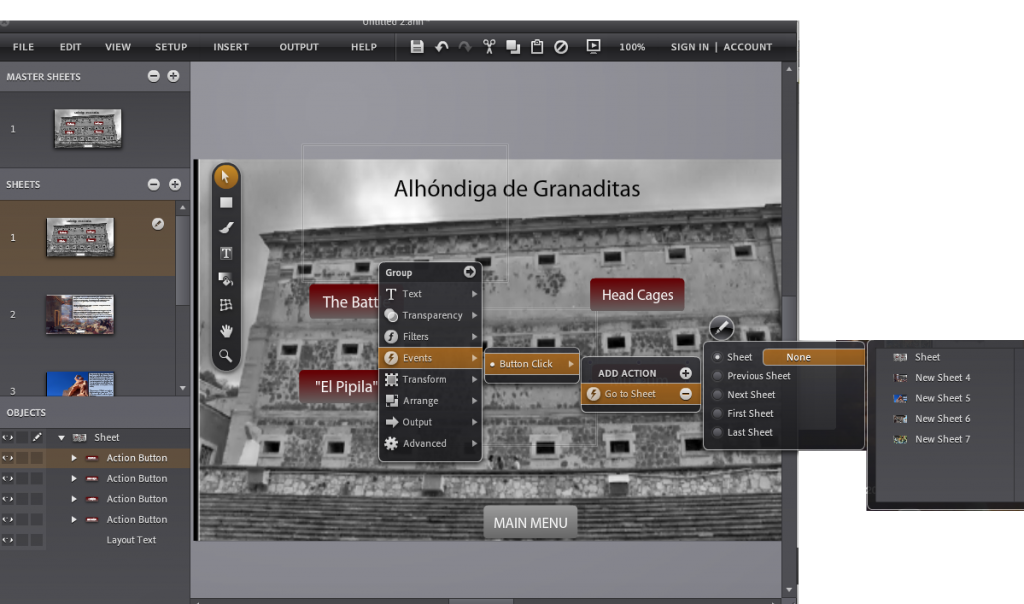
Once that’s done, you need to choose your Action. I want my action to be switching to one of the Sheets I made. To do this, first select the Link option in the menu and then select the Sheet you want to link to. If you want to check that things are working the way you want them to, you can preview your project. Click on the Preview button: it looks little monitor with a triangle in the middle and is located on the top menu bar. I can click on the Action Button in the preview window, to test out if it links to the correct Sheet. It does! Hooray!
Another useful Action that I did not use in this example is opacity. Changing the opacity can make an Object either fade a bit or disappear completely to show the Object underneath it. I like to use this Action with a hover Event to make a different pop-ups appear depending on which Object the viewer is hovering their mouse over.
Once you’ve finished designing your Sheets and assigning Actions and Events to your objects, preview it one last time. If everything works the way you want it to, then you can go ahead and export it! Under Output on the top bar, you can click File Export, and then select SWF (Flash Player compatible). This saves the project as a flash file.
You can also make interactive PDFs by selecting it’s respective option: this embeds the flash video file into a PDF page. Be aware that the interactive PDF format can only be opened by people using Adobe Reader 9 or a later version of it, so depending on the audience you wish to share your infographic with, it may not be the best option.
To put my infographic onto my WordPress site, I followed this wonderful tutorial. Follow the tutorial instructions: you will need to add some code to the WordPress theme and install an add-on so make sure you have the permissions to do so! You will also need to know the exact dimensions of the flash file; I used this handy dandy site to find that out.
So there you have it, now you can create your very own interactive infographic!
This is a SUPER cool piece of software and I’ll be sure to use it in the future! Your guide gave a great introduction to its inner workings, and a good discussion of some of the range of things you could do with it. I appreciate the easy-to-read bold-faced text, as well as the screenshots and link to your own info graphic. Thanks for the tutorial!
I agree with Eliza and think that this is SUPER cool and definitely something I will be using in the future. I think the accessibility and relevancy of this tool is what really attracts me (and I’m sure other college students.) I enjoyed your walkthrough, as it was fun and helpful to read.
Really good tutorial, and the interactive infographic you produced is super impressive. I appreciate that you hosted the final product on your website and linked to it, and I appreciate that you linked to the tutorials you used.
Clarissa, this is a really detailed tutorial. This looks like a dope tool. I really like that you created your own infographic project and linked it.
Clarissa,
I agree with your classmates that this is a well written and illustrated tutorial that not only tells us how to create an interactive graphic with Project ROME but shows us why we would want to by linking to the one you created and hosted on your own site. And I love that you dove into the theme layer of your WordPress install to make modifications necessary to get it to work!
That said, the fact that you had to jump through those hoops and that Project ROME has been retired reveal that you’ve stepped into the flash vs. HTML5 wars with this project. Flash applications like this are increasingly being sidelined for HTML5 alternatives for a number of reasons, but mostly because mobile devices don’t really support it. This tool looks really intuitive and easy to use, but I wonder if there’s a more recent mobile-friendly version that has supplanted it?
Still, great job describing how to use this tool to produce an impressive and informative interactive graphic. Thanks for sharing!