SketchUp? what is that? 3-D Images? Digital Humanities? What?! I don’t do computers, man!
That was the thought process in my head when I sat down for my first Hacking the Humanities class. I was intimidated by the idea of working with computers, but once I got my hands on it, it wasn’t as bad as I expected.
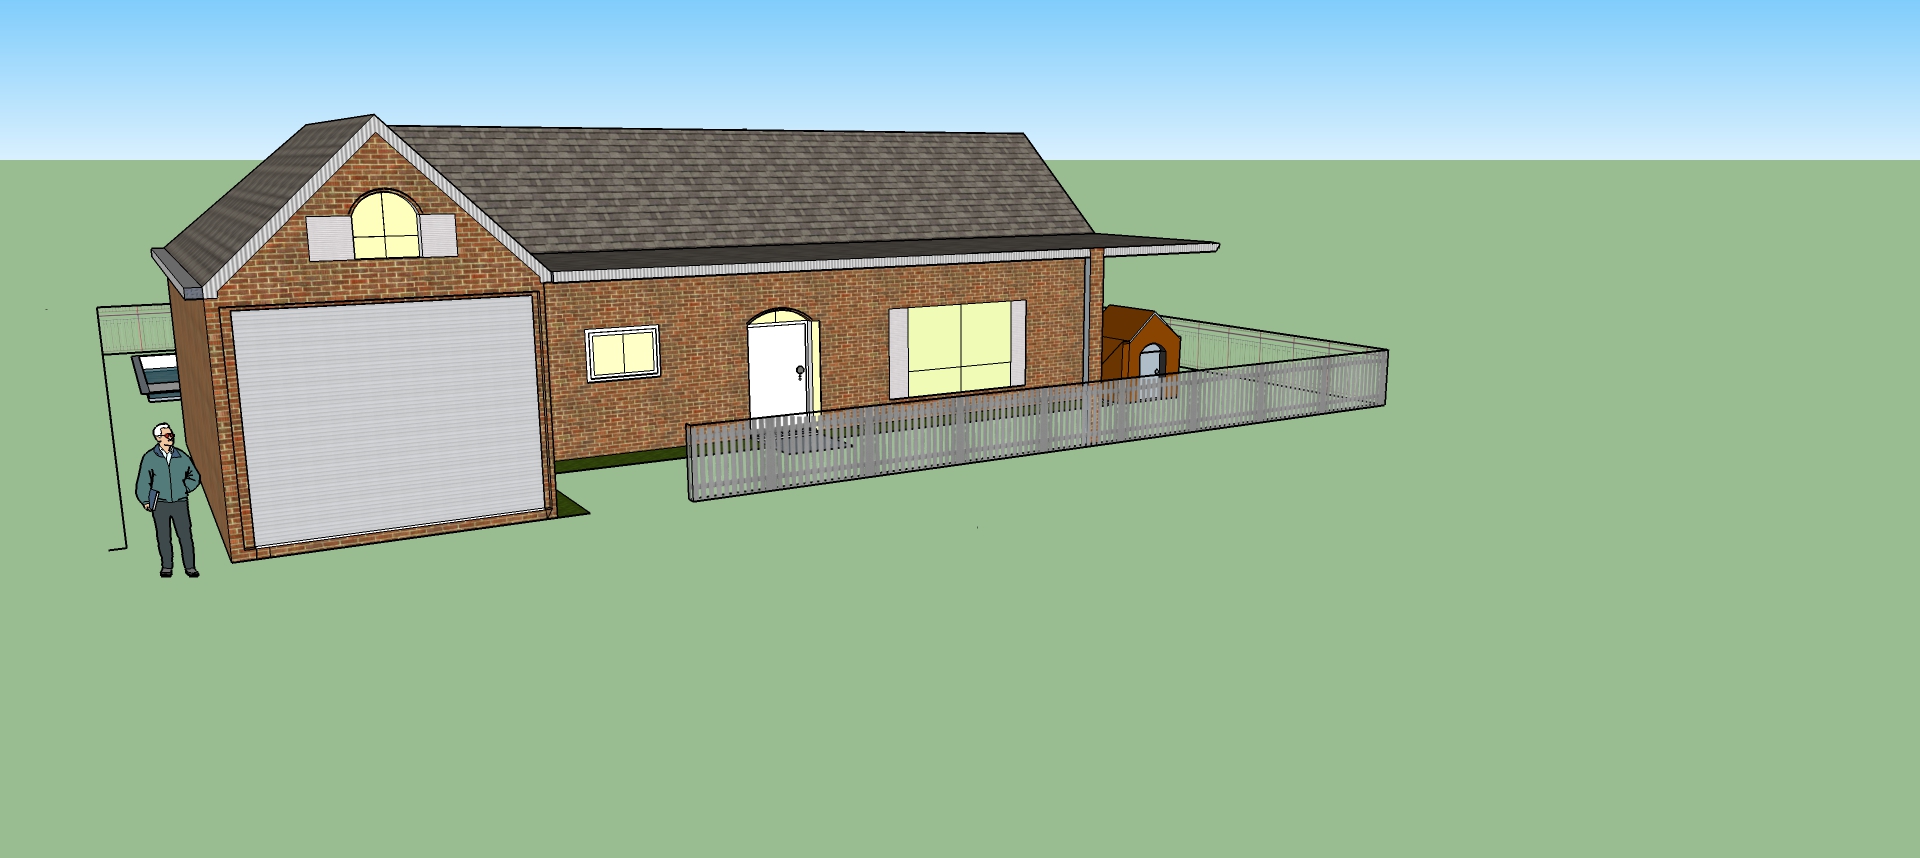
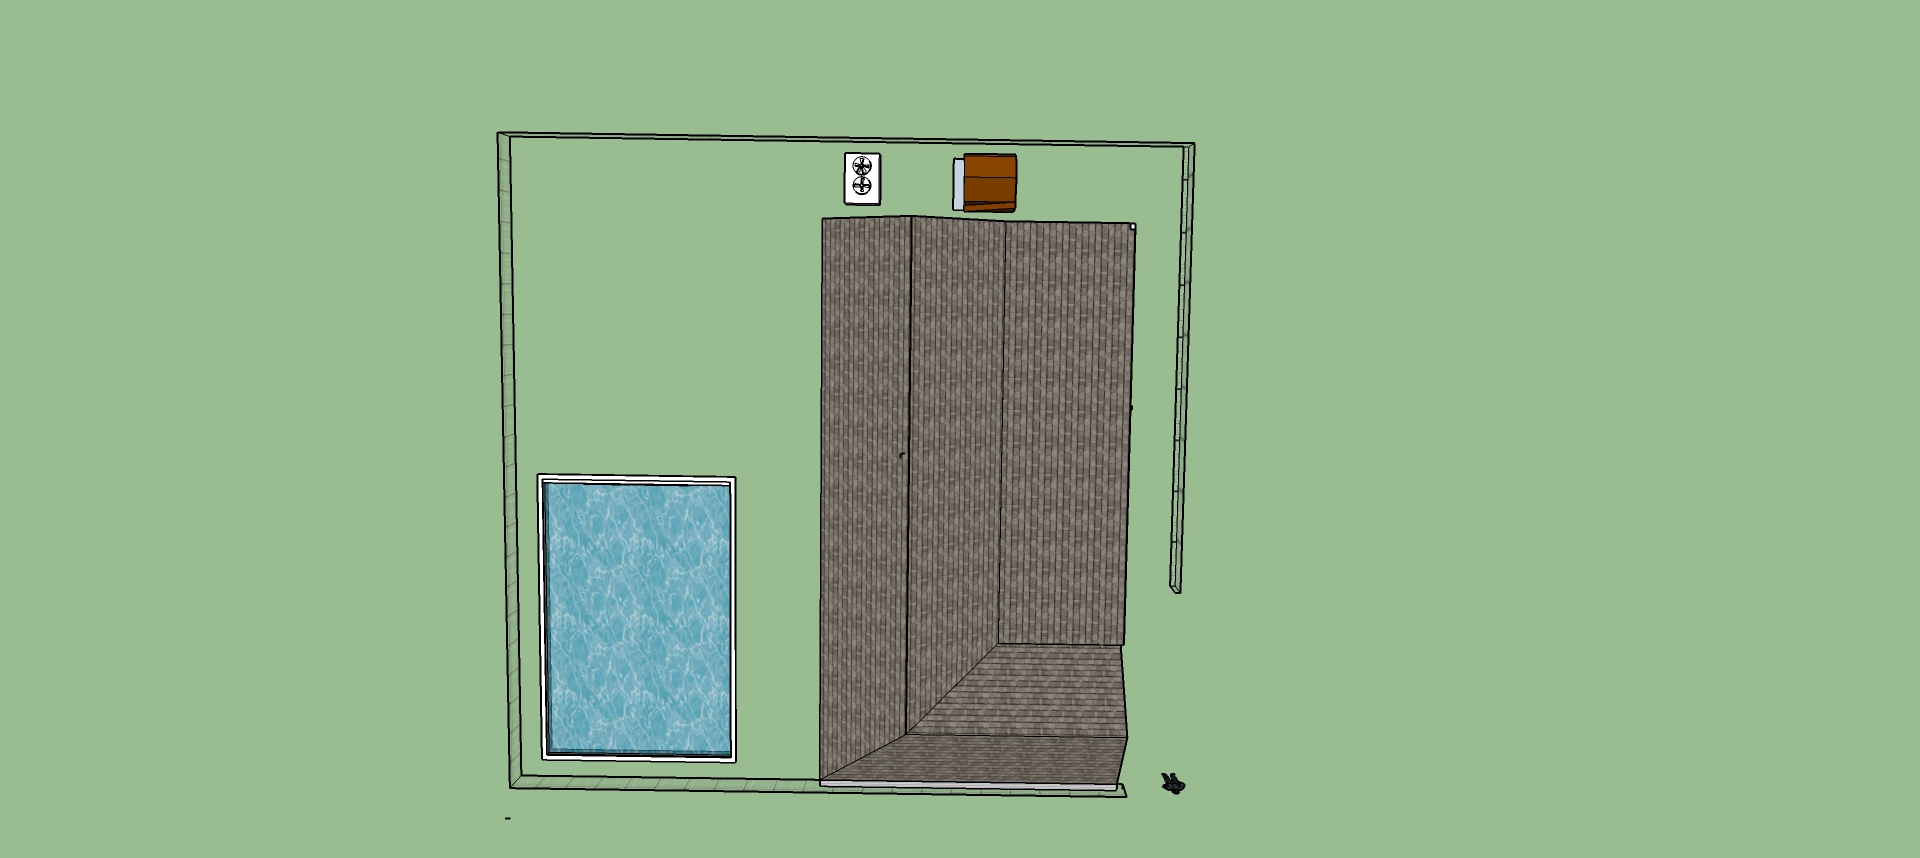
My official first experience with building my SketchUp house was three hours and two cups of coffee long (considering I never drink coffee, this is a big deal). It was frustrating yet very exciting. I, surprising, want to do this more often. The world of SketchUp is one I had never been introduced to before this class but while building my house, I learned so many new tricks and way of creating things through trial and error. Now, I can’t wait to start building more complex and intricate things and venture into creating more 3-D images.
Getting the basic shape of the house and using the tools was easier than I expected. However, I had trouble with getting the right angles and dimensions . I think I spent about thirty minutes trying to get the right angle to build a chimney. I would draw the lines with what I though was the perfect angle and dimension. When I zoom out and view from a different angle, my chimney ends up floating on air instead of being attached to the roof. It was so frustrating that I just had to settle with what I had. Another tricky thing was the roofing. I had trouble with finding the right intersection so that the roof would lift correctly. It wasn’t until I googled SketchUp tutorials on youtube that I was able to figure it out.
Here is the process that I followed to build my house:
- I used the Rectangle tool to create a rectangular area. I used this to set the foundation for my house. I also used this tool to create the pool, doors, window, and even the fence. Pretty much: get used to this particular tool…it’s pretty handy.
- I then used the push/pull tool to pull up the rectangular figures I had created. This tool was also pretty darn useful.
- After that, I struggled for about 30-40 minutes trying to get the right intersections for the roofing. I would lift one part and leave the other part looking super weird. After all of this, I had a bulb-light moment. I can just use the life guru – YouTube, for tutorial videos. After watching a couple YouTube videos, I learned to make the right intersections for the kind of roof I had.
- I then used the Move tool to lift the roof.
- After that, I just went to the Paint Bucket and started doing the little tweaks and played around with the endless amount of tools.
Thing I wish I knew before I started:
- YouTube is life. Whether or not you agree. YouTube will always be life…well unless someone creates something even cooler than YouTube which seems pretty impossible. But what do you know, we once thought it was impossible to travel to space. Anyway, watch YouTube videos before you start on your SketchUp project. WATCH TUTORIALS.
- Download this super useful, SketchUp toolbar/shortcuts guide. It will save you SO much time. link: https://jeffbranch.wordpress.com/2013/10/31/sketchup-tip-get-to-know-the-scroll-wheel/sketchup-quick-reference-card-2013-bam/
Perhaps, after all of this frustration, you would expect me be salty about using sketch up again, but I actually want to utilize this tool more often. Here are pictures of my end products! Enjoy, and have fun creating your SketchUp project!

The tone of this post is great! From confusion and nervousness to excitement and a sense of accomplishment, you really took us through not just your learning curve but your emotional states along the way. And offered some concrete suggestions and tips to boot. A nice looking model and a great first blog post.
This sketch doesn’t look sketchy at all! It looks phenomenal.